For our negotiated design placement module, we were required to attain a 6-week placement for the first semester in year 3. Since I worked as a part-time customer service assistant on the shopfloor in Wickes, I was able to attain a part-time design consultancy job in the Kitchen & Bathroom department at Wickes Winchester. This role included working with the Kitchen & Bathroom design team which comprised of 2 Kitchen & Bathroom Advisors (KBA’s) and 2 Design Consultants (DC’s) including myself. As a DC I will primarily be responsible for designing and processing kitchen & bathroom quotes with/without an installation quote through conducting In-Store Appointments (ISA’s) and Home Visits (HV’s).
Wickes is a home improvement retailer and garden centre with over 230 stores throughout the UK. It has established a strong place in the UK market for both tradesmen and DIY’ers to purchase all their building requirements as well as all the tools they need to complete the job. Recently, the building retailer industry has experienced a massive boom in demand especially for kitchen and bathroom renovations. Also due to the various lockdowns, Wickes has introduced home office designs as part of a Wickes design service; however, I have not yet been assigned any leads that requires a home office design due to space and finance restraints with most leads.
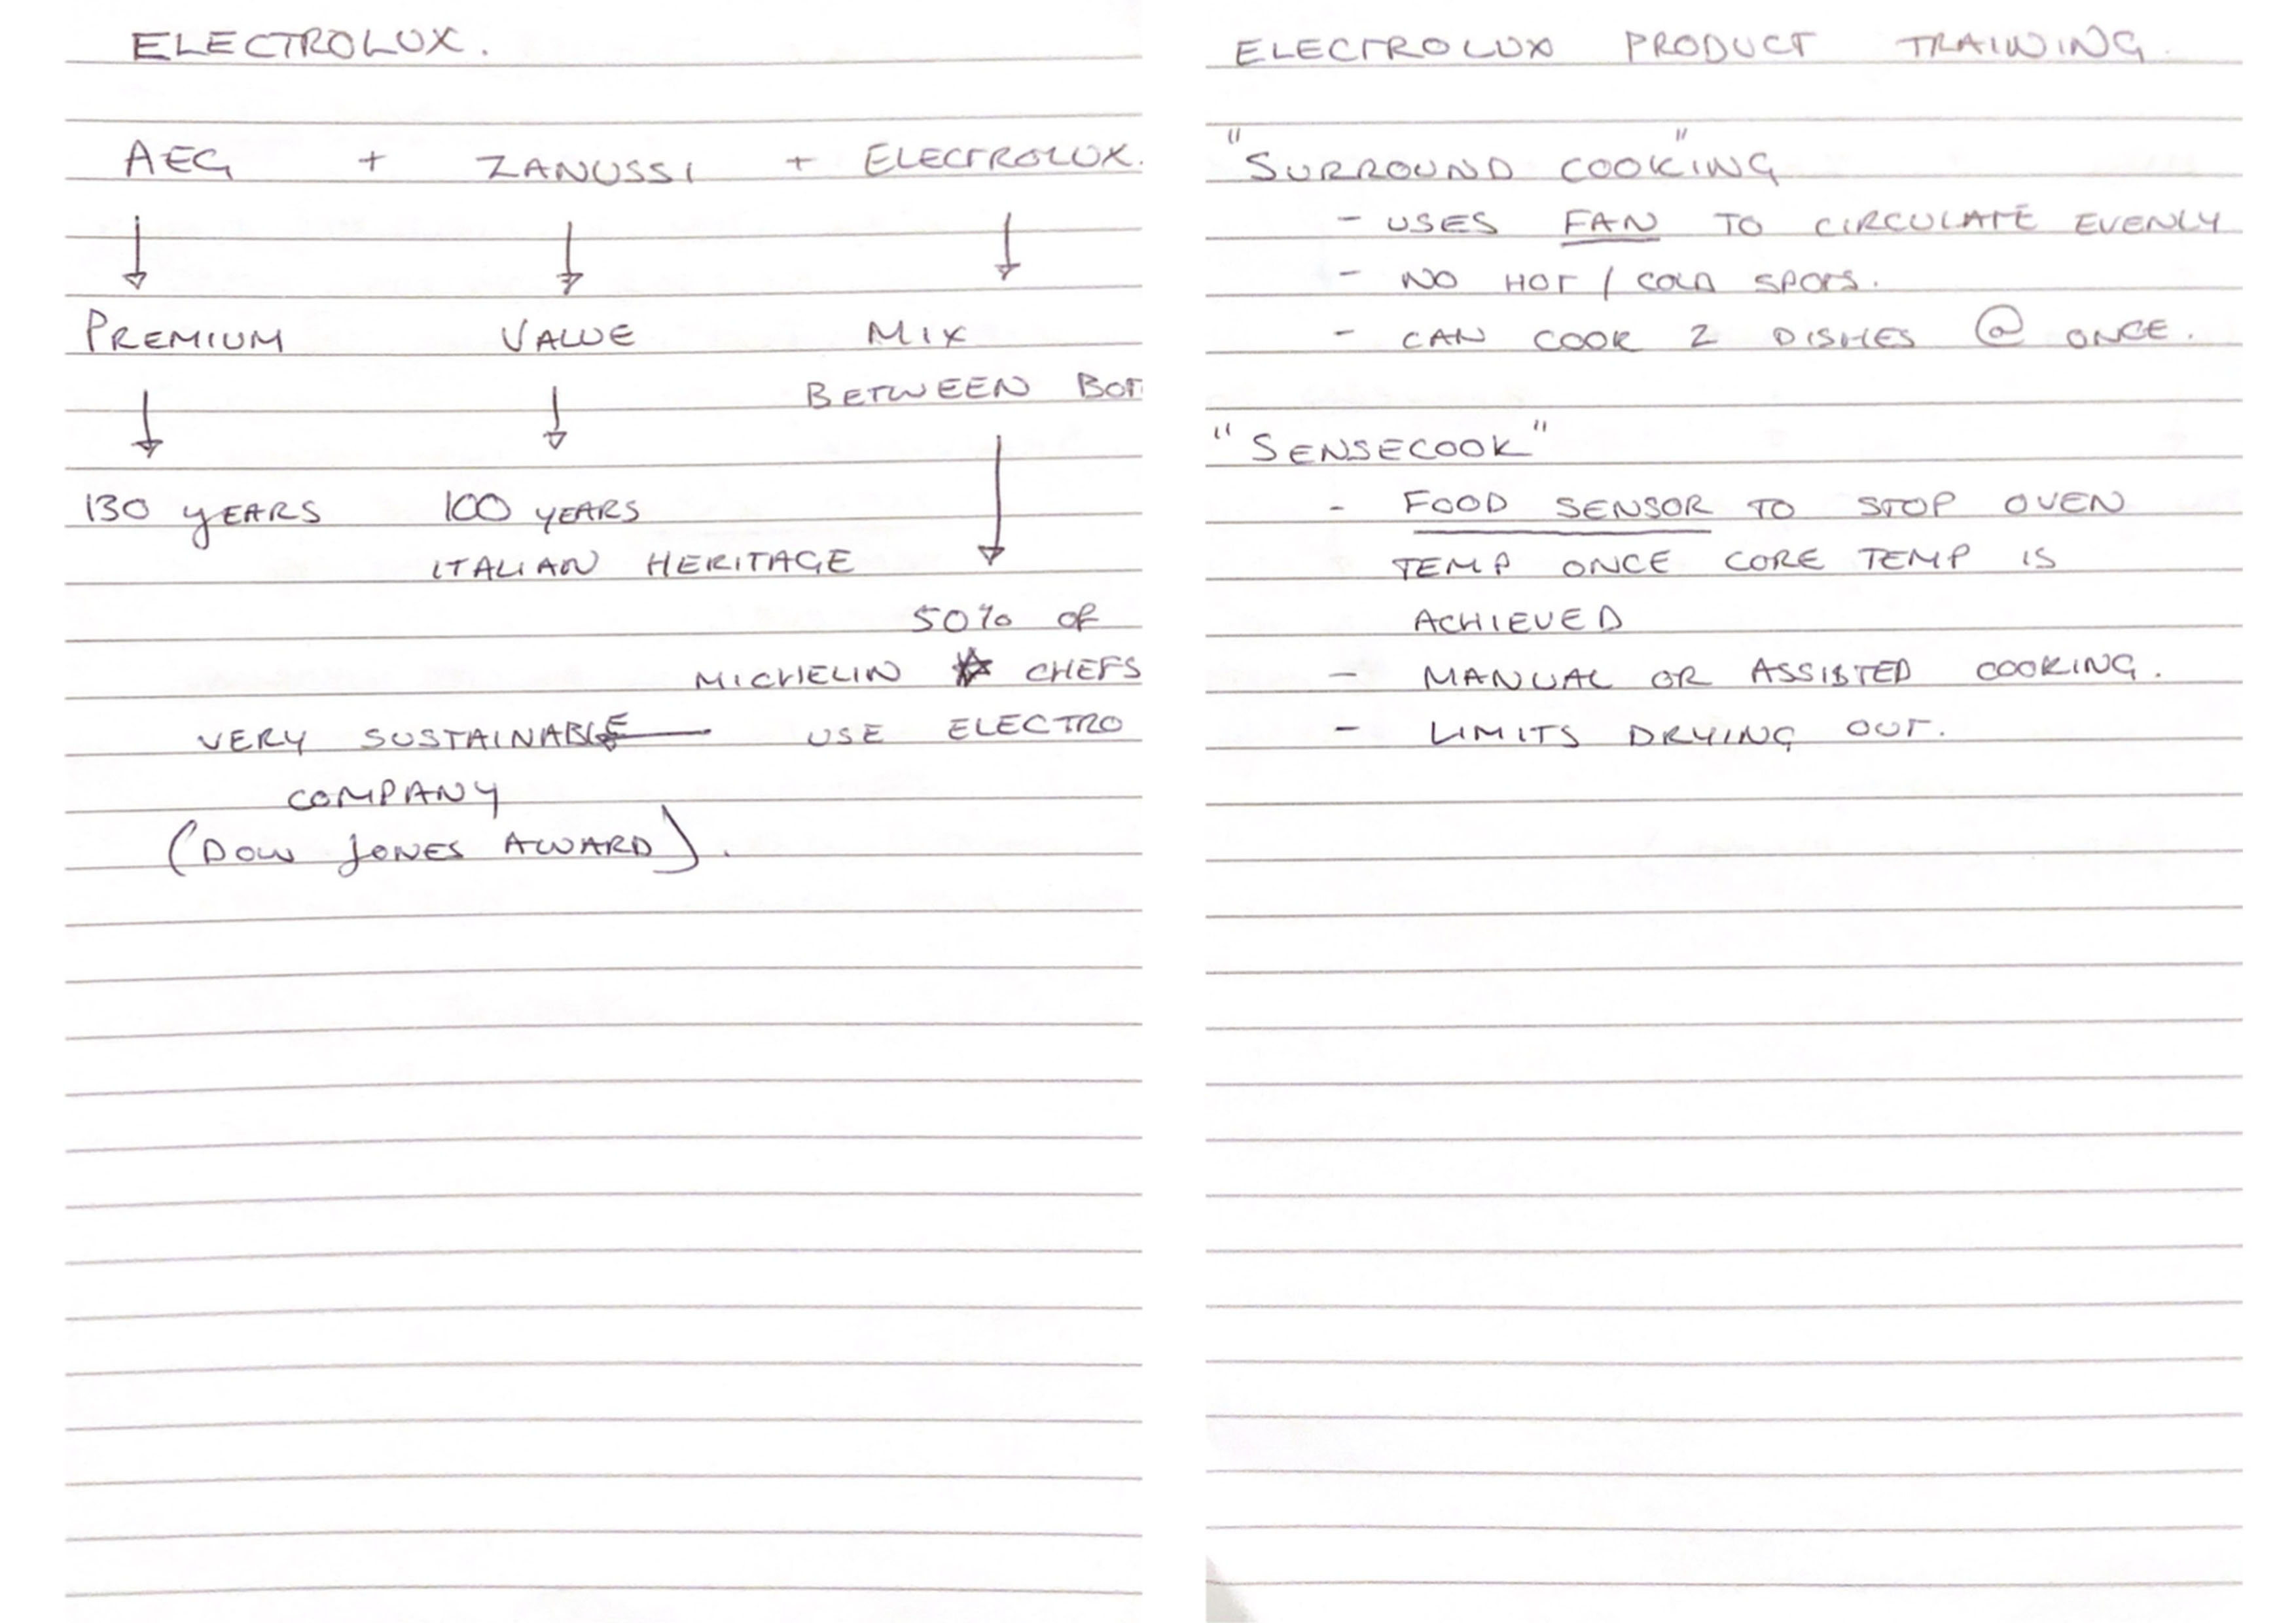
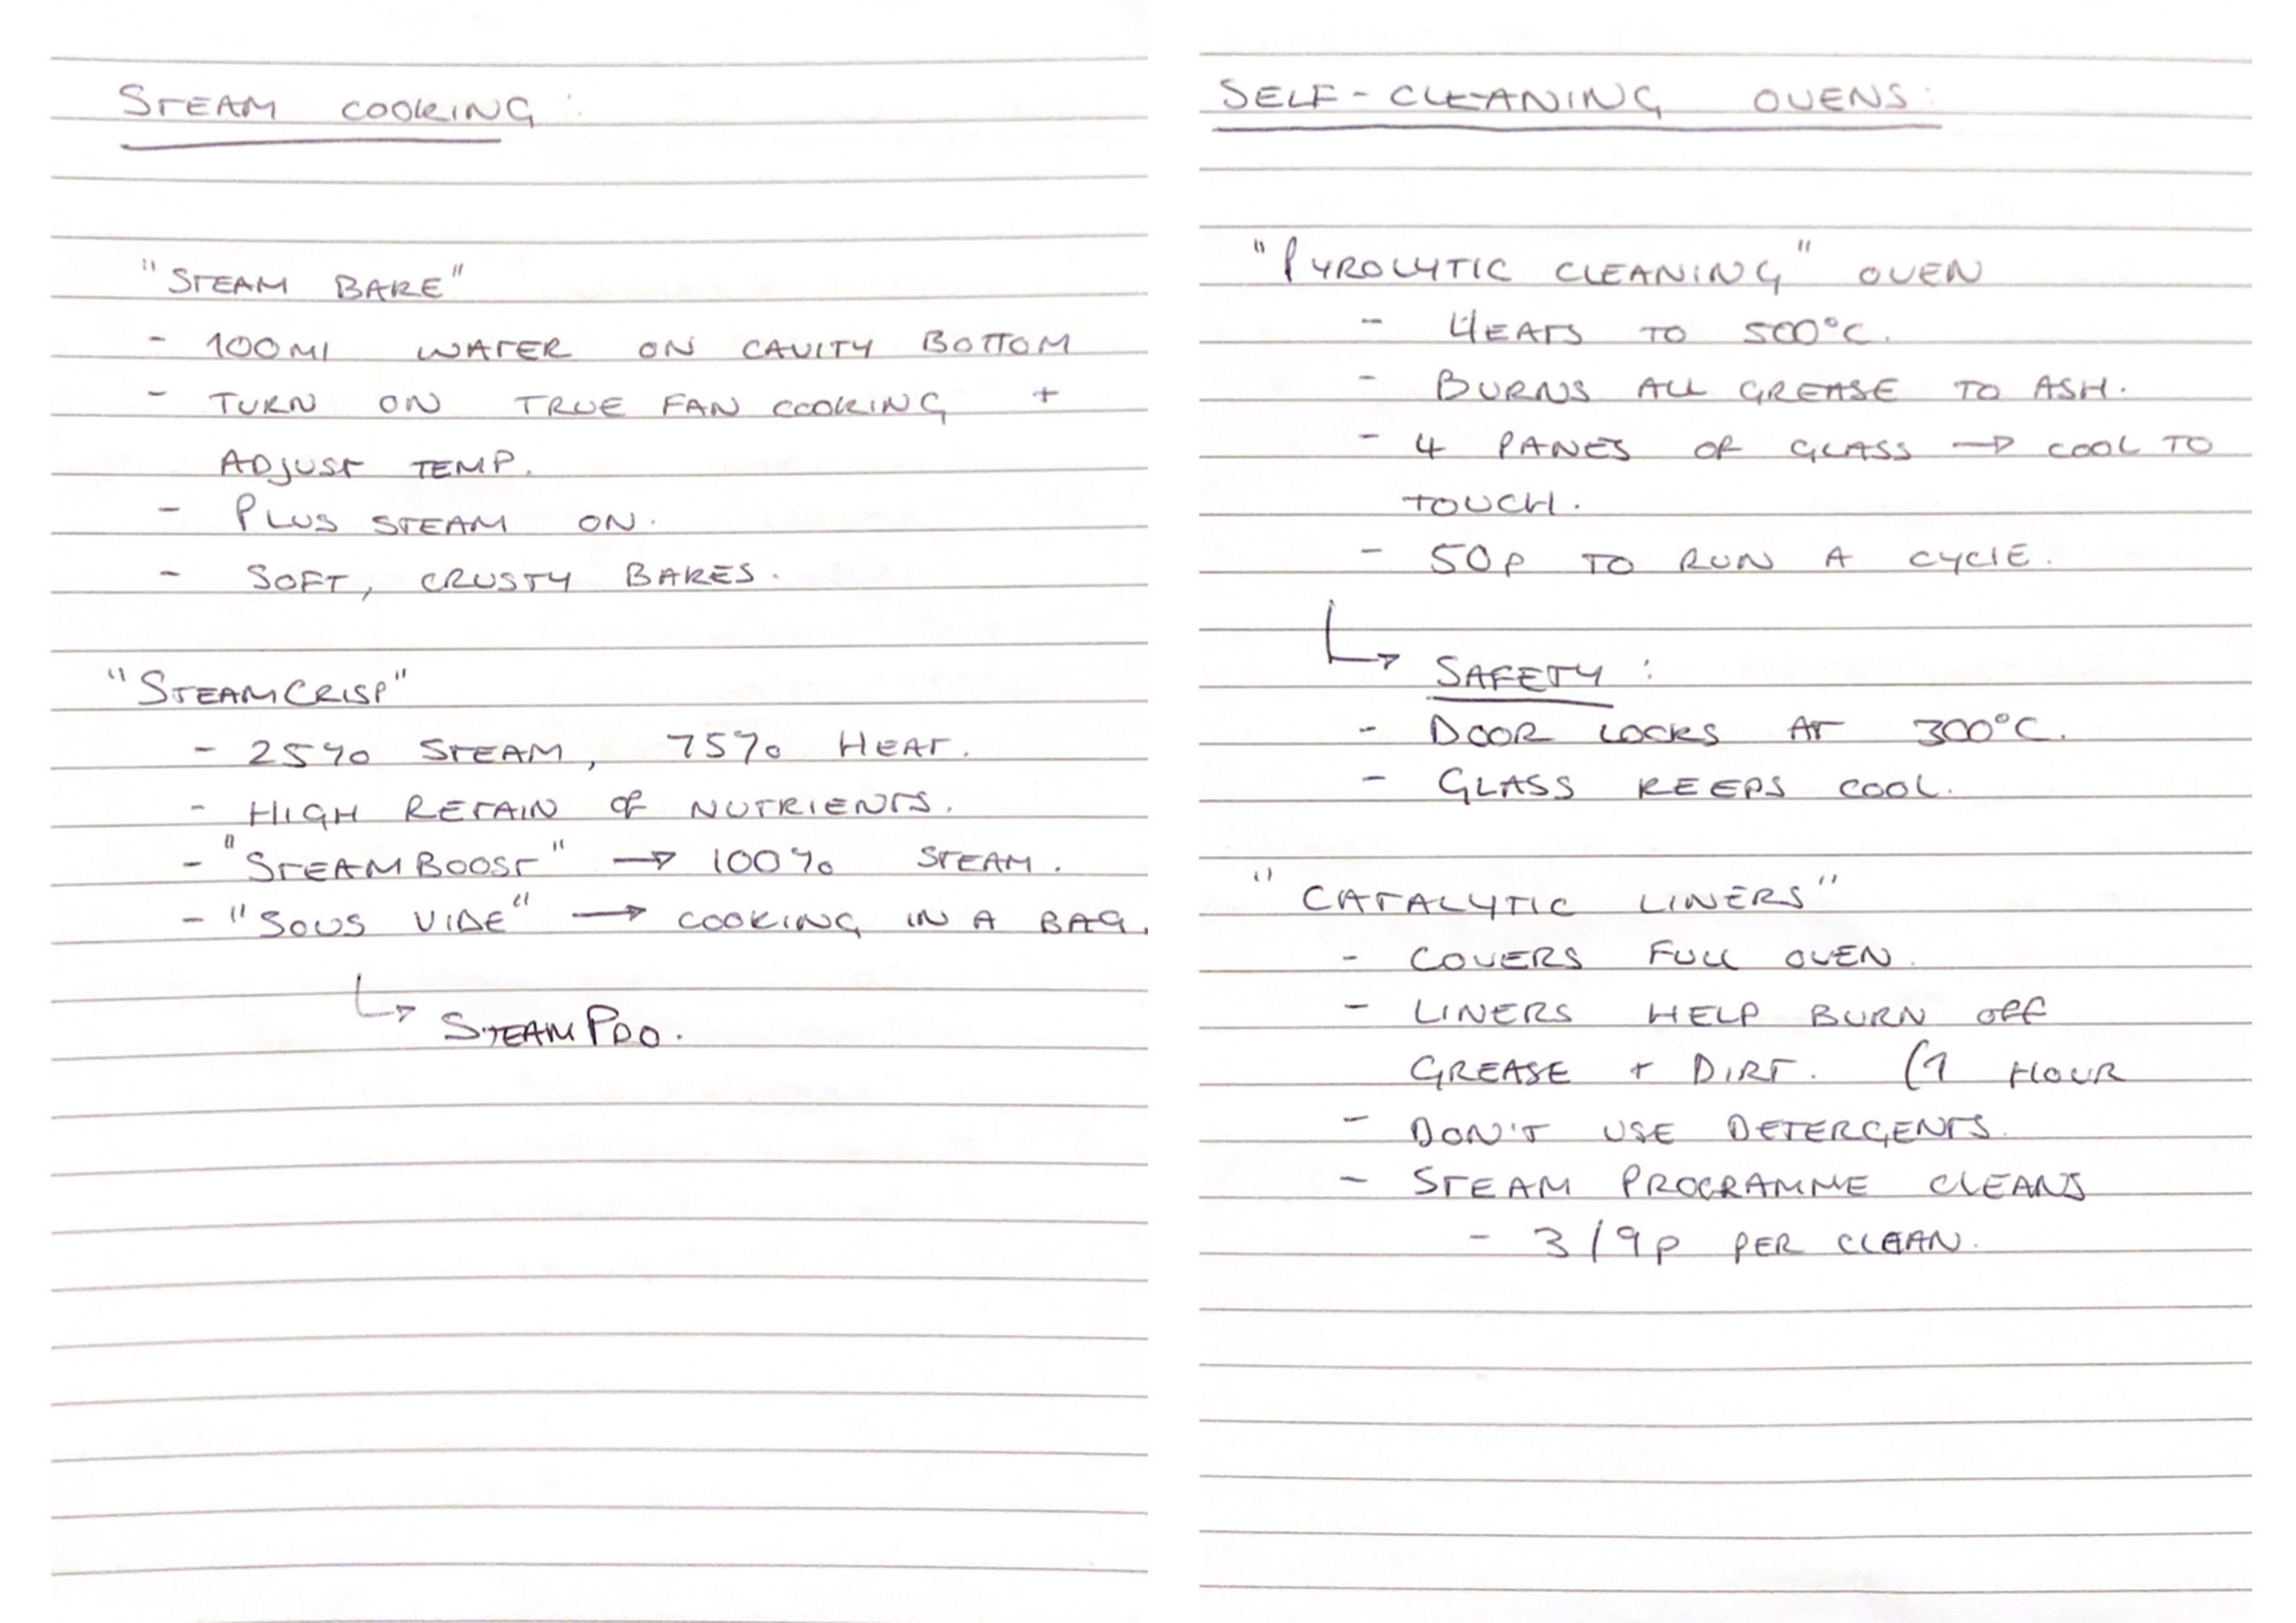
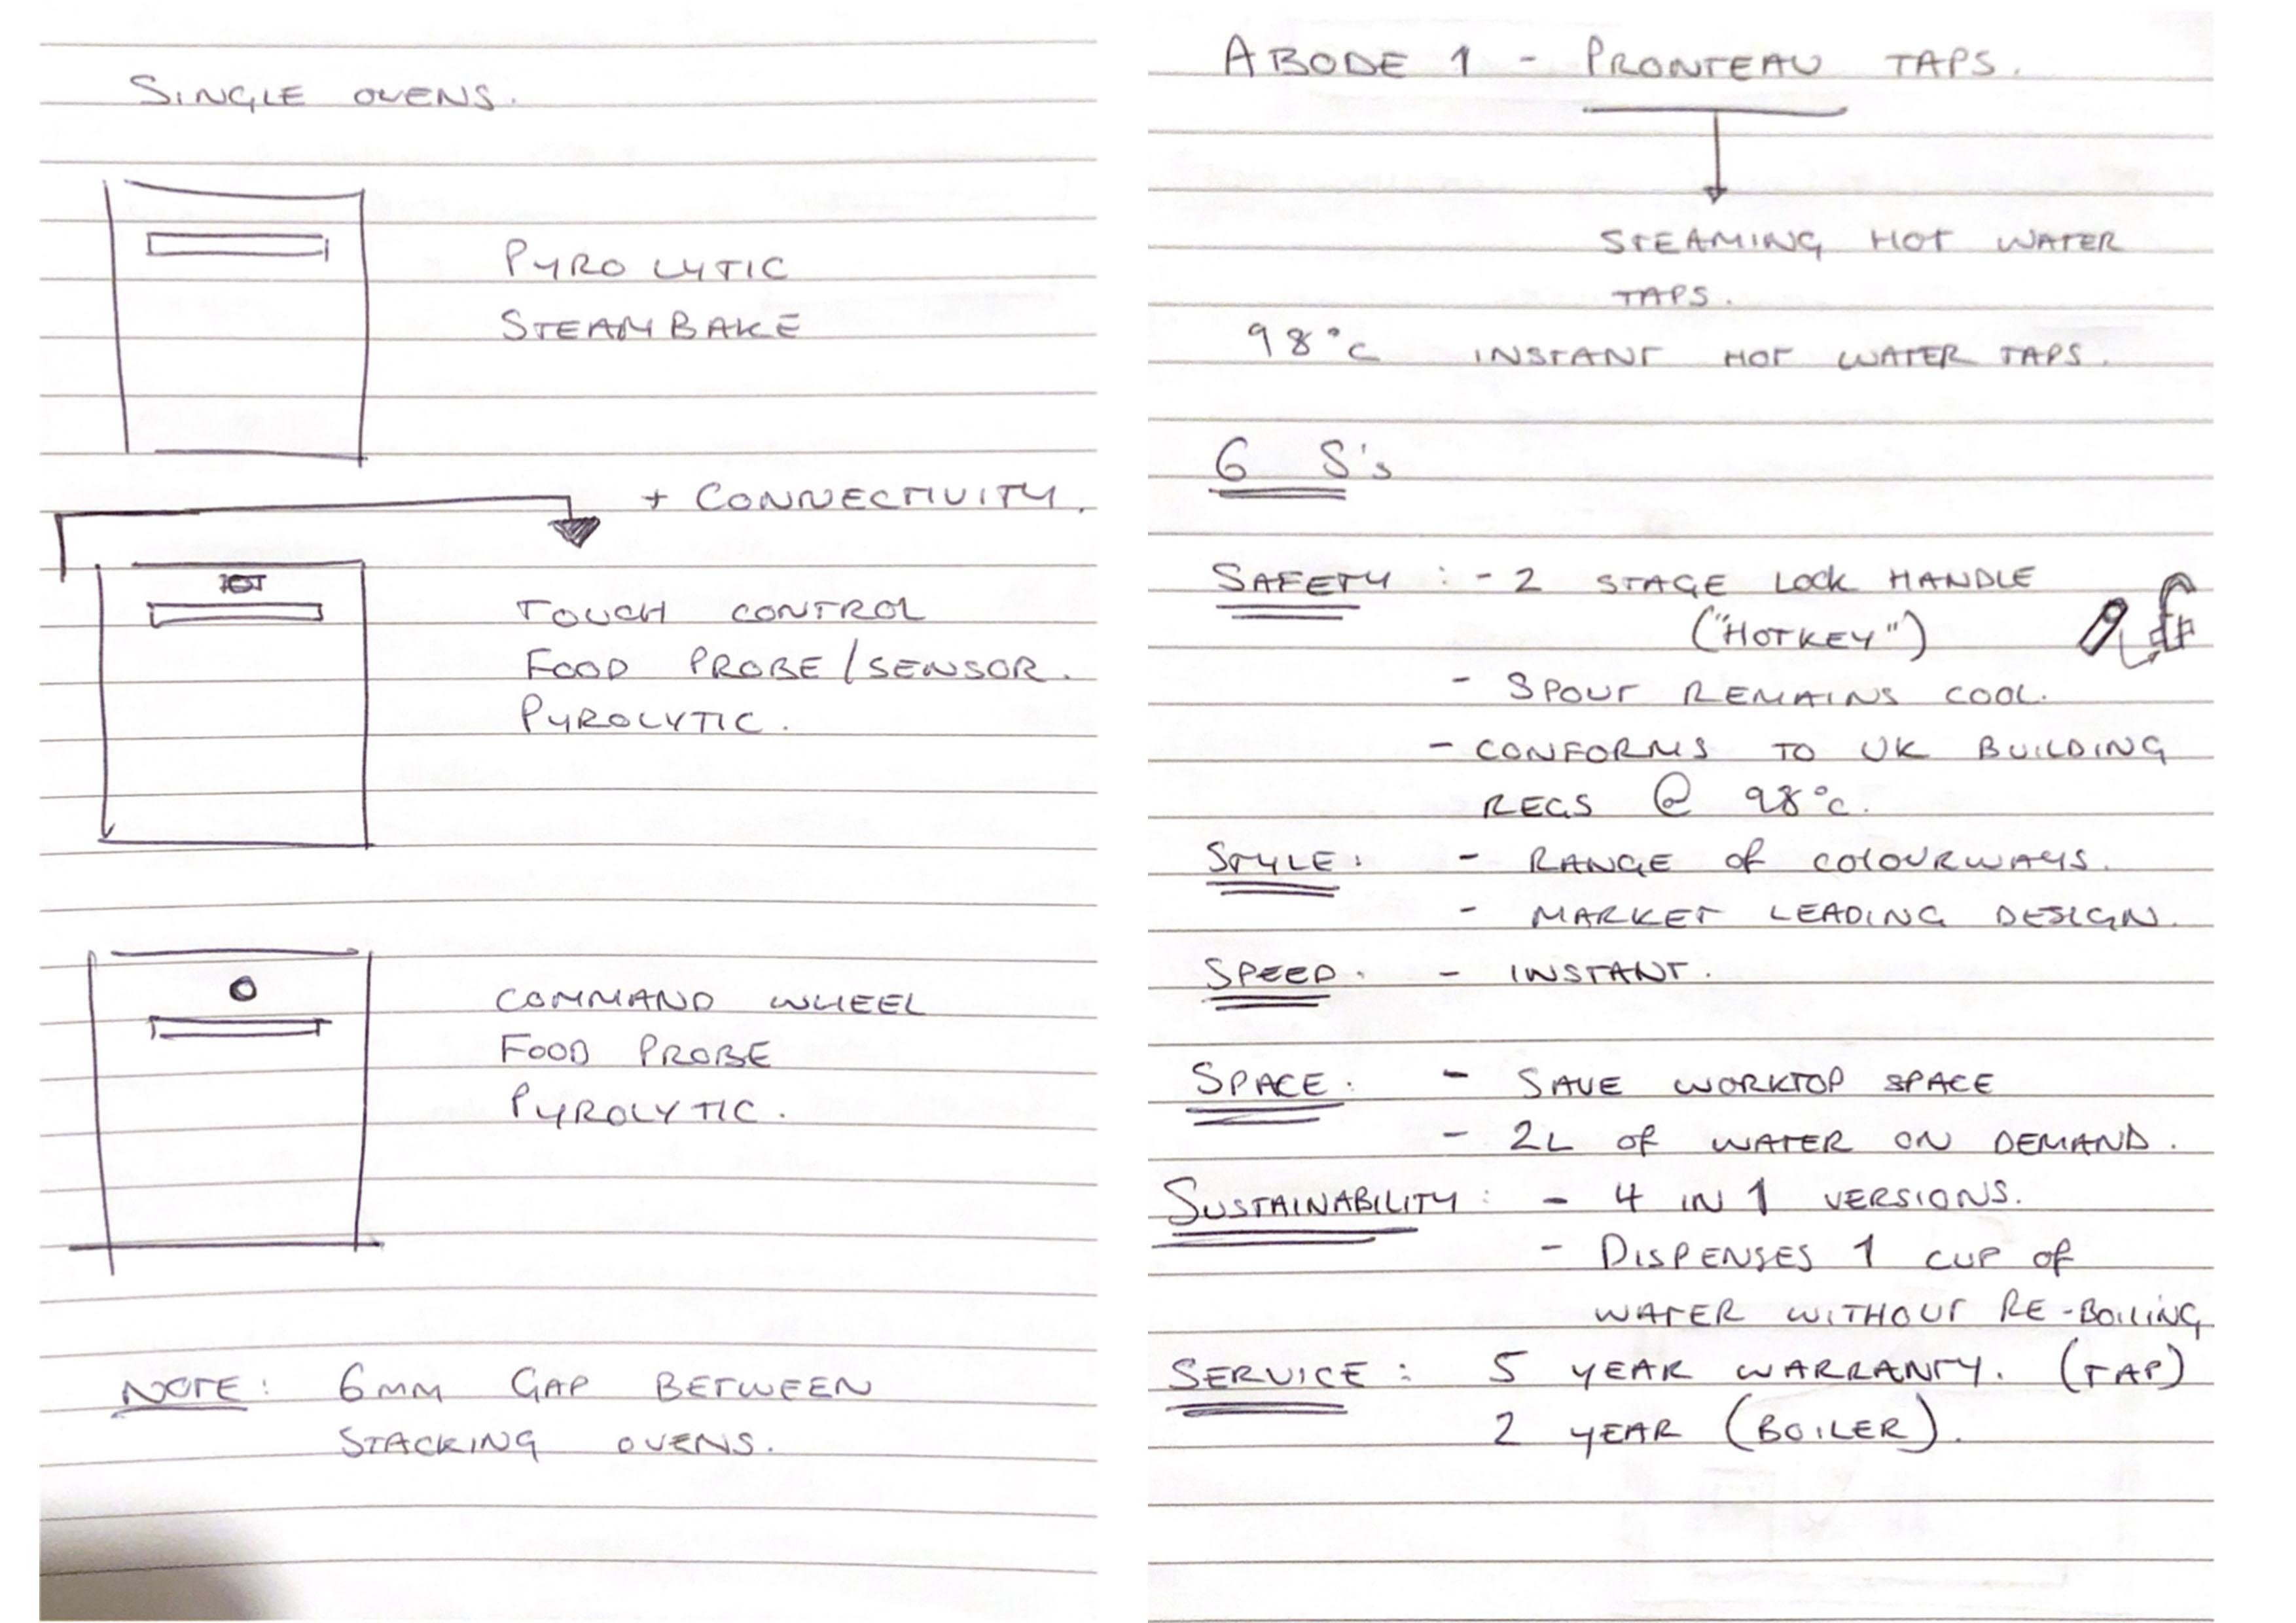
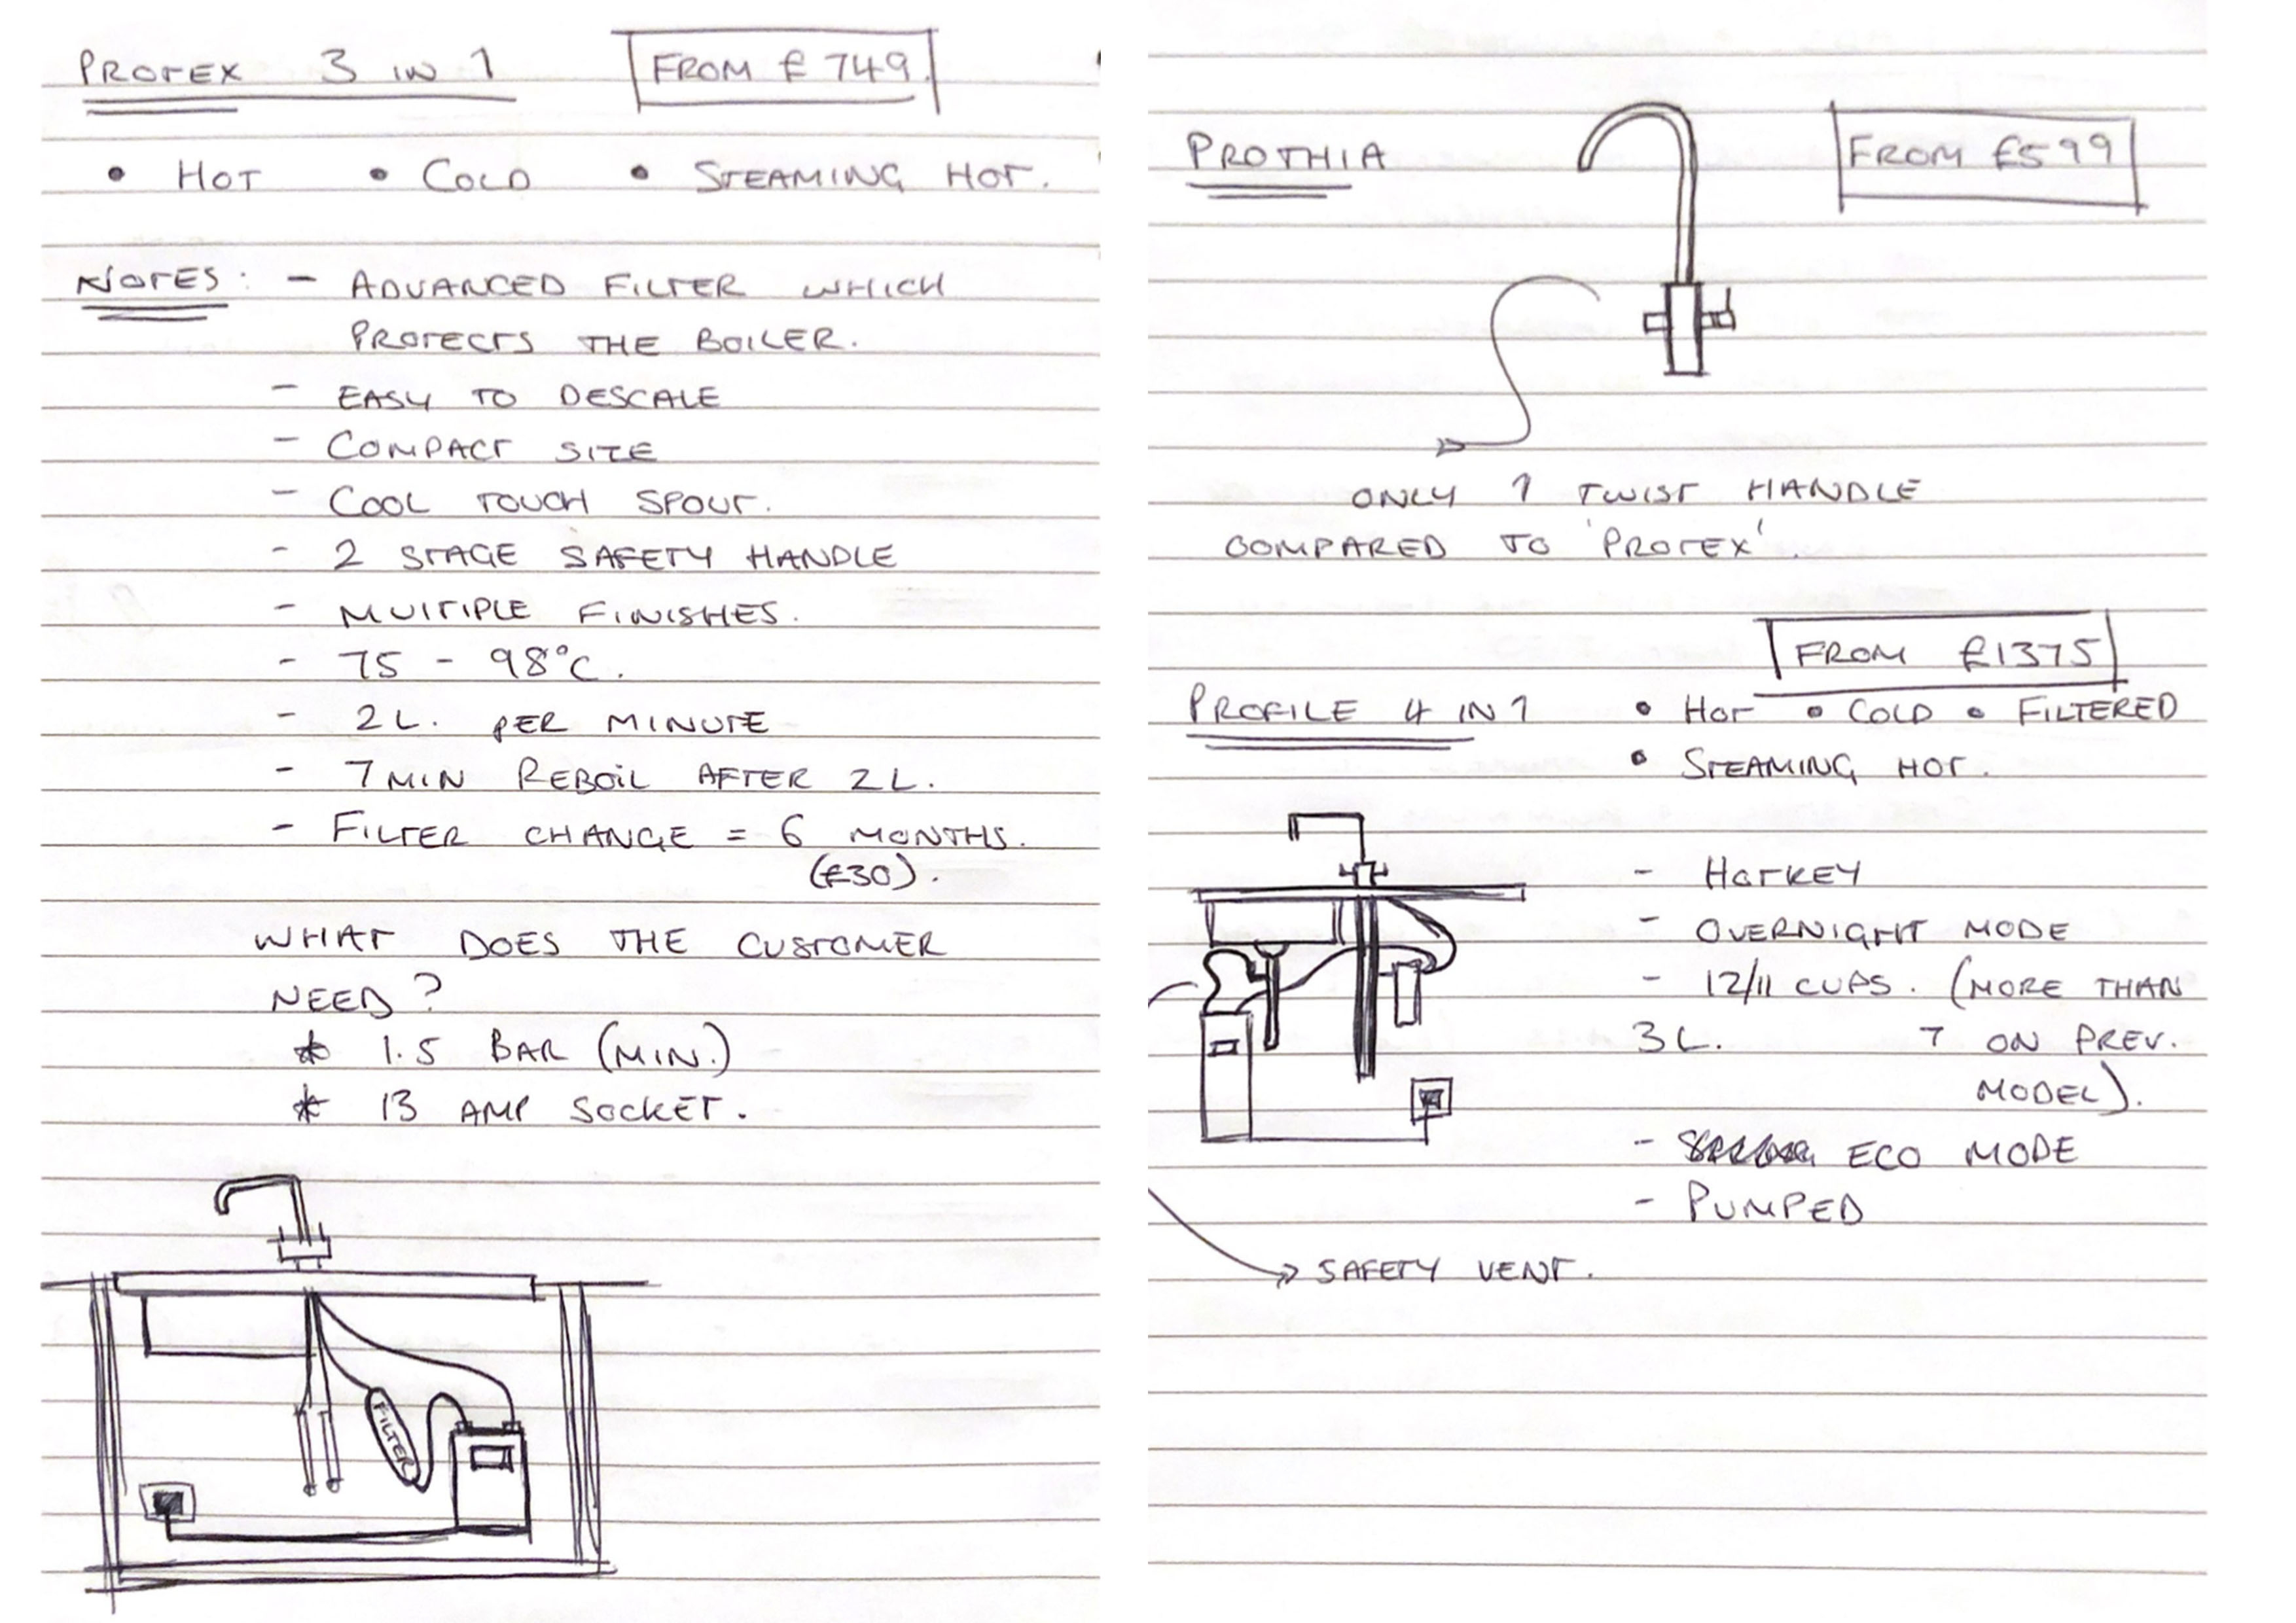
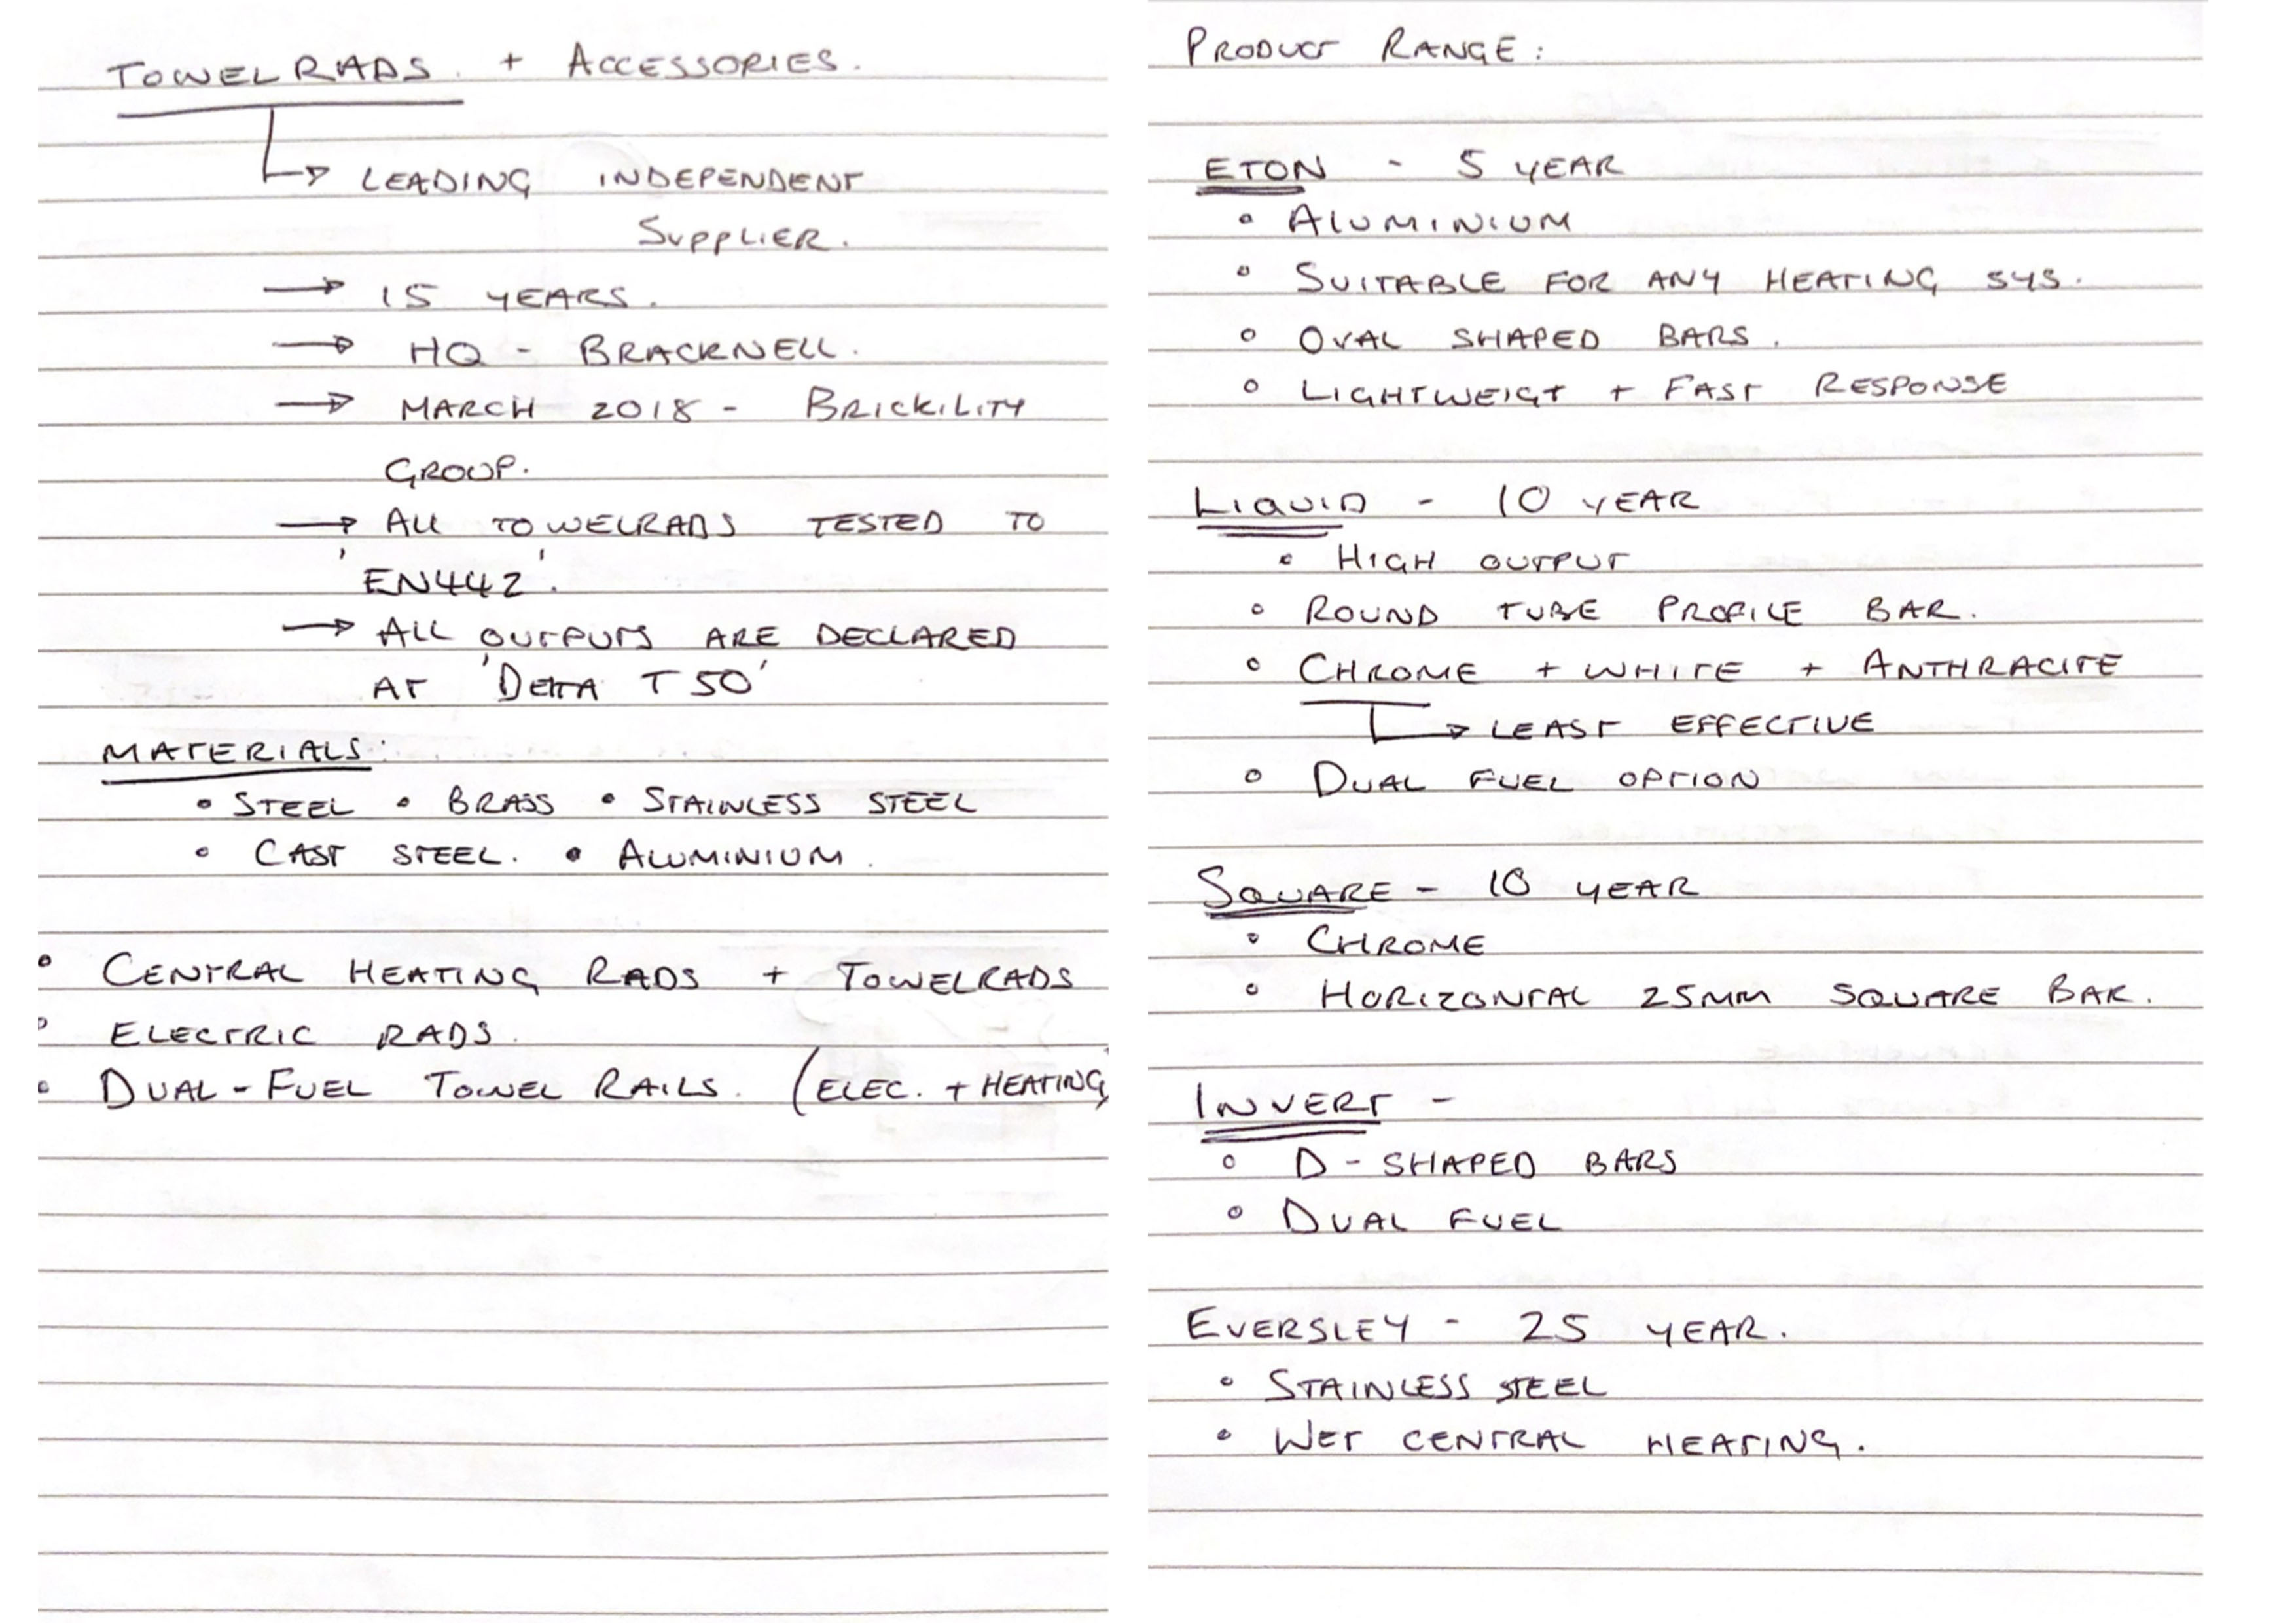
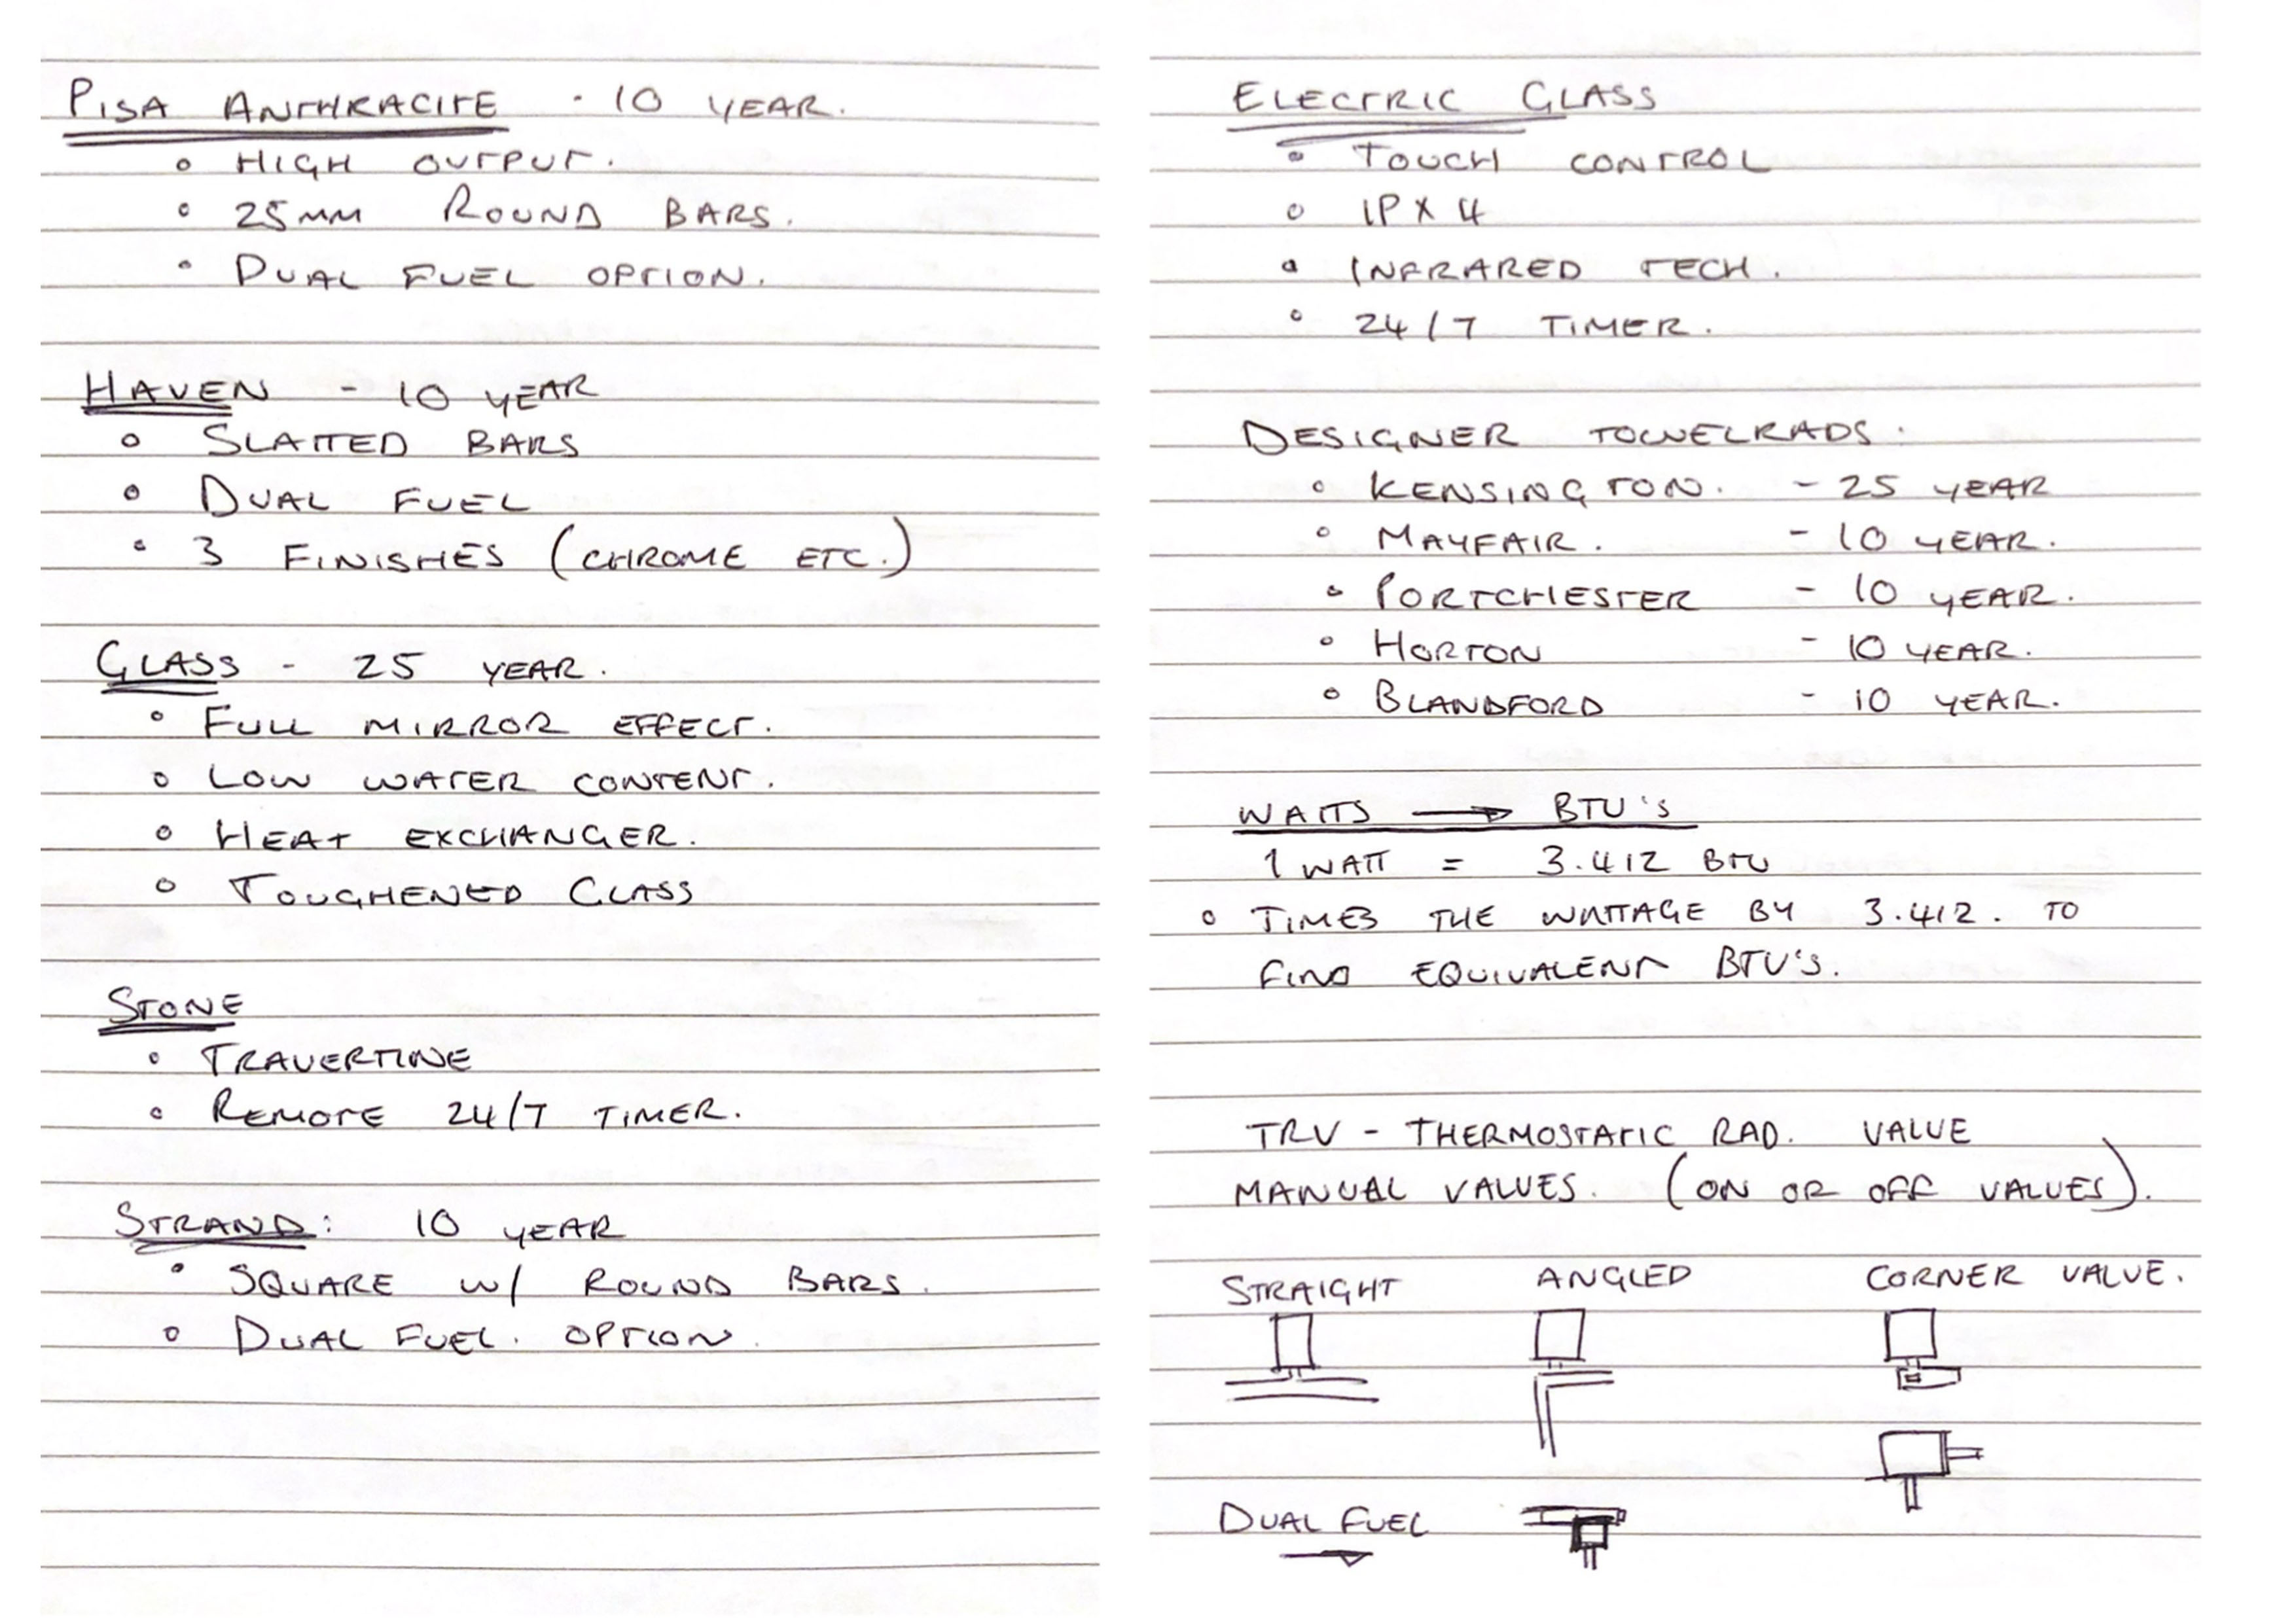
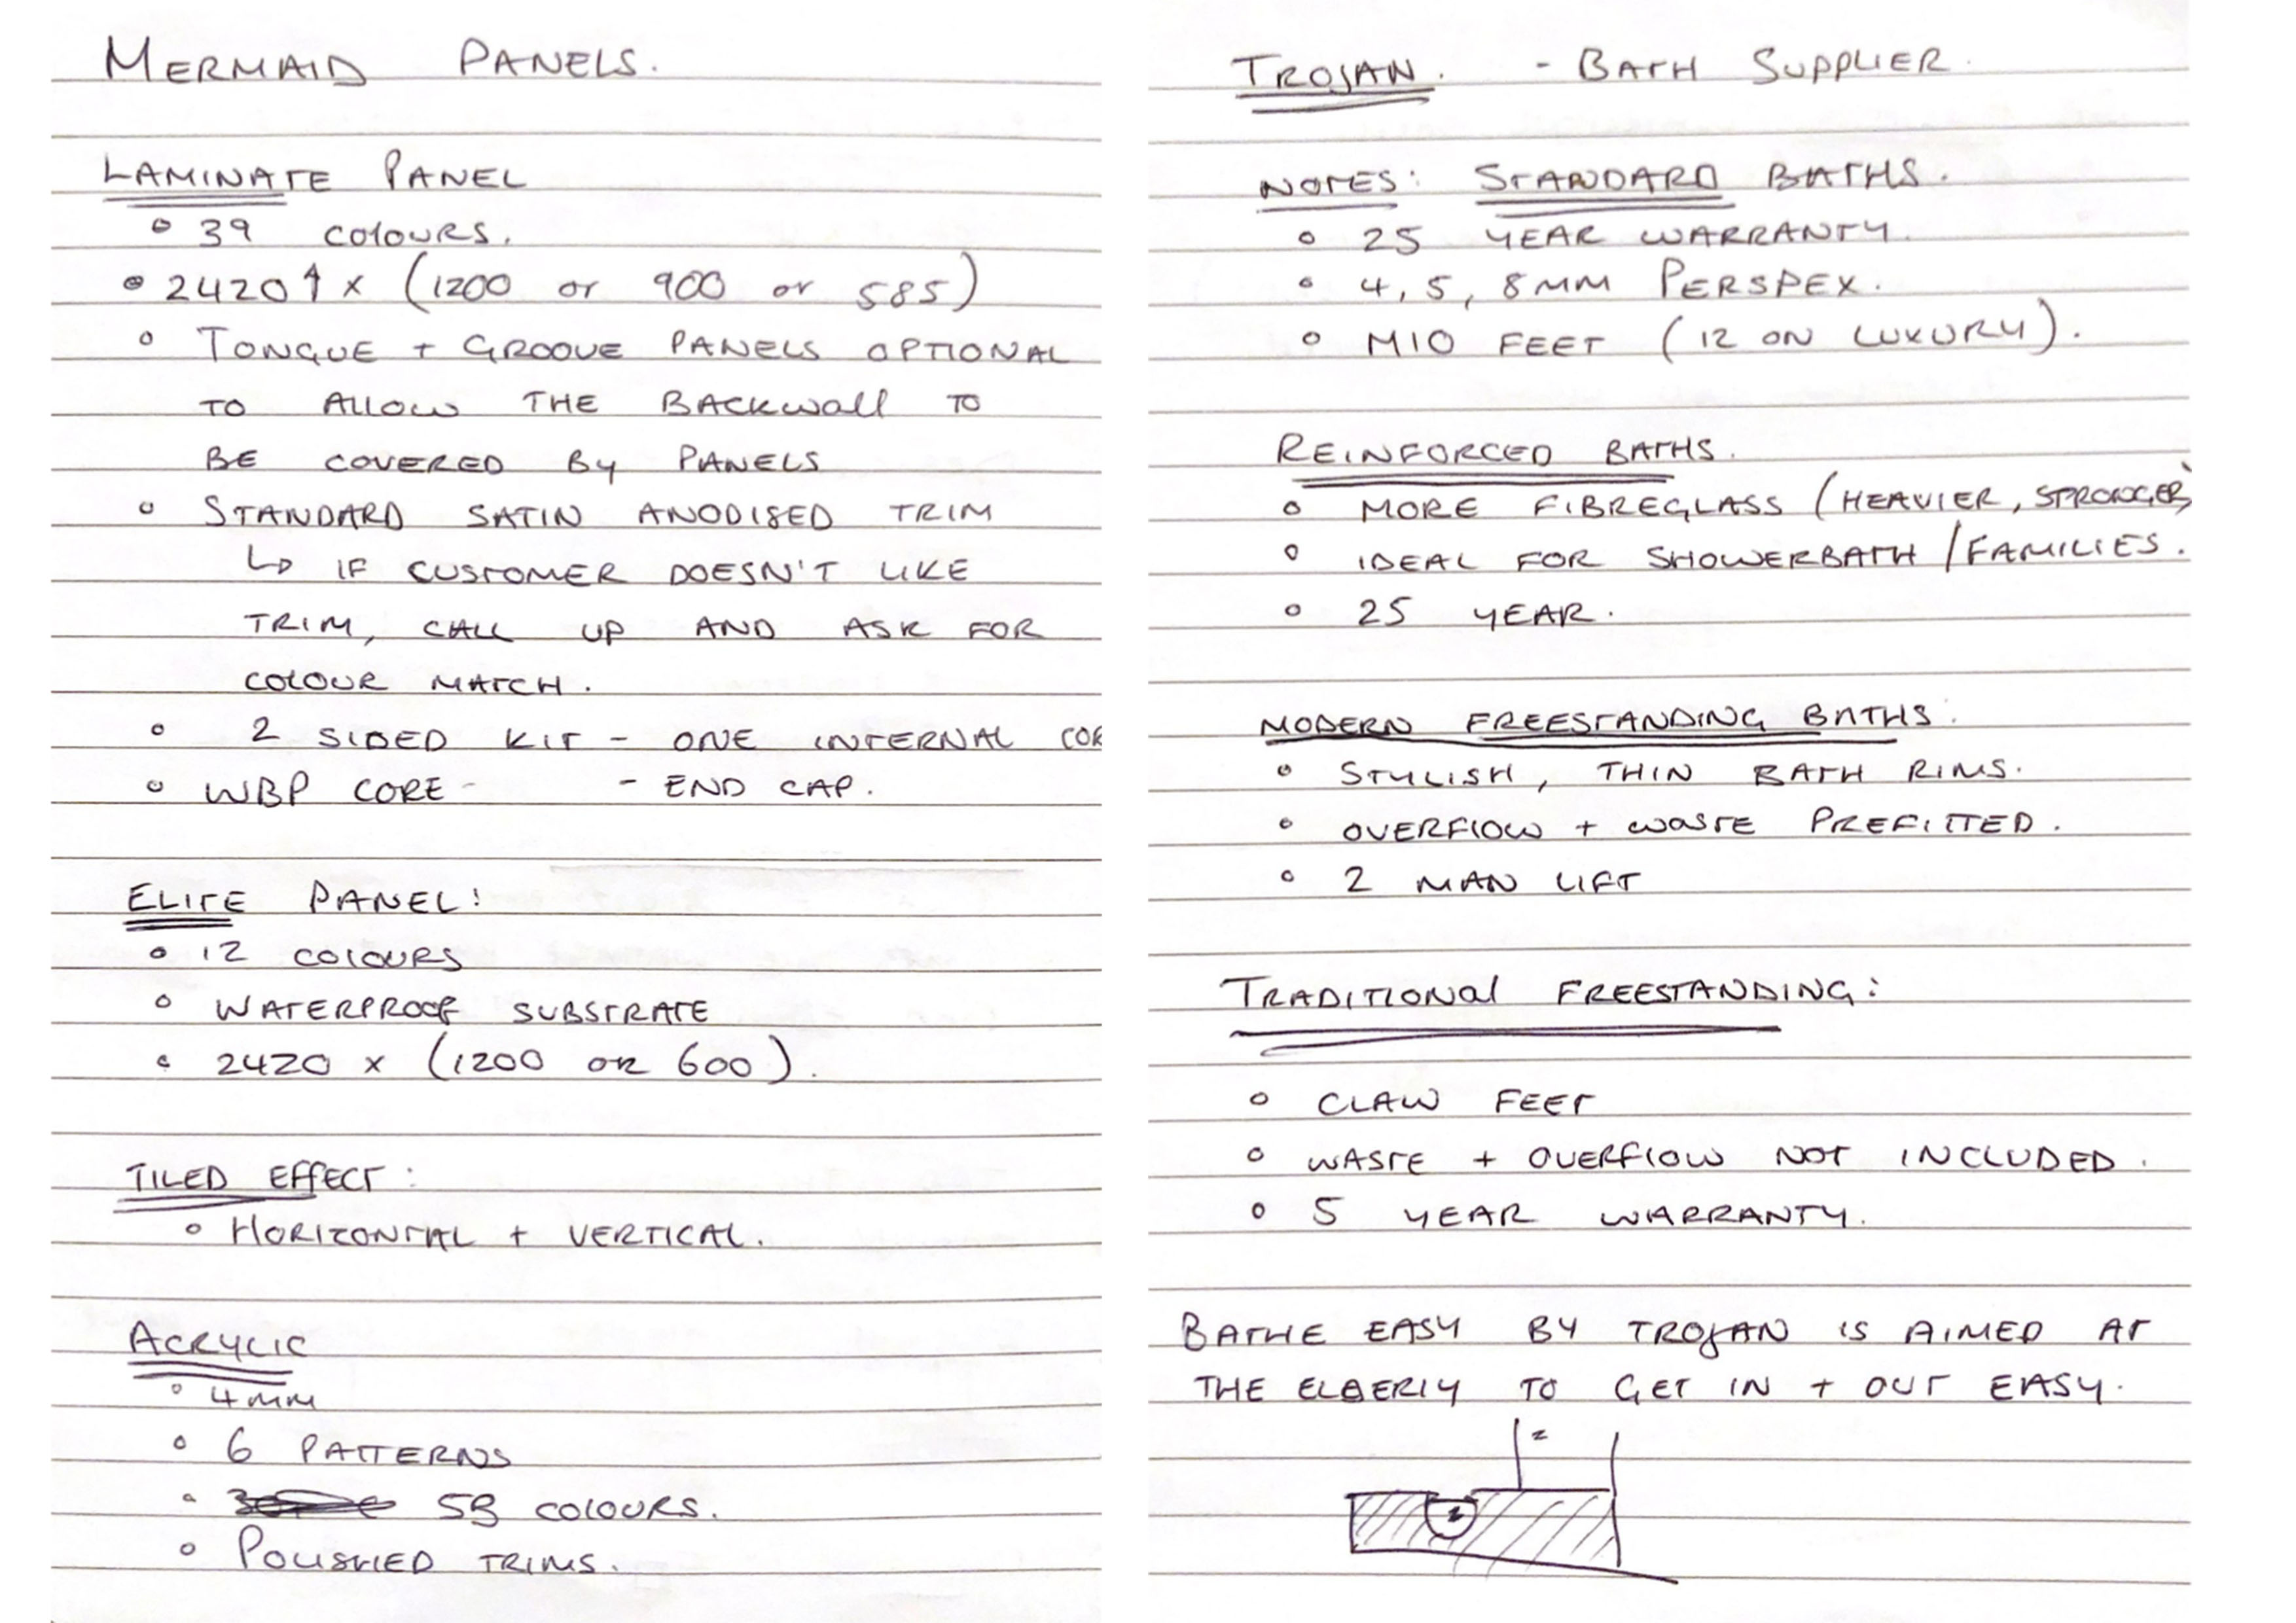
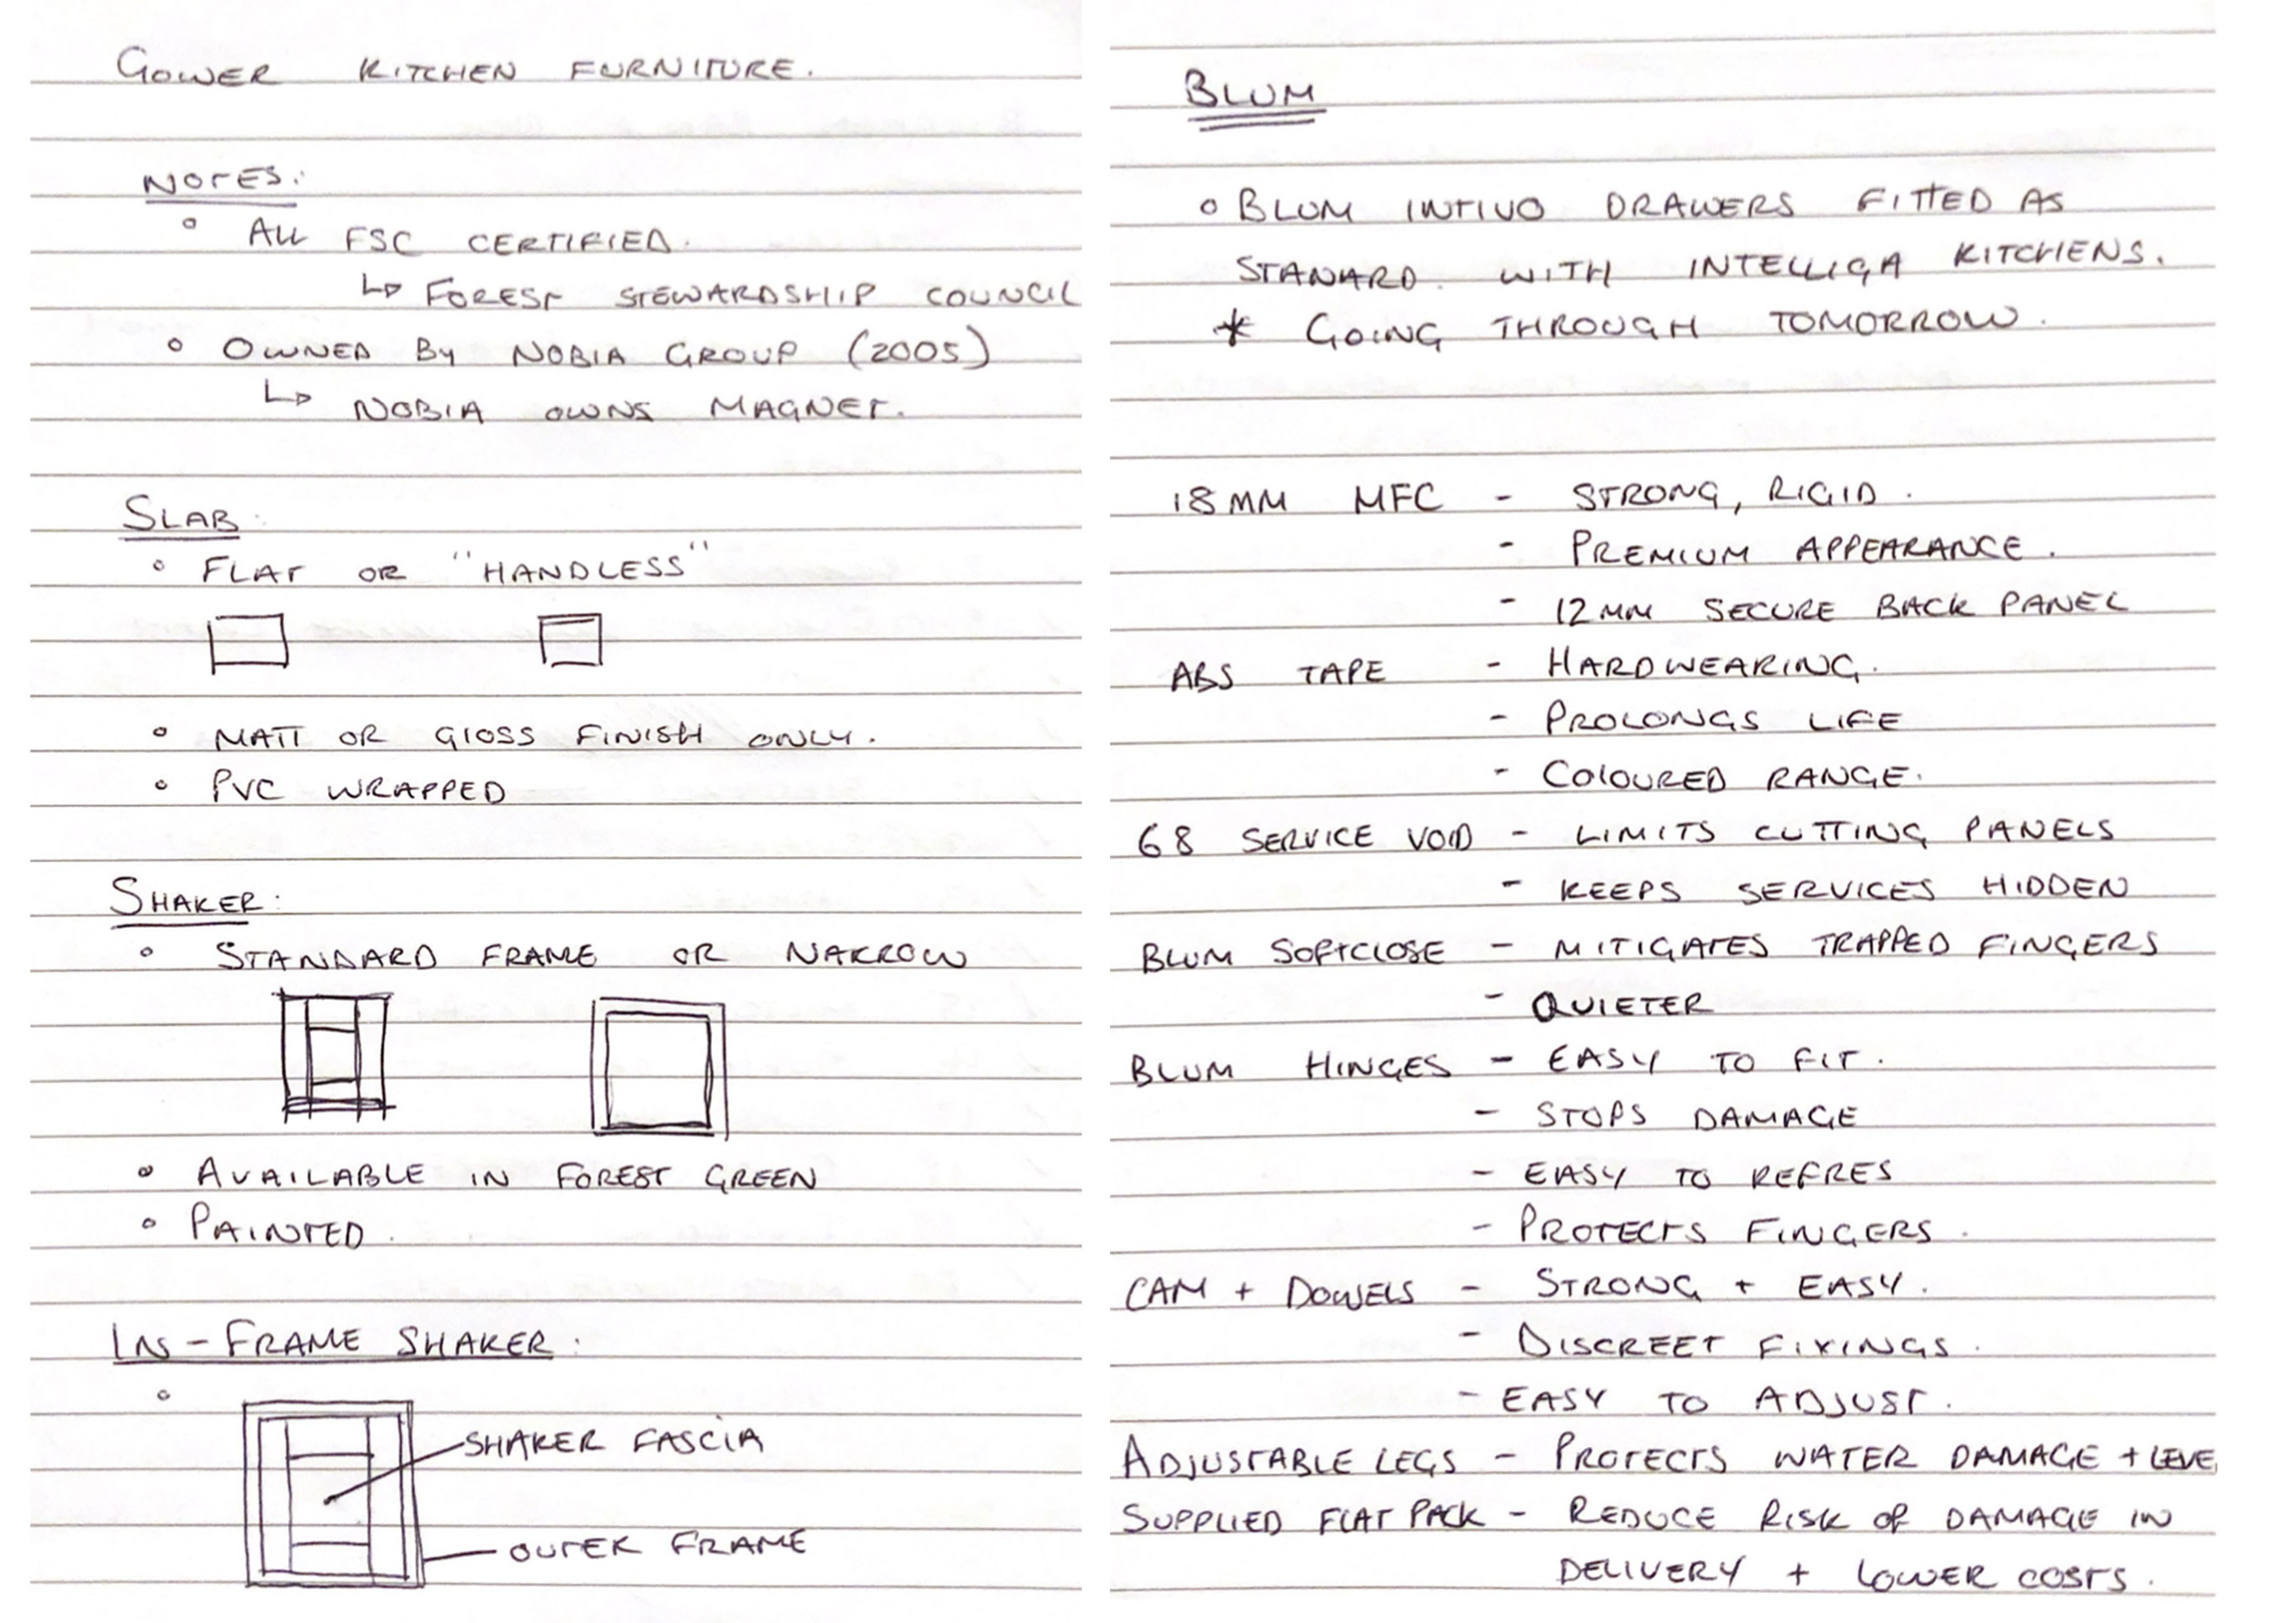
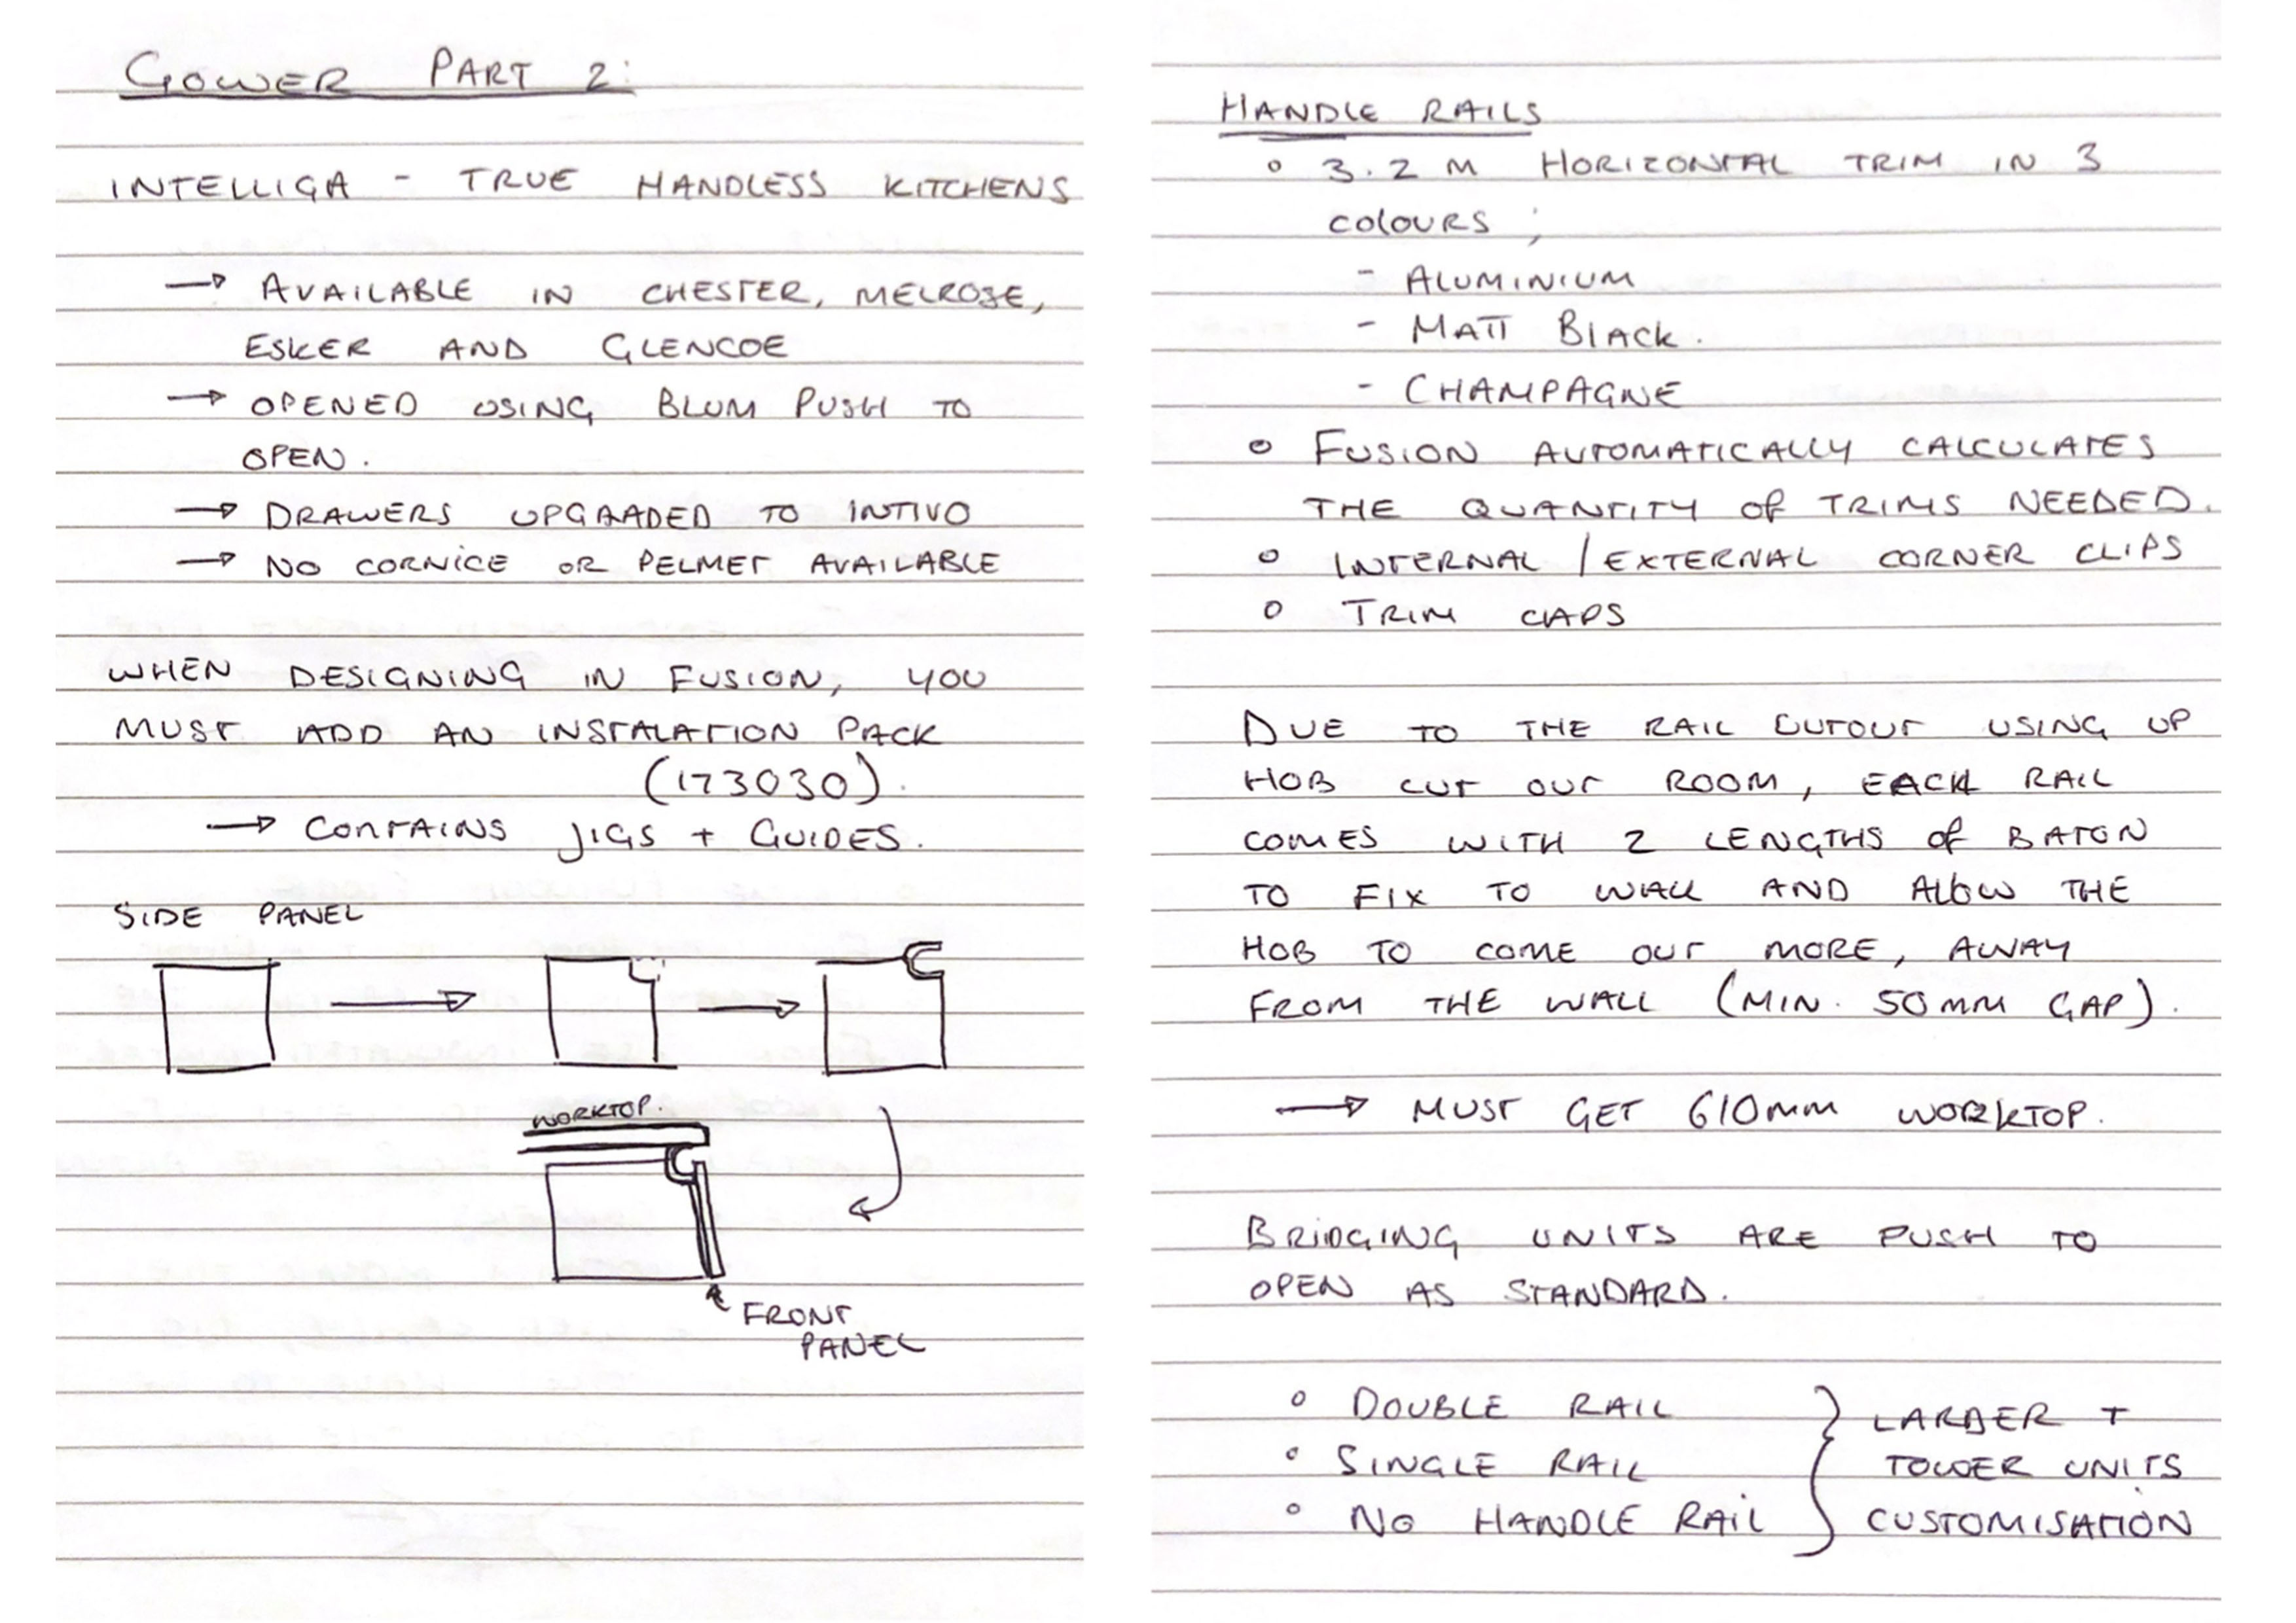
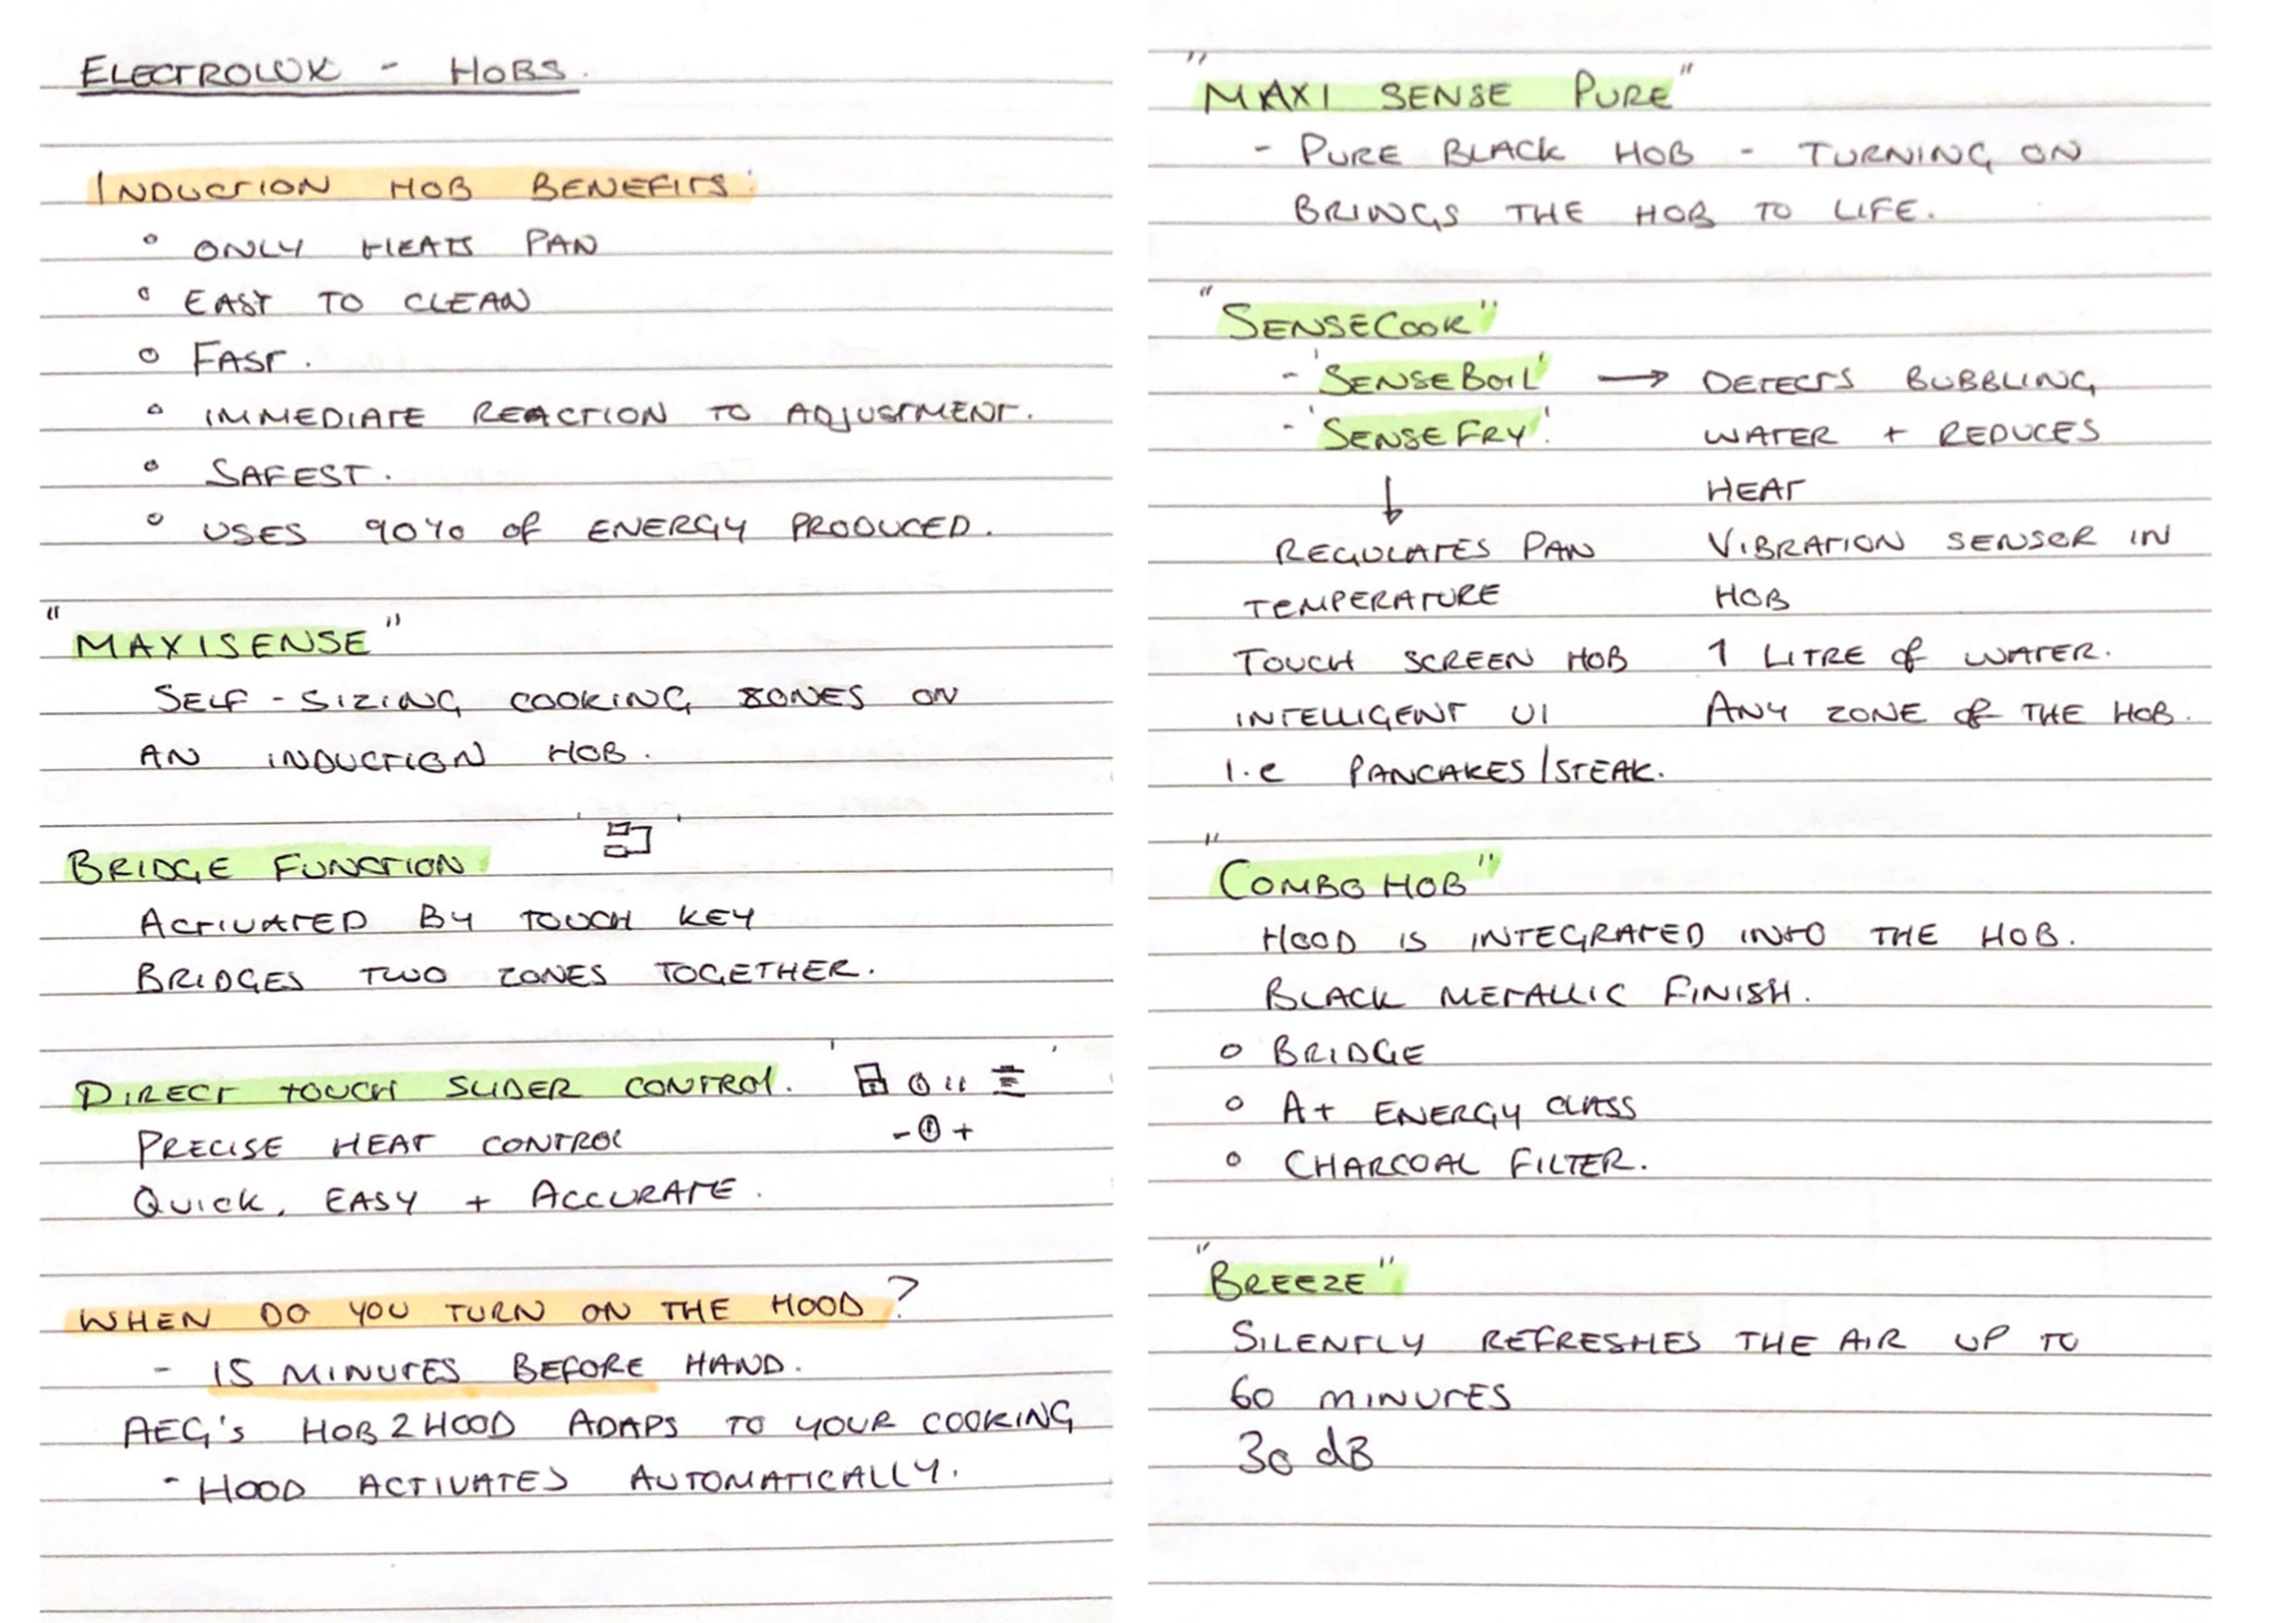
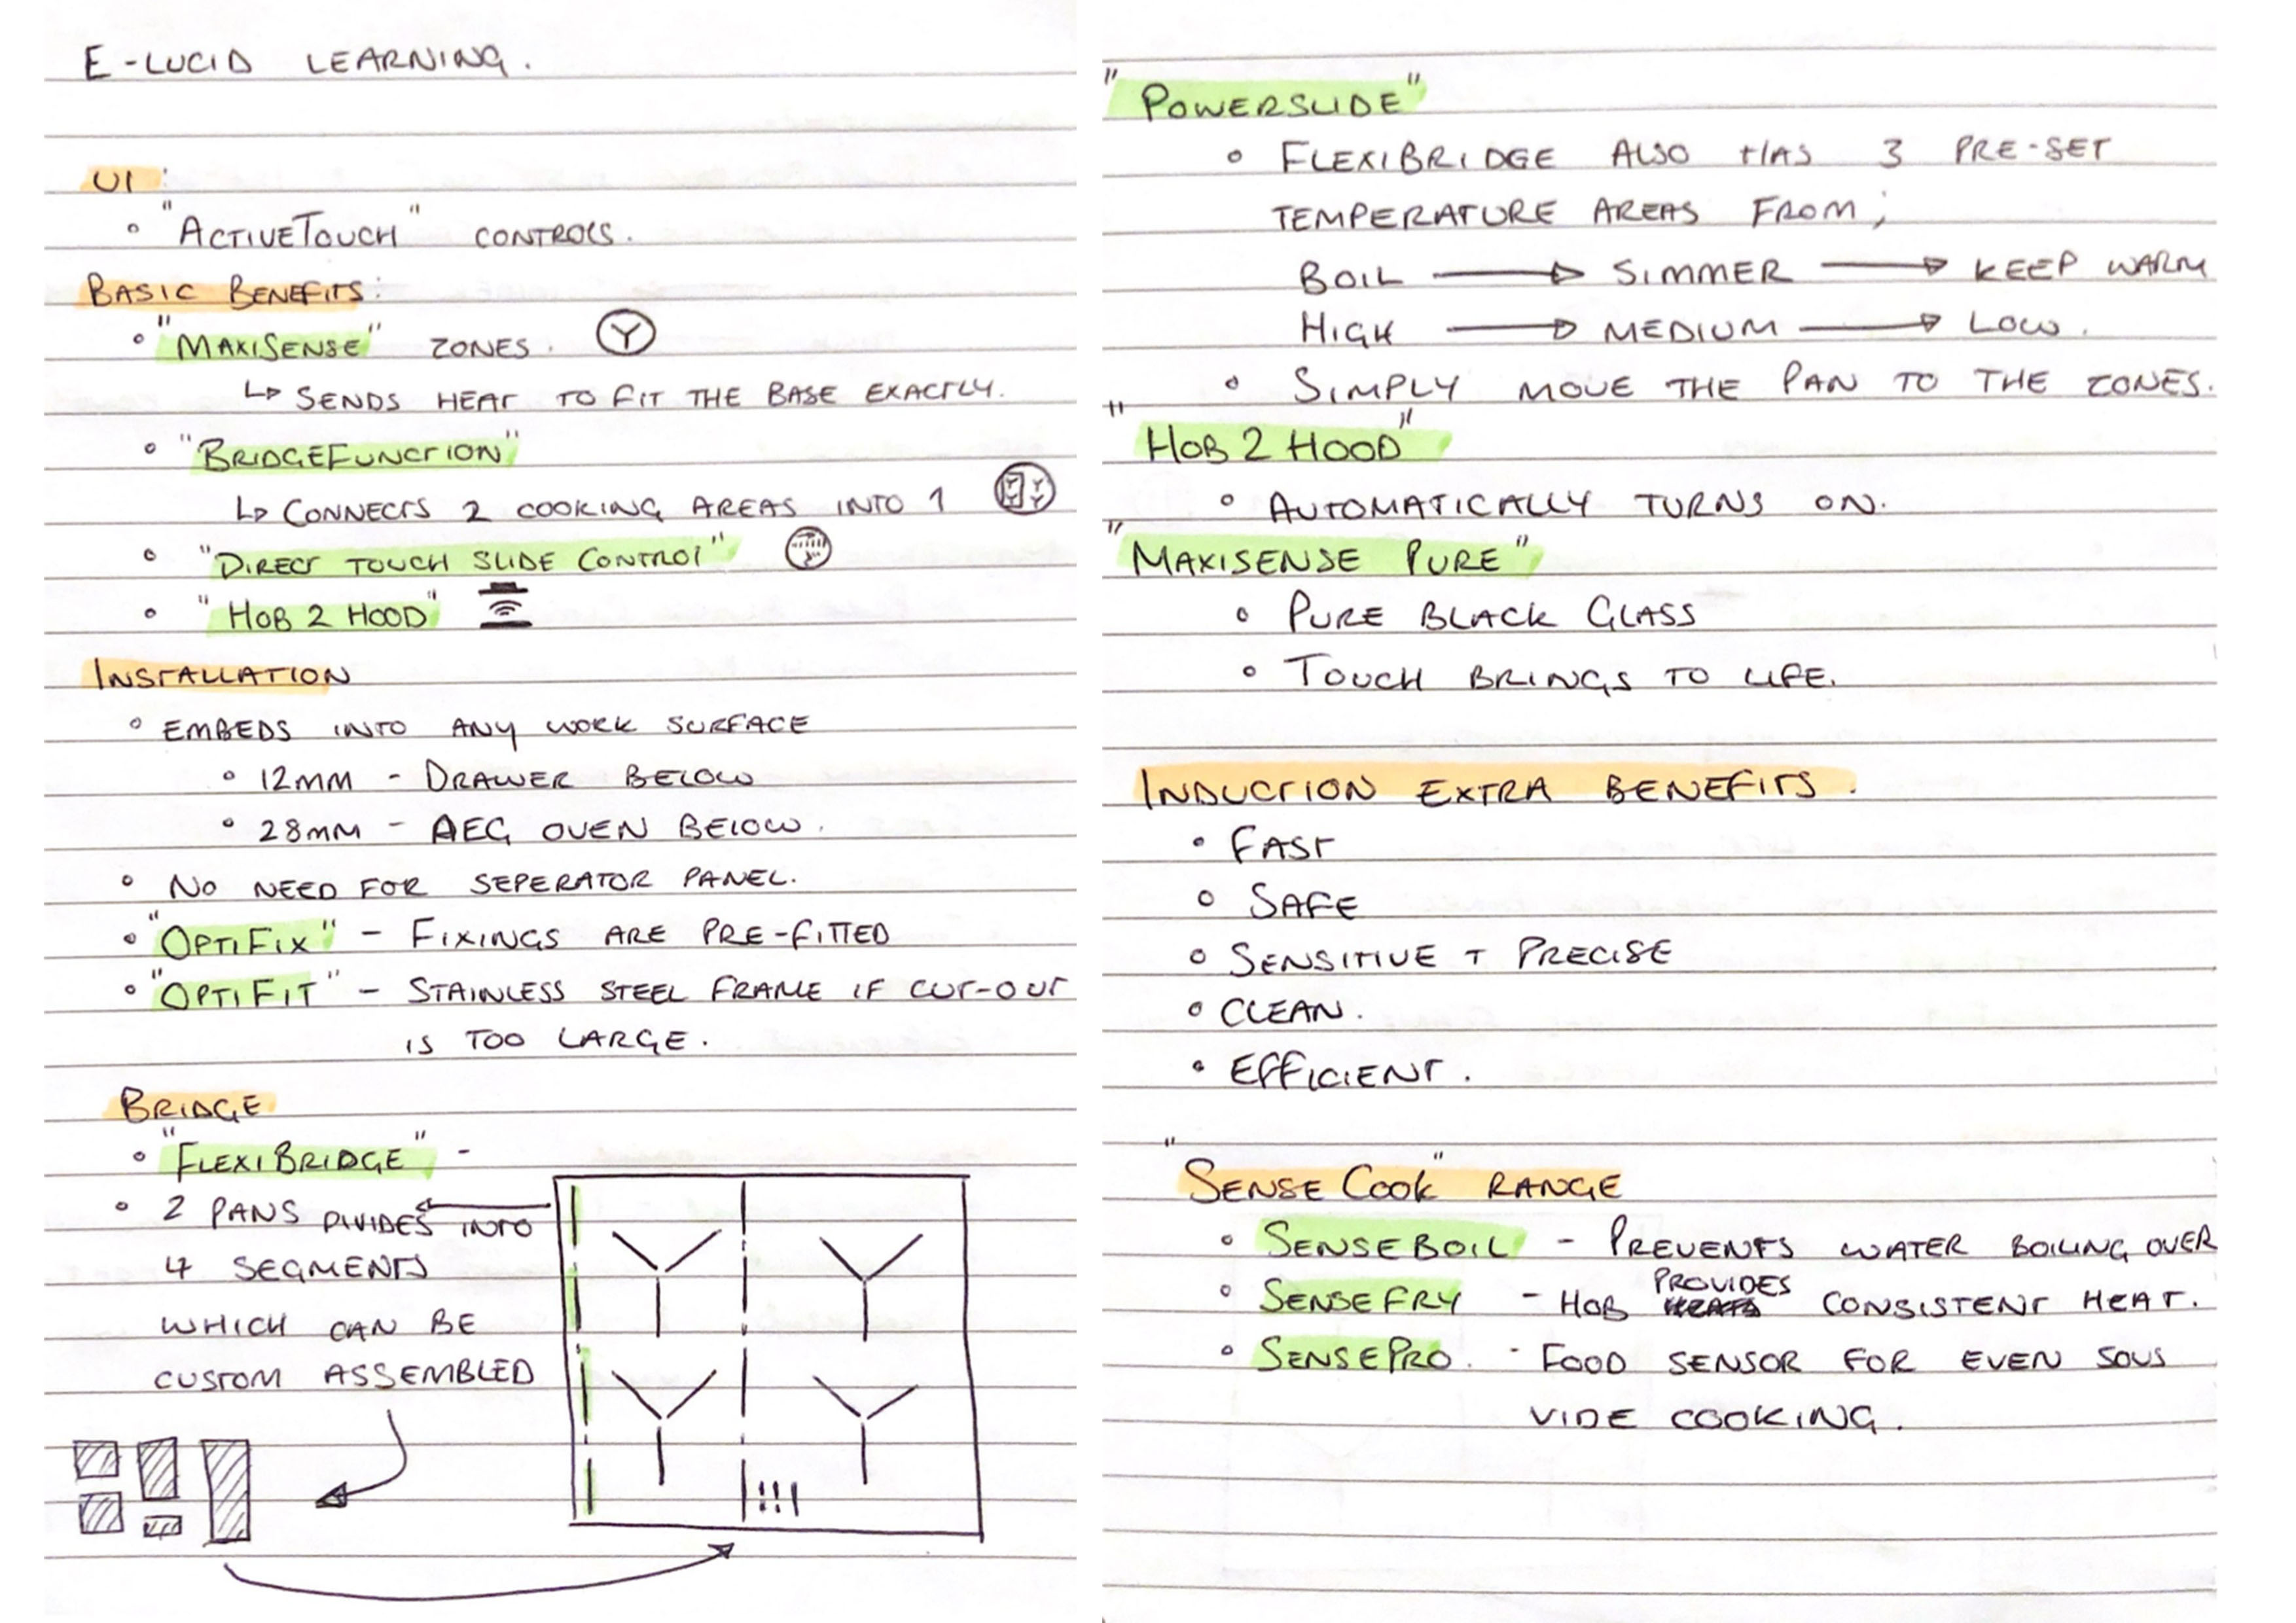
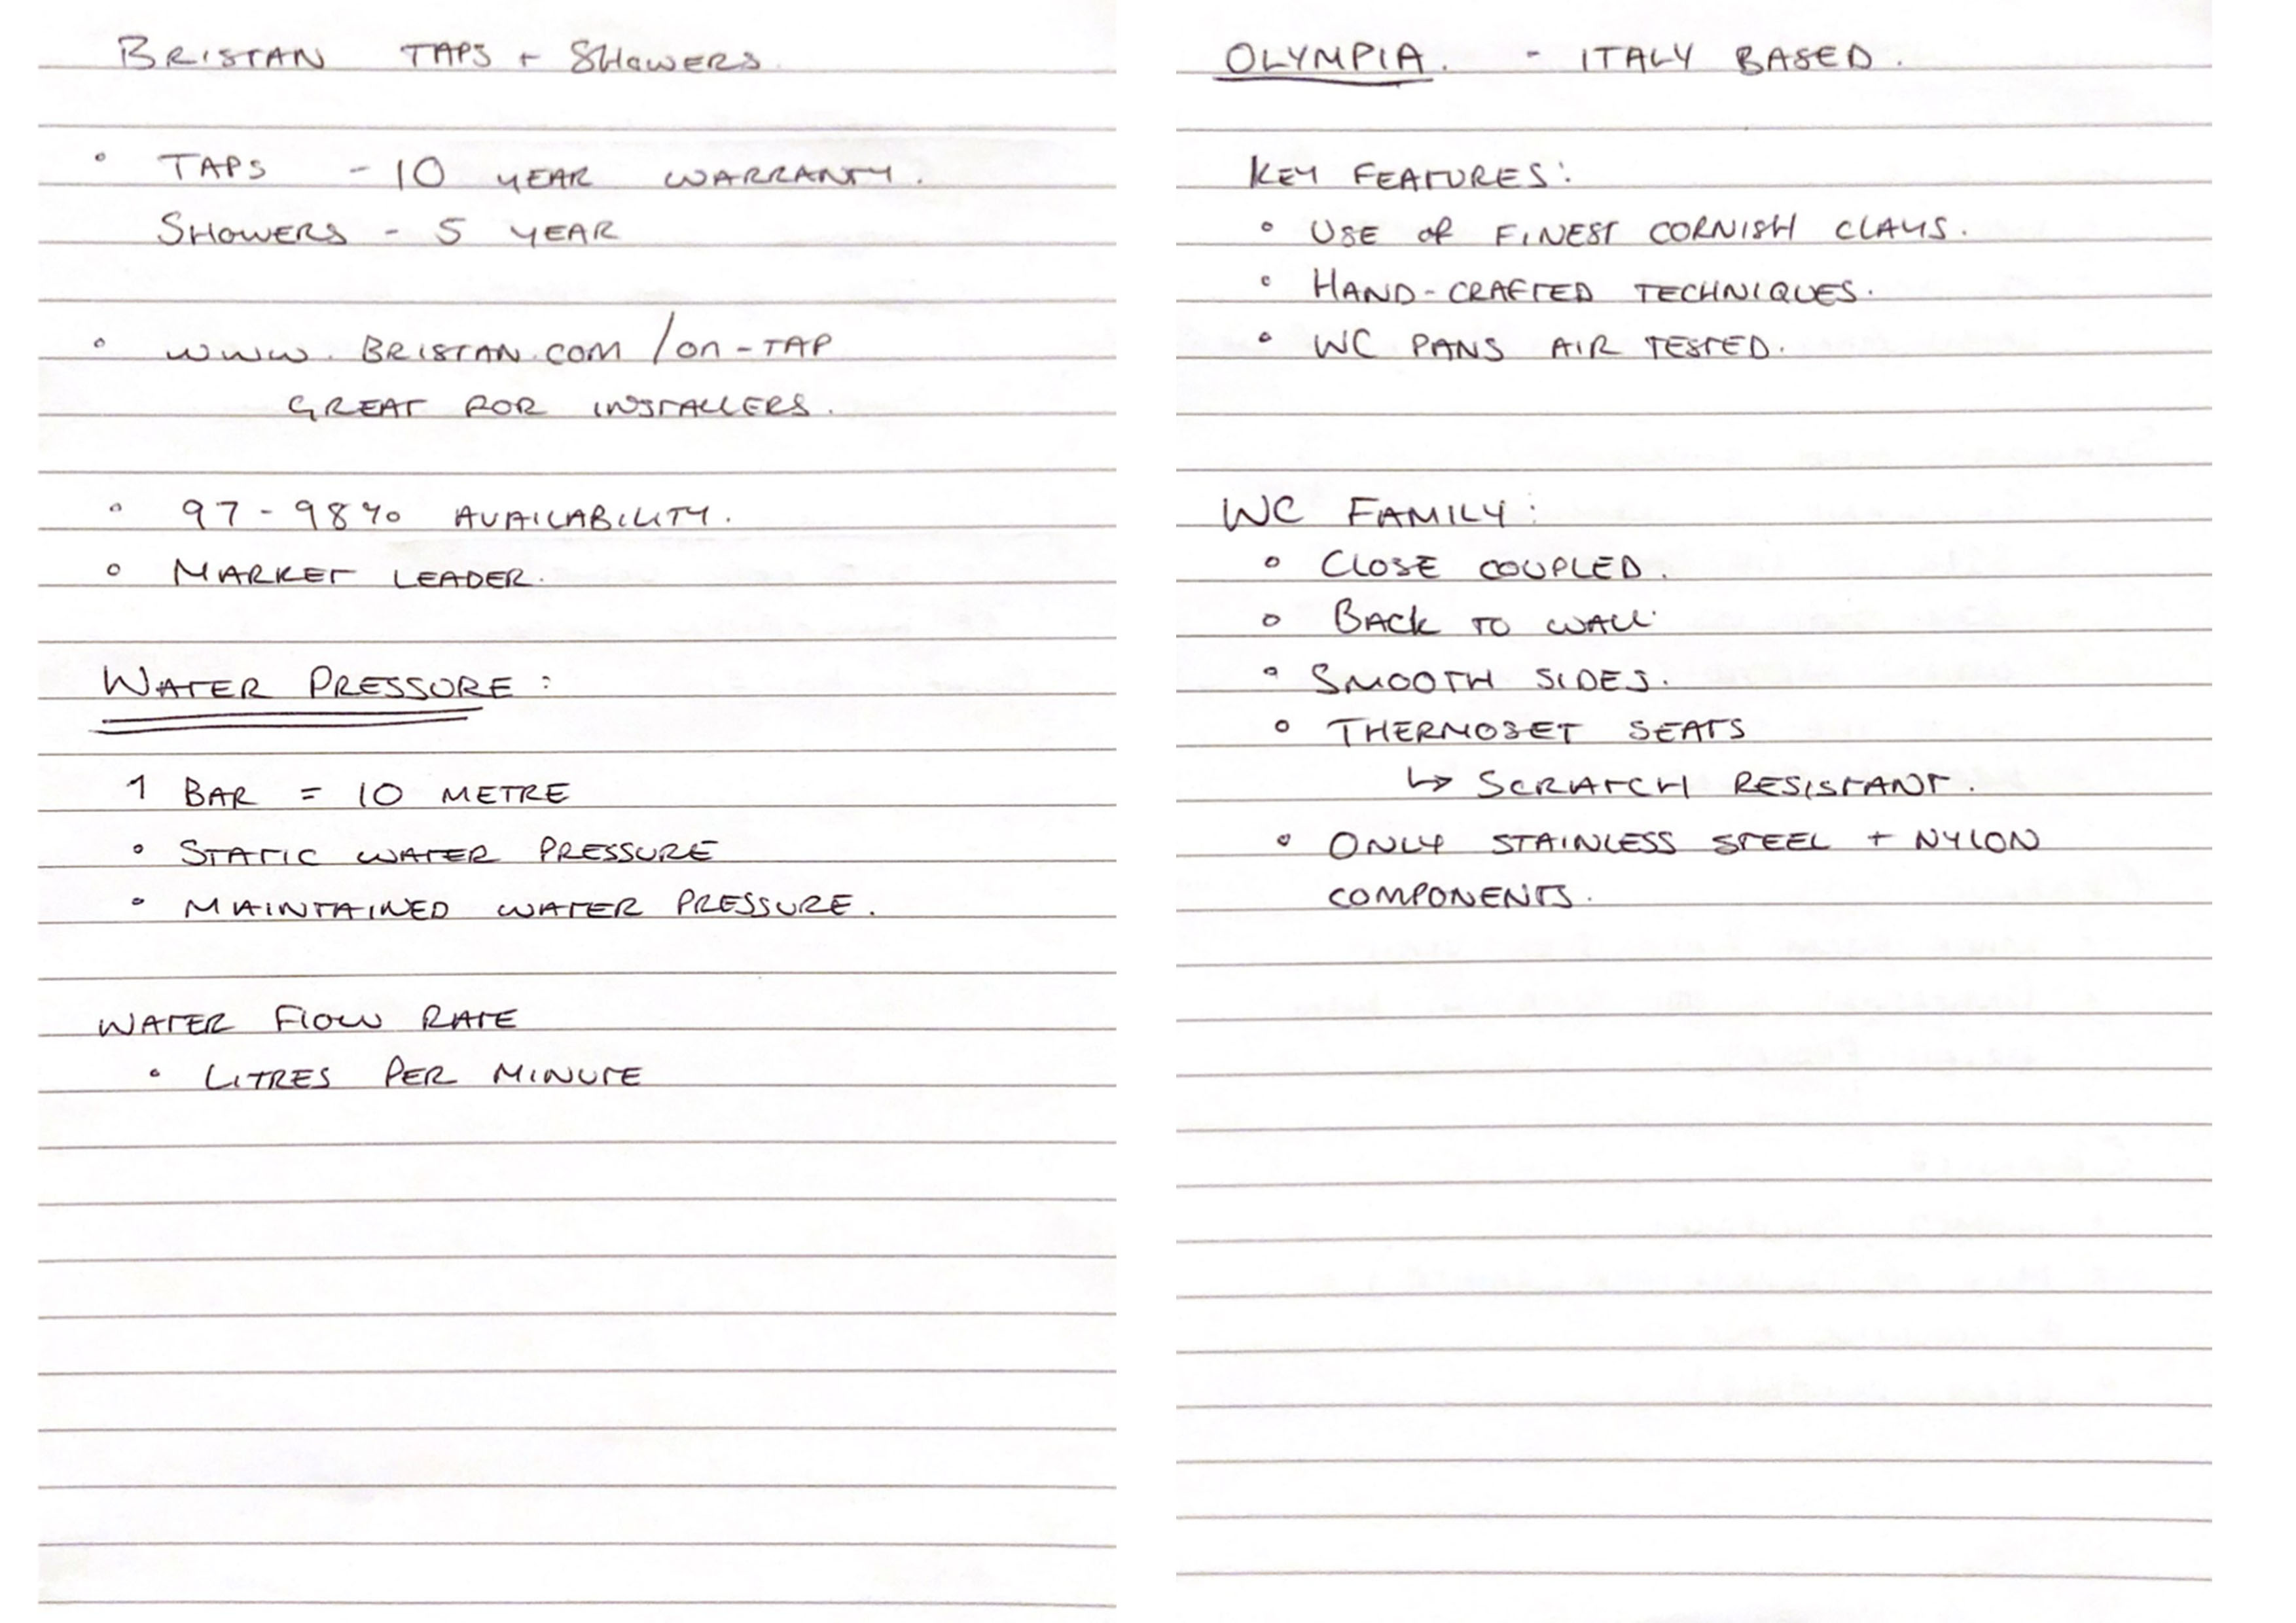
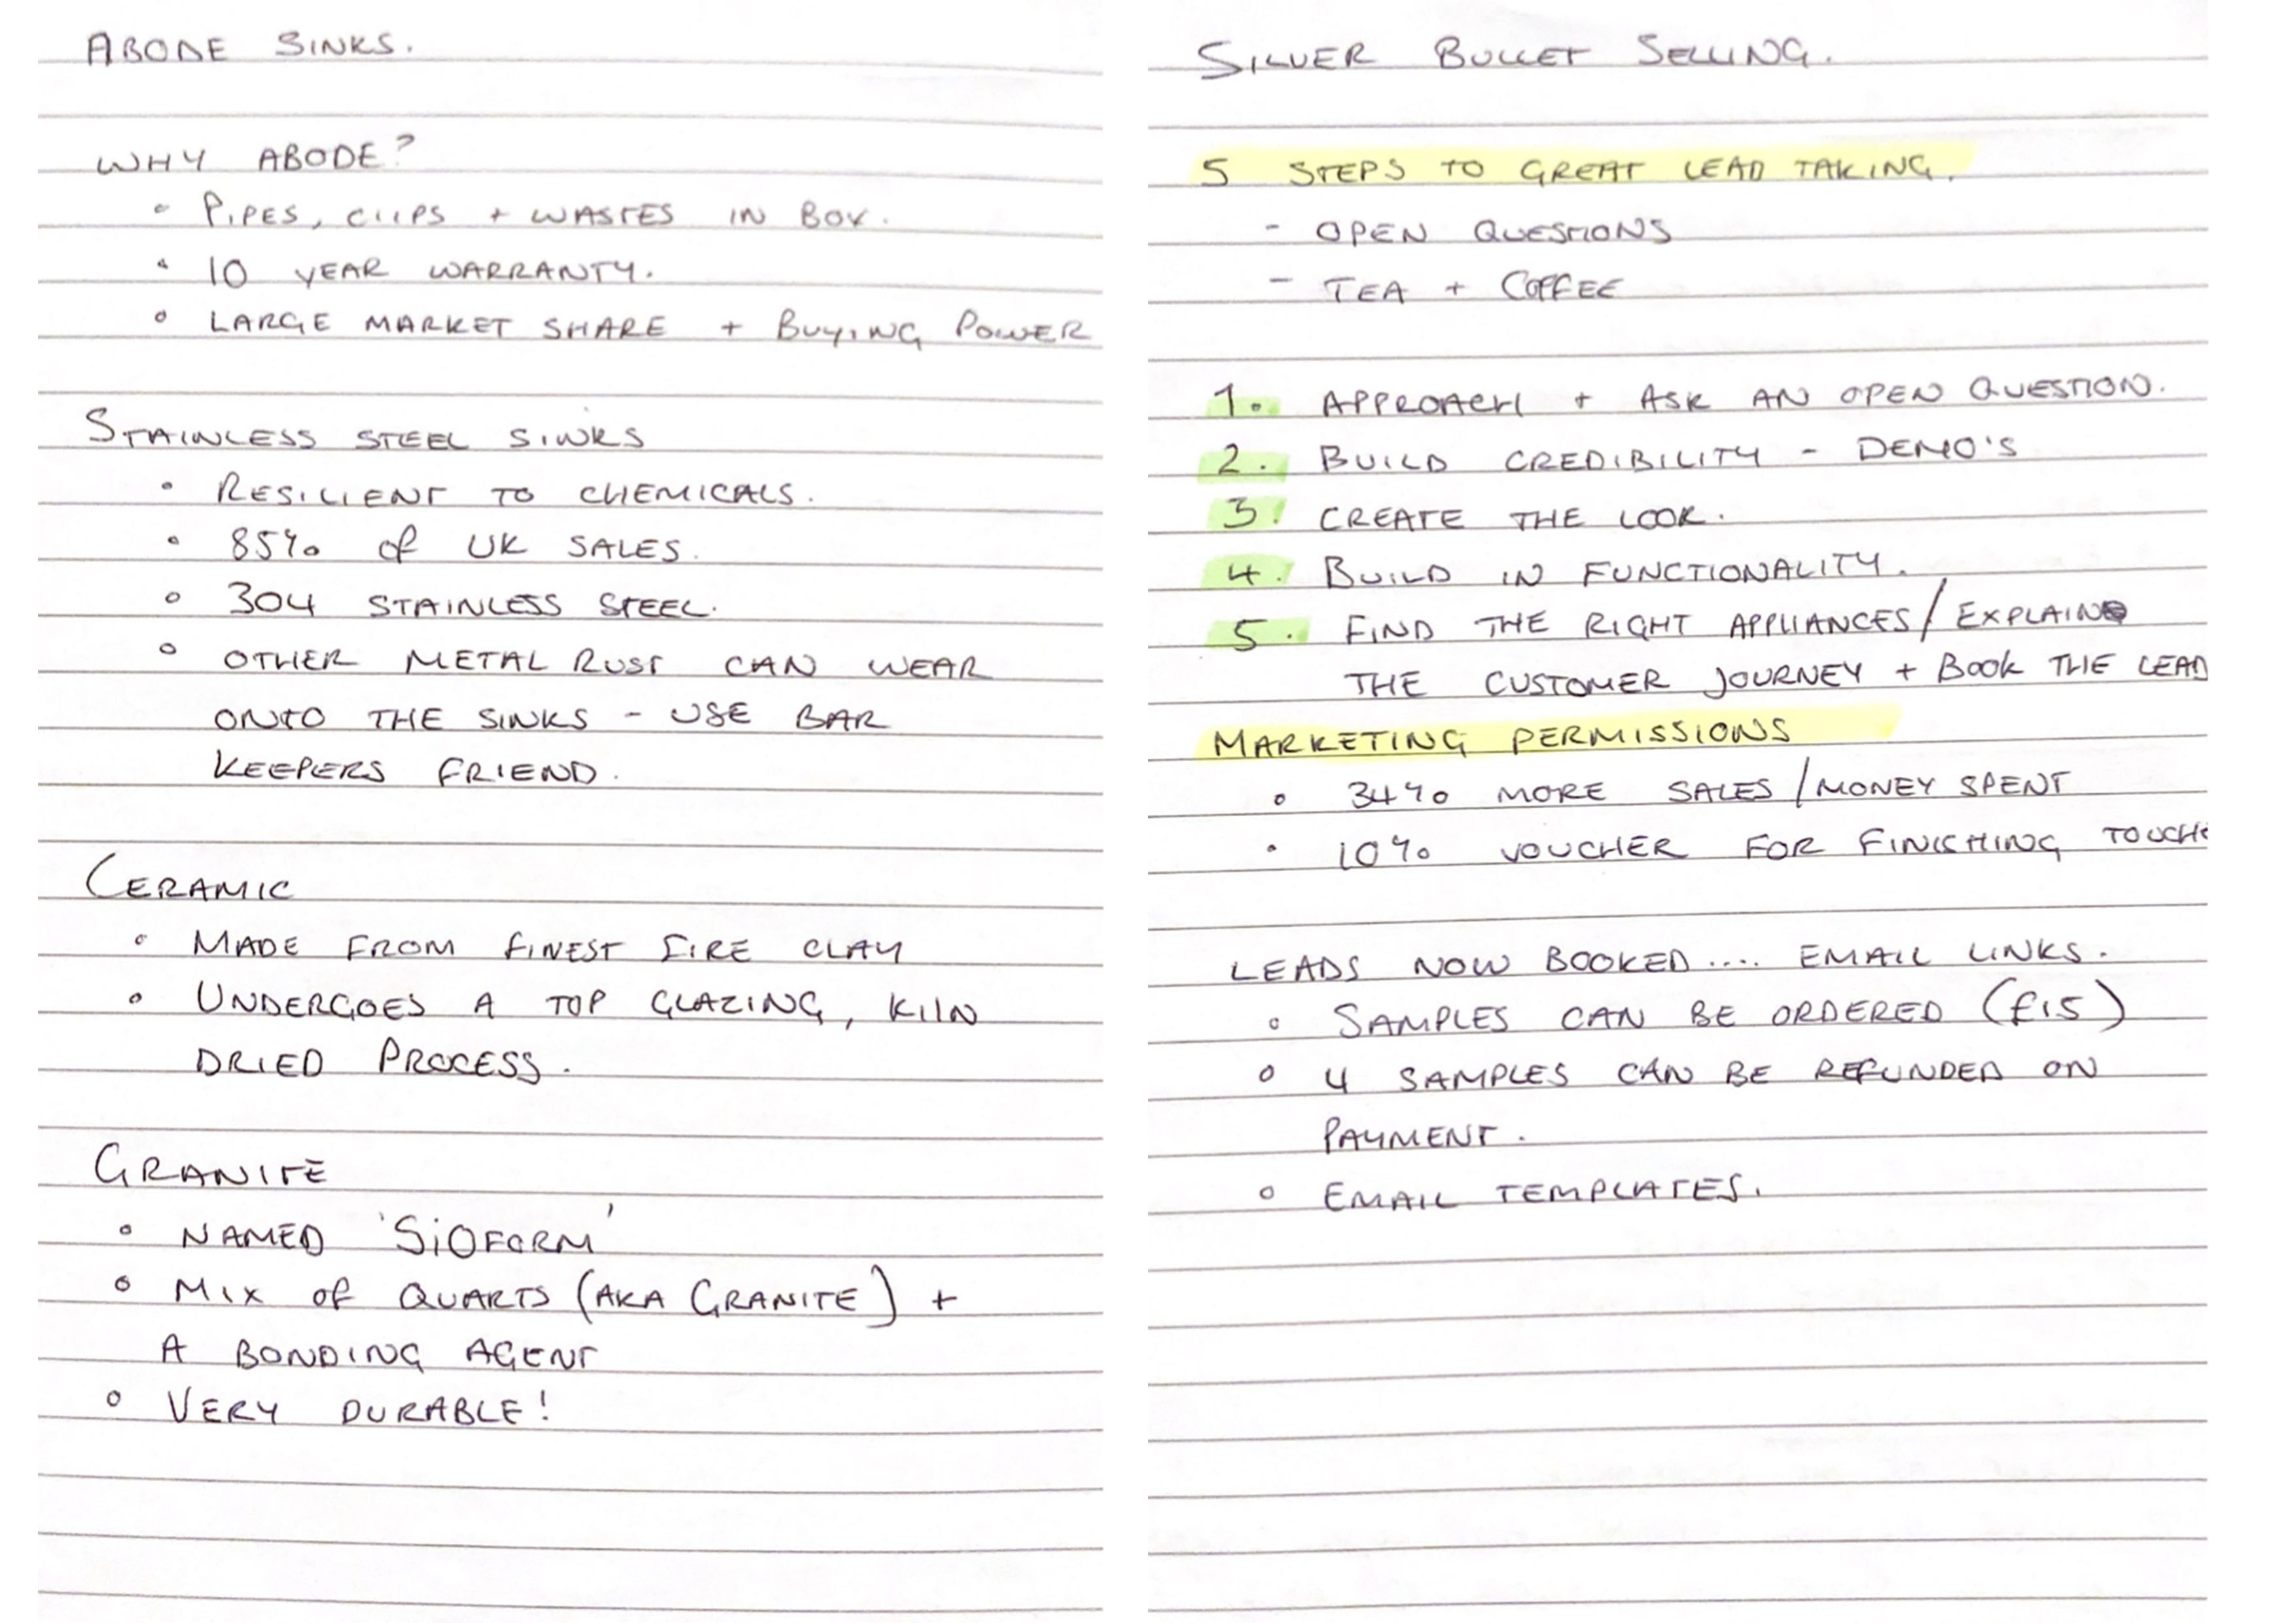
The role of the DC is to provide specifications of our products and installation service ready to inform customer either in-store or on HV’s. Wickes provides an extensive training program which spans 8 weeks and includes numerous virtual training sessions that are held through google meets. For example, Electrolux, Gower, Merlyn, Barclays, Bristan, Abode and many more companies come into wickes or google meet sessions to train us on their products or service. Their role is to provide all the information regarding their products, technologies, warranties and contact details in case a customer experiences issues with their product/unit. In the carousel below, you can see the notes I have made in each session to keep as a handy reminder or ‘cheat’ book if a customer has a query and I need to find the answer relatively quickly.
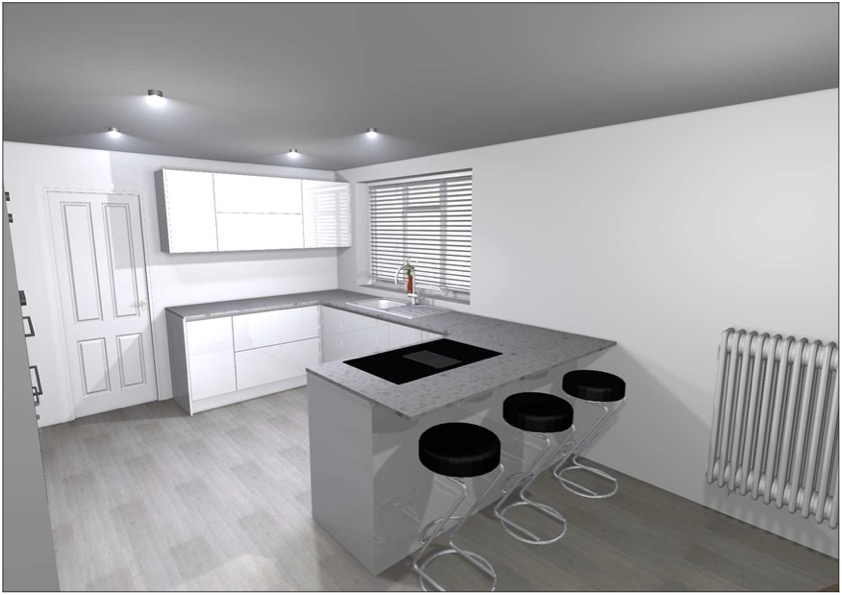
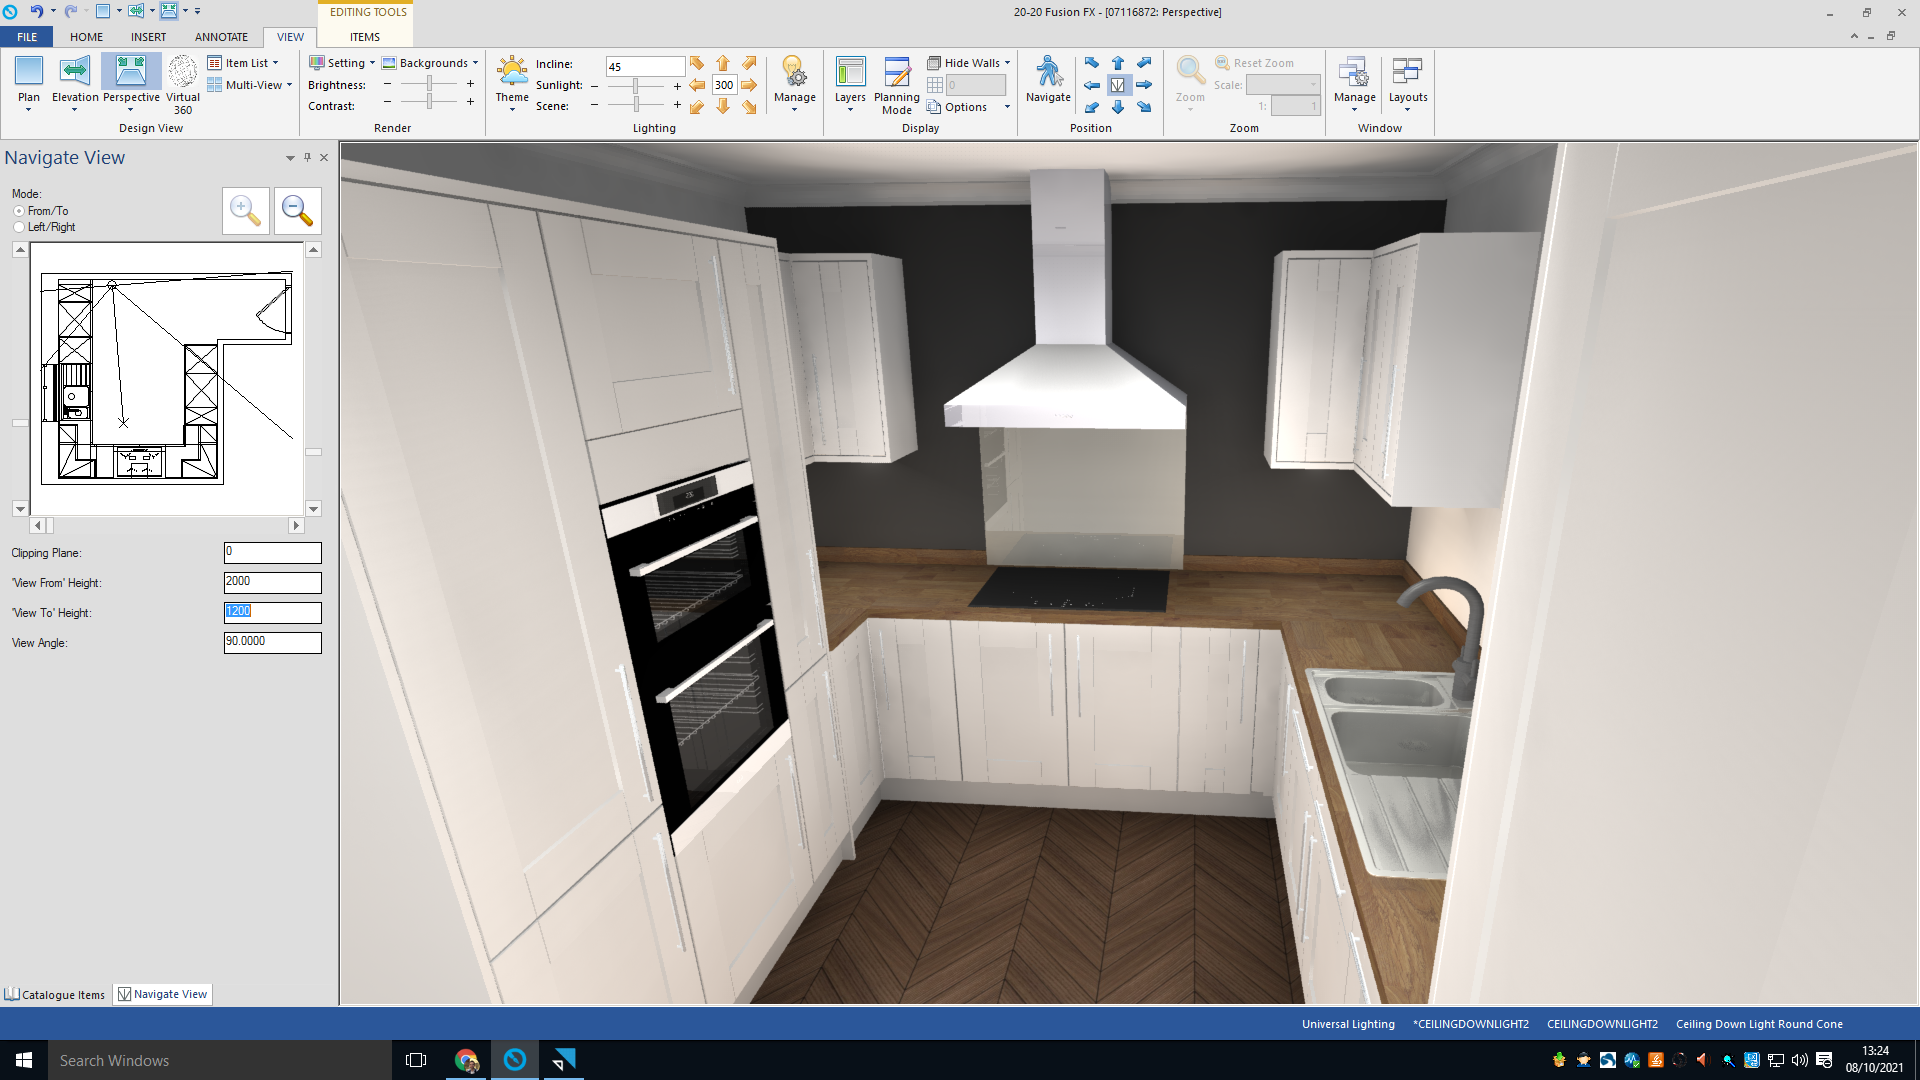
In addition to the virtual training sessions, each new DC was assigned a mentor to contact and arrange a face-to-face visit to help us develop our CAD or customer service skills. My mentor was based in Truro, Cornwall and visited Winchester to perform my training review. He supervised one of the home visits I conducted that day and provided extremely useful feedback to improve how I deliver and control the visits. A key piece of feedback I received was to reword my questions to have greater control of the conversation. For example, instead of saying ‘what colours are you interested in?’, my mentor advised me to ask ‘have you had a chance to look around our displays in store and have you got any styles you are interested in?’. This small difference allows me to control the visit more, but also attain more information from asking one simple question. Once I had completed the HV, my mentor assisted with a bathroom design once back in the store and showed me several techniques to improve the lighting and rendering speeds of the design as illustrated below. Due to my experience in CAD, he noticed I was very proficient in using the software and learned the fundamental and complex techniques he was showing me extremely quickly and efficiently. The techniques learned during this visit, I was able to show to my colleague who was greatly appreciative of taking the time to show her this tool which goes to show how well we work as a team, we all help each other whenever needed.
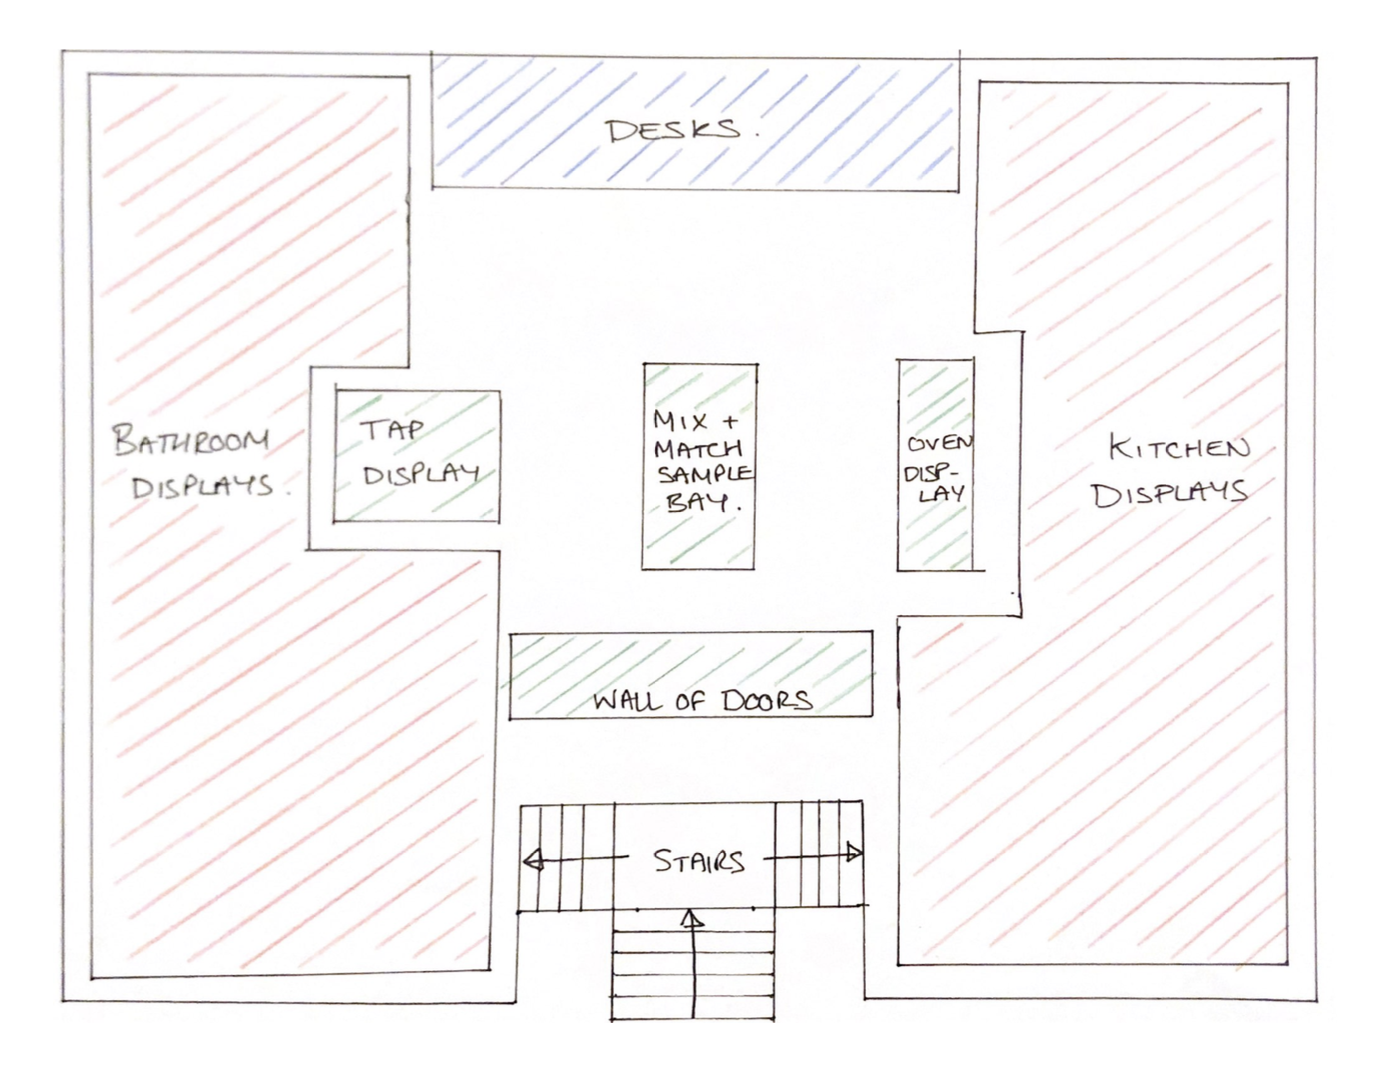
In our training we were introduced to way the showroom layout is intended to guide the customer through the design process and start making decisions as they move onto each area/display. I have shown below a brief sketch showing the general layout of the showroom. As you can see, as the customer comes up the stairs they are directed to either the bathroom or kitchen displays depending on which project they intend on having done. As the walk around the staircase, they are then shown the ‘wall of doors’ which is a term we use to describe the display with all the kitchen fascia ranges we offer and the other side shows the handles, worktops and tiles to help choose the style you would like. As you start looking around this display, you arrive at the next station which is a bay intended for customers and the team to utilise and mix and match handles to create a sample of the customers desired style. If in this bay the customer is struggling to make a few decisions, we often take them around the showroom to get some more inspiration and help them finalise some choices. Alternatively, if the customer is quick to make the decisions, we may also show certain displays which are similar to their choices but also some different displays with slight changes to show what their kitchen could look like if they change the handles to knobs etc. the showroom is our tool to attaining 100% customer satisfaction and gather the leads for the DC’s to create the designs based on their choices in-store. Recently, we had a coffee machine delivered which is like the cherry on the icing for the showroom and allows customers to indulge in a nice warm hot chocolate or latte as we show them around the showroom...that’s our biggest secret...lots of tea’s and coffee’s!
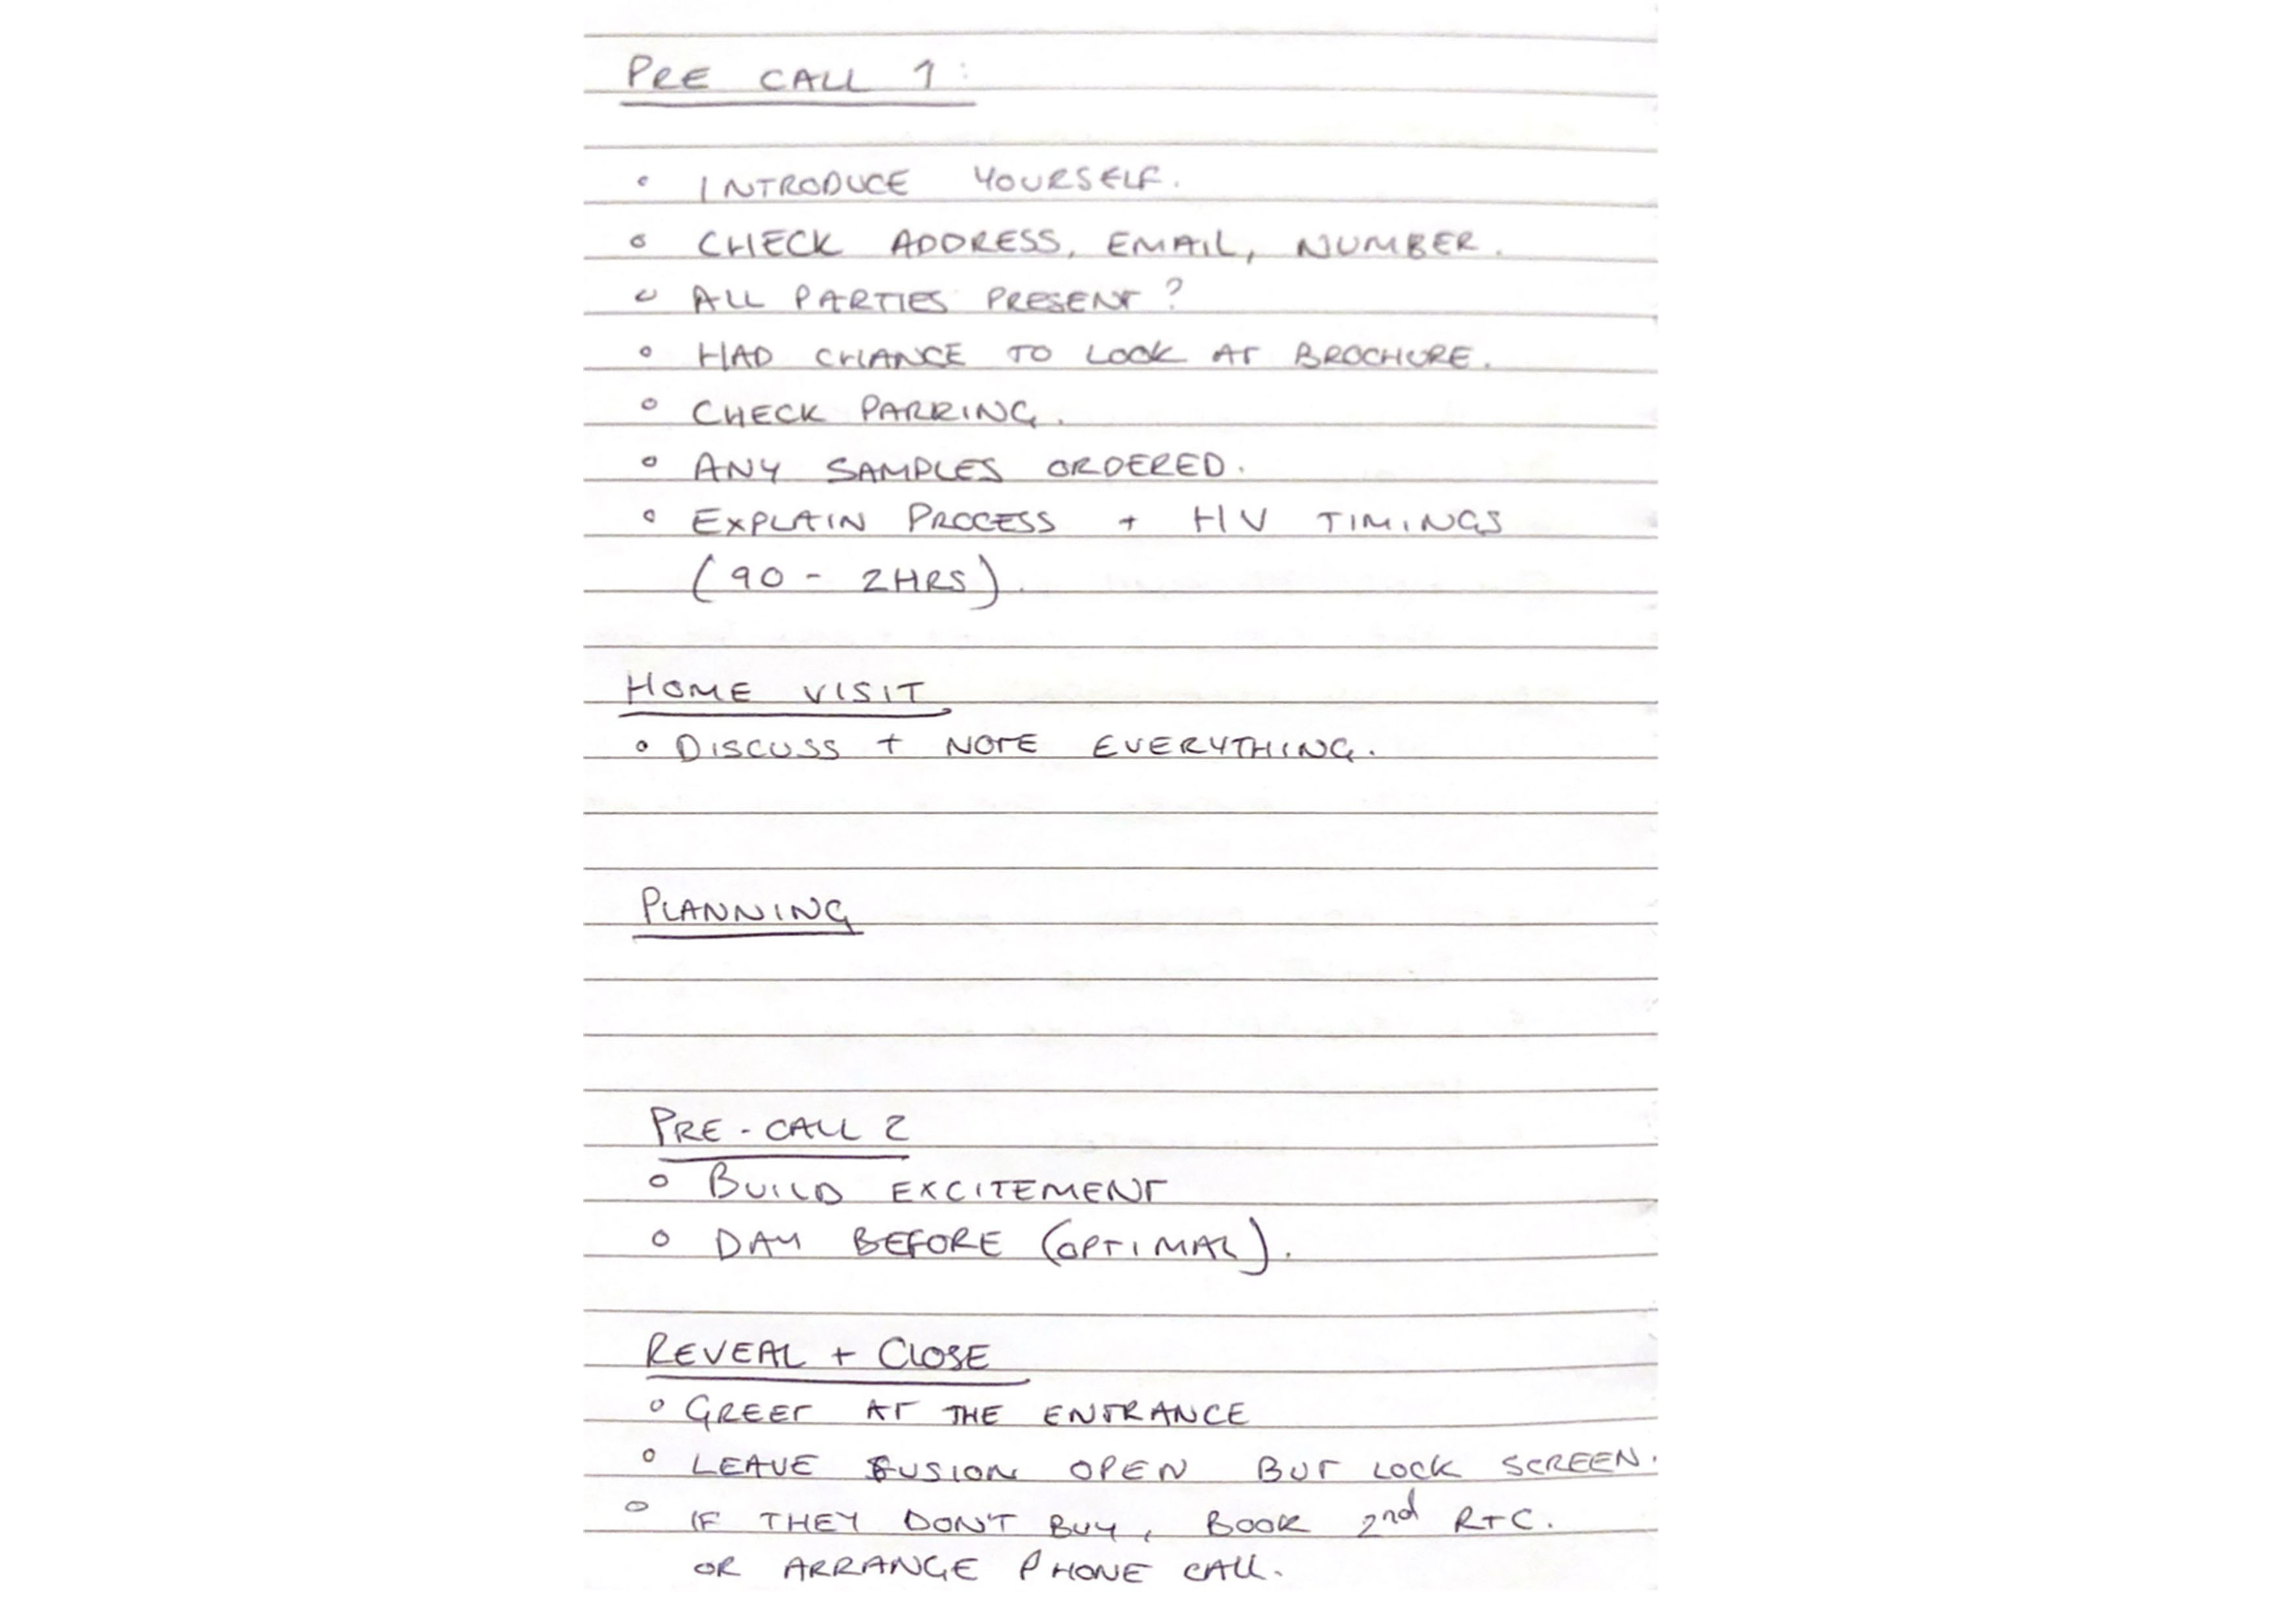
The customer journey is a crucial step in understanding my role as a DC and the process in which we take the leads right through to completing the sale. The journey is as follows;
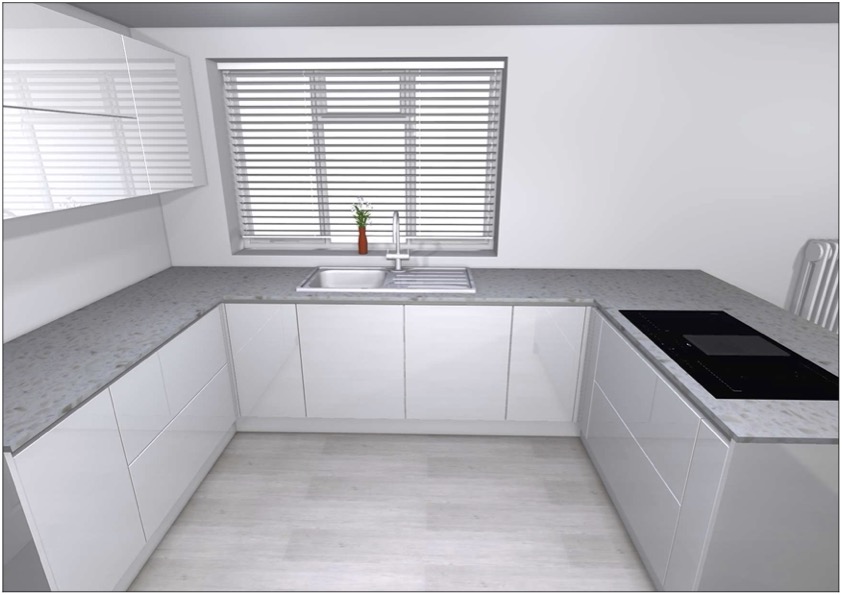
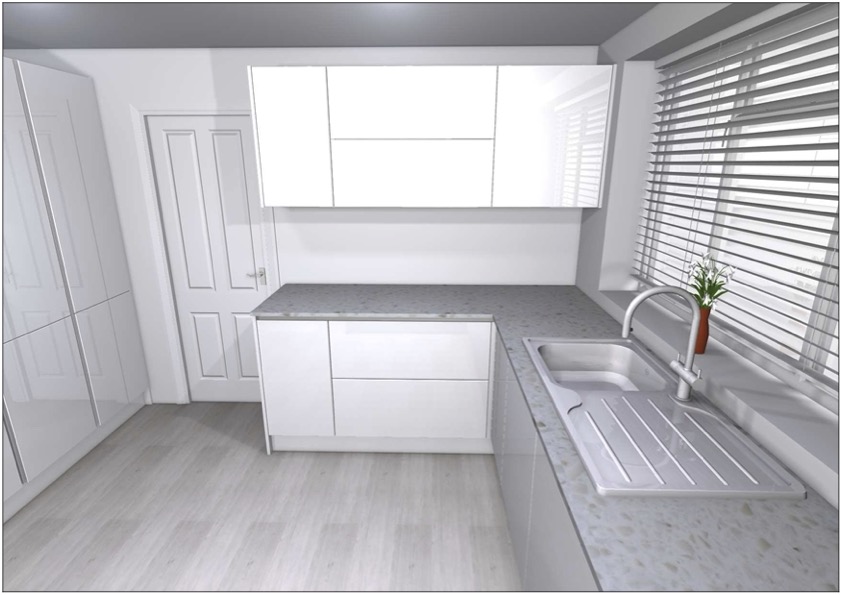
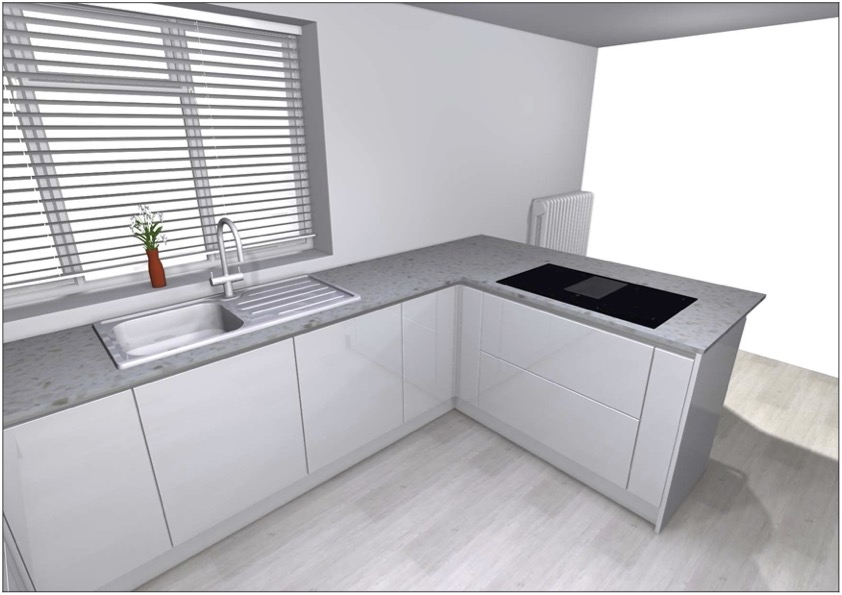
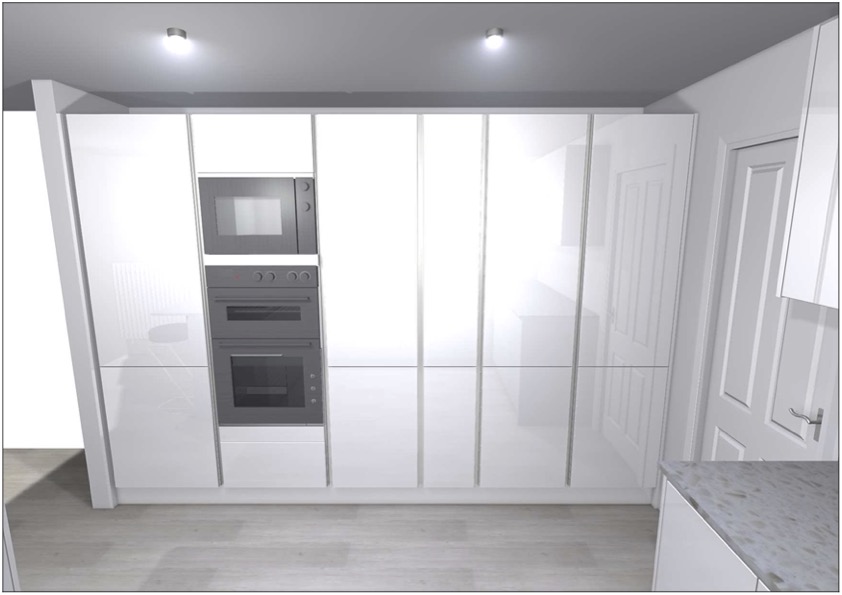
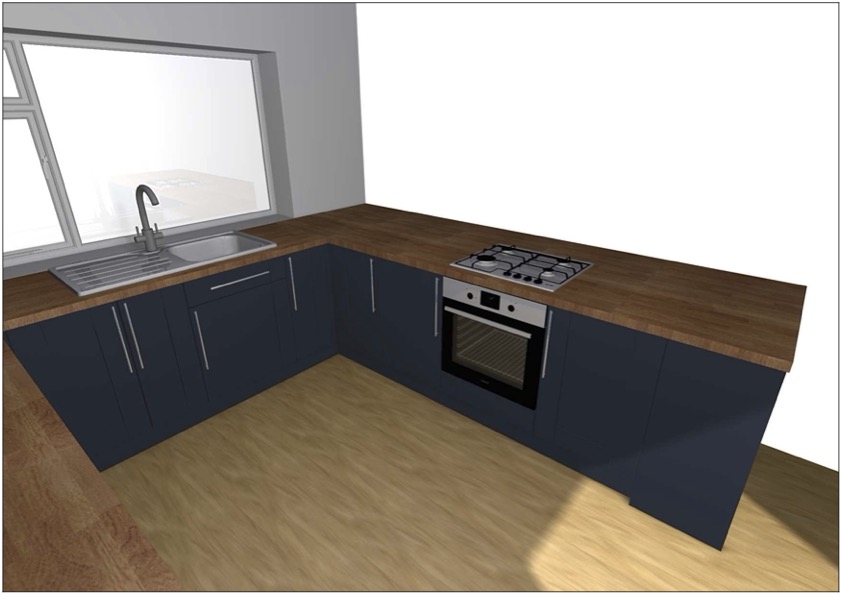
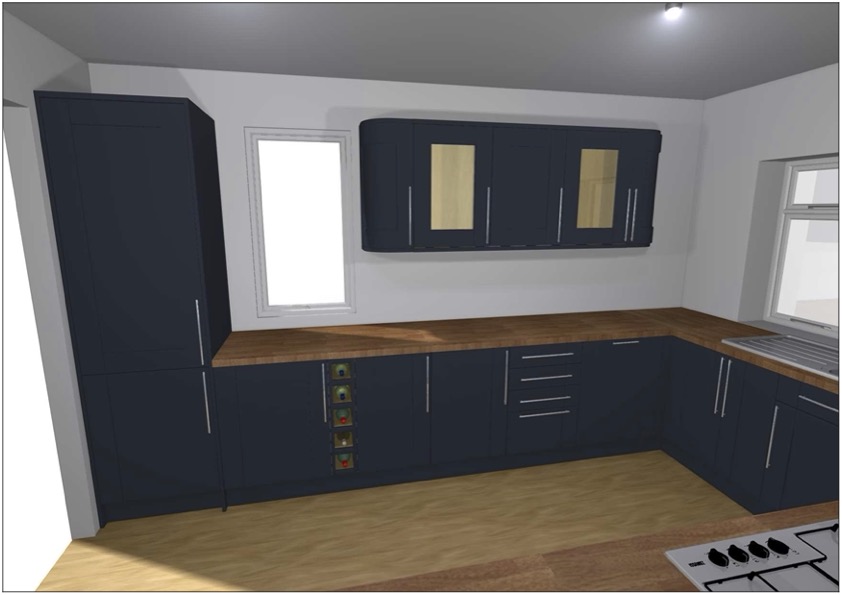
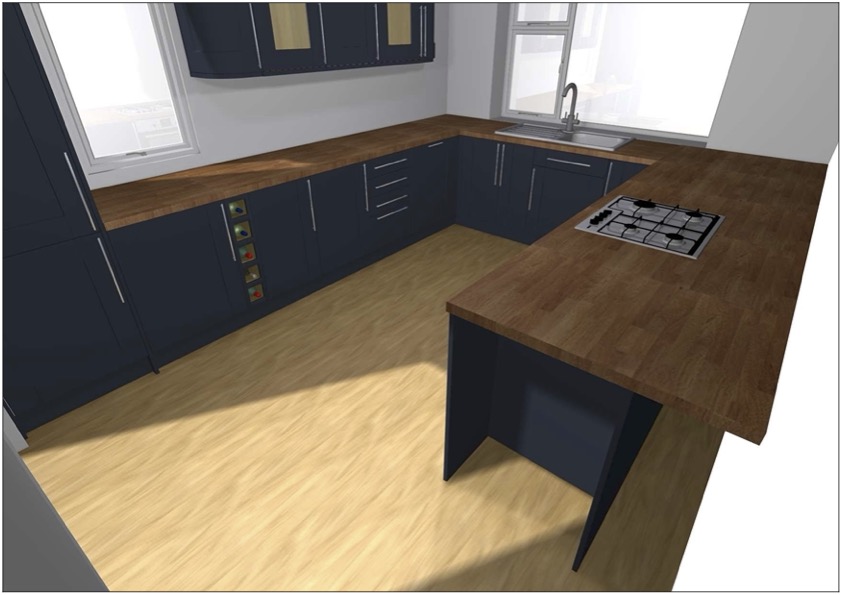
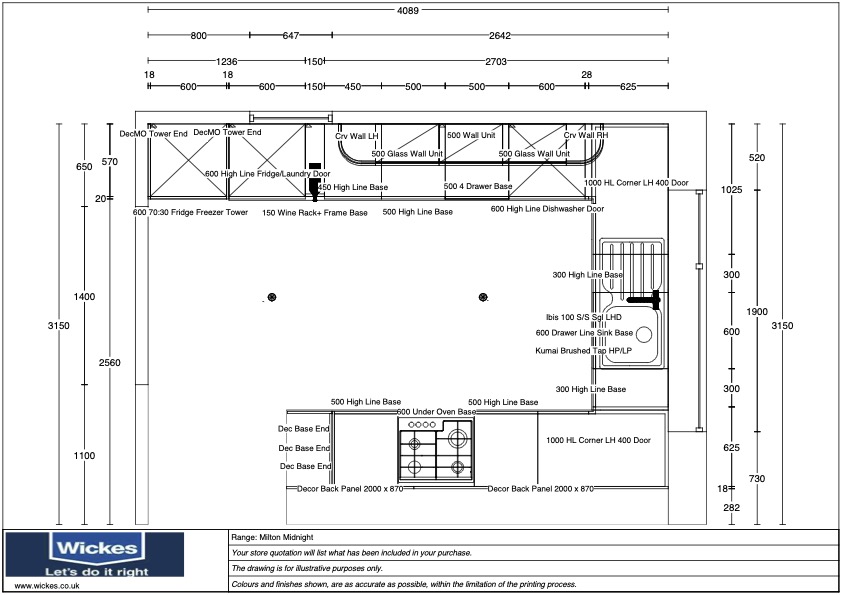
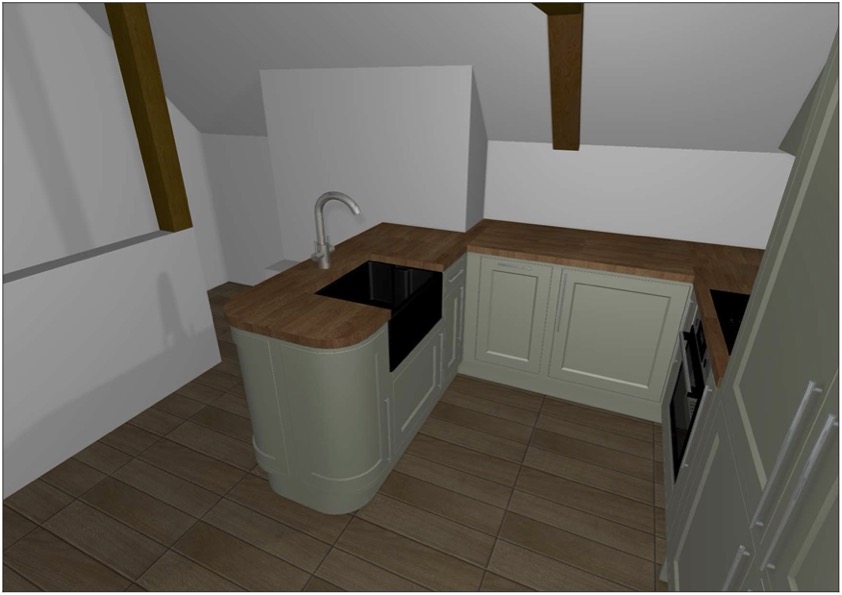
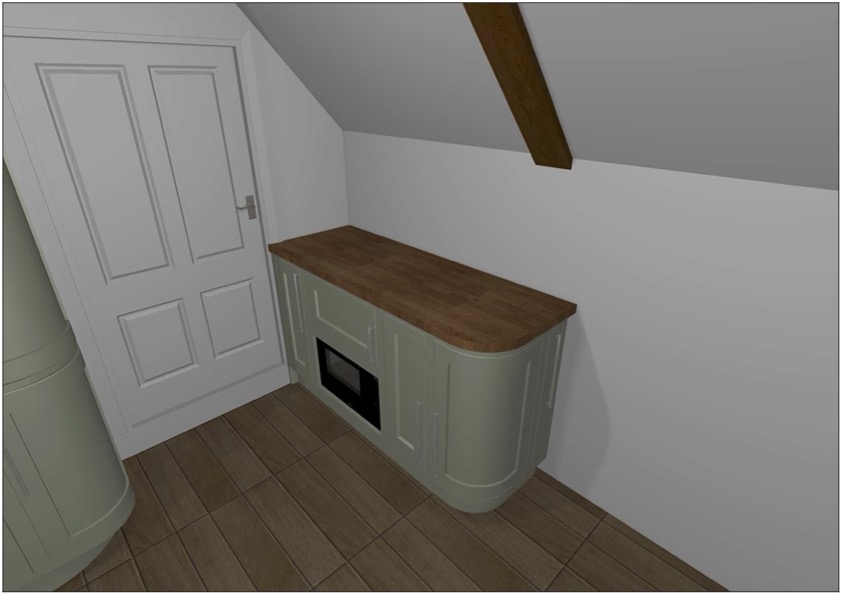
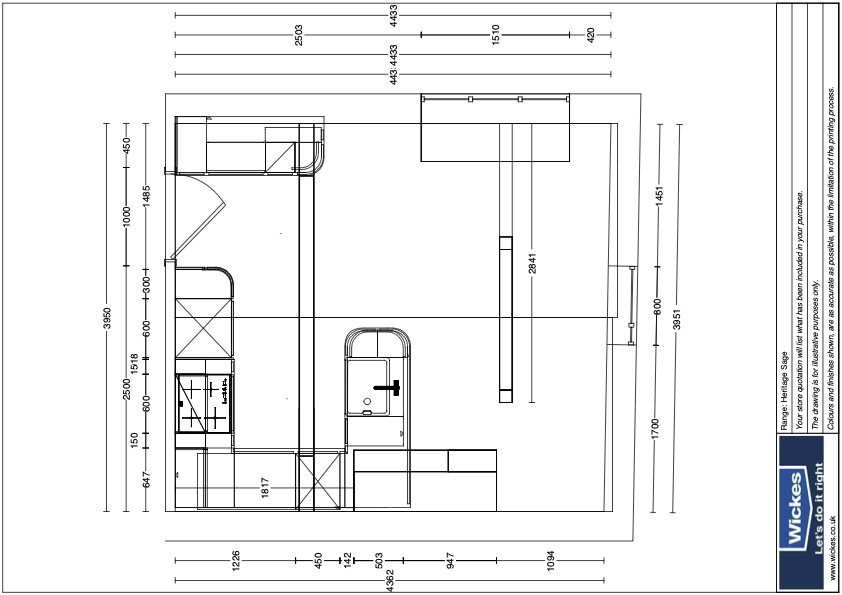
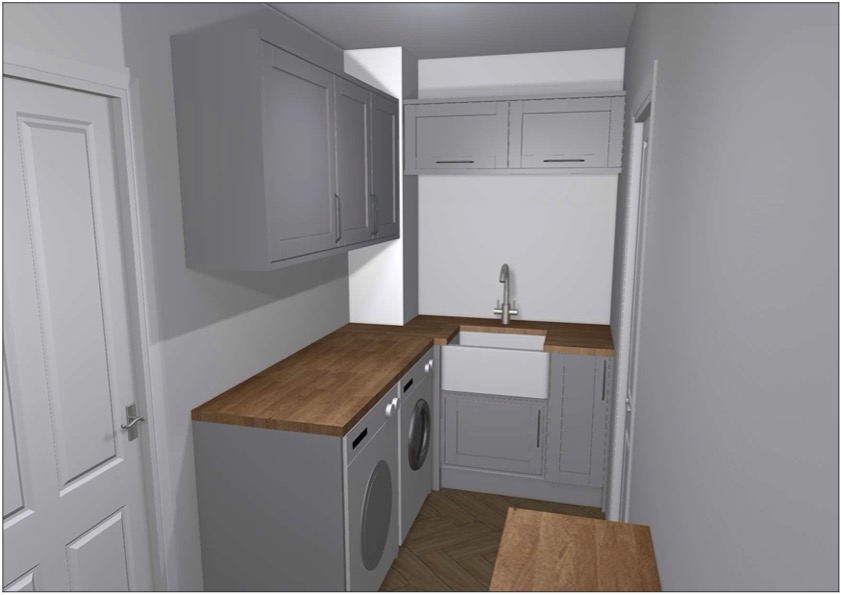
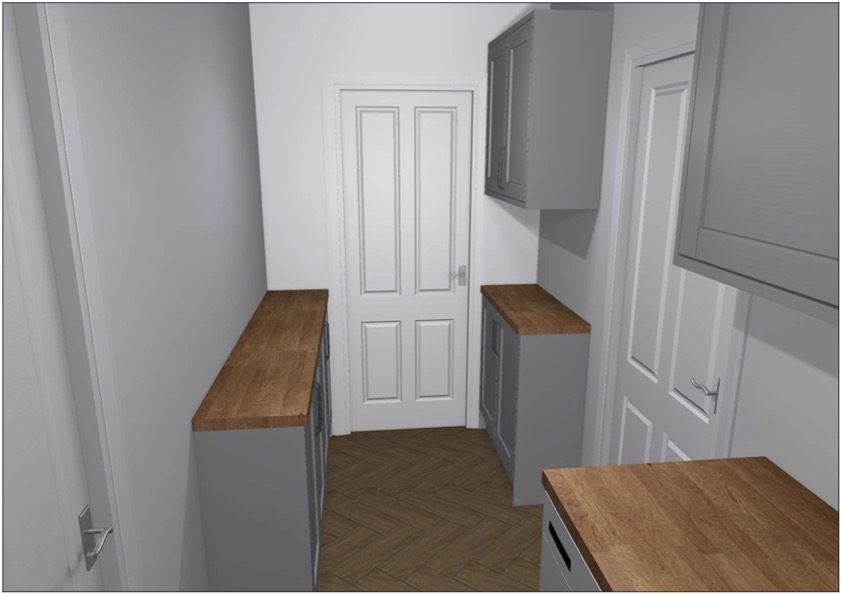
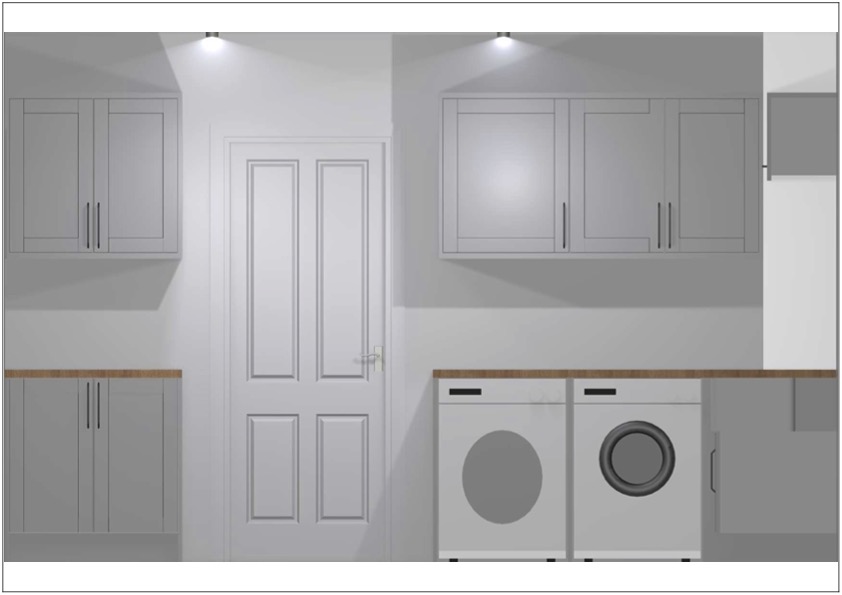
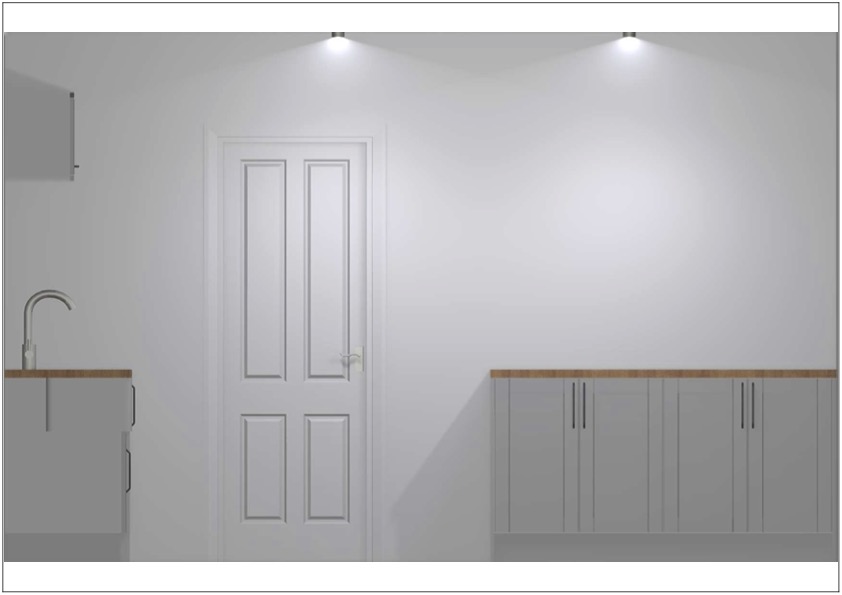
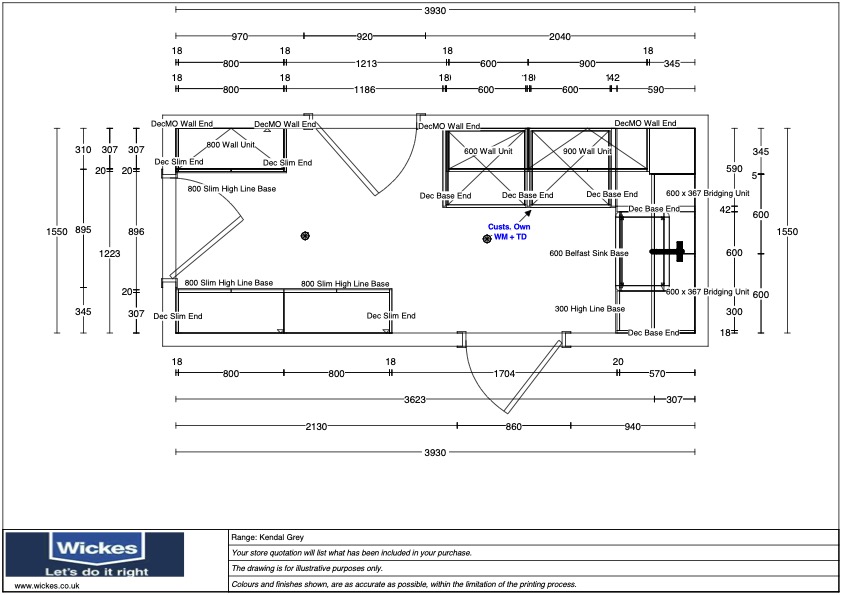
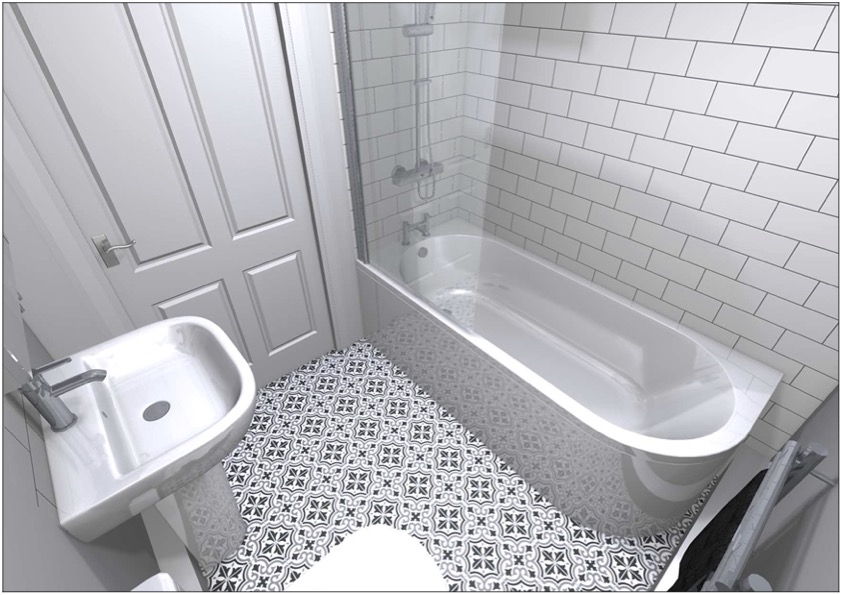
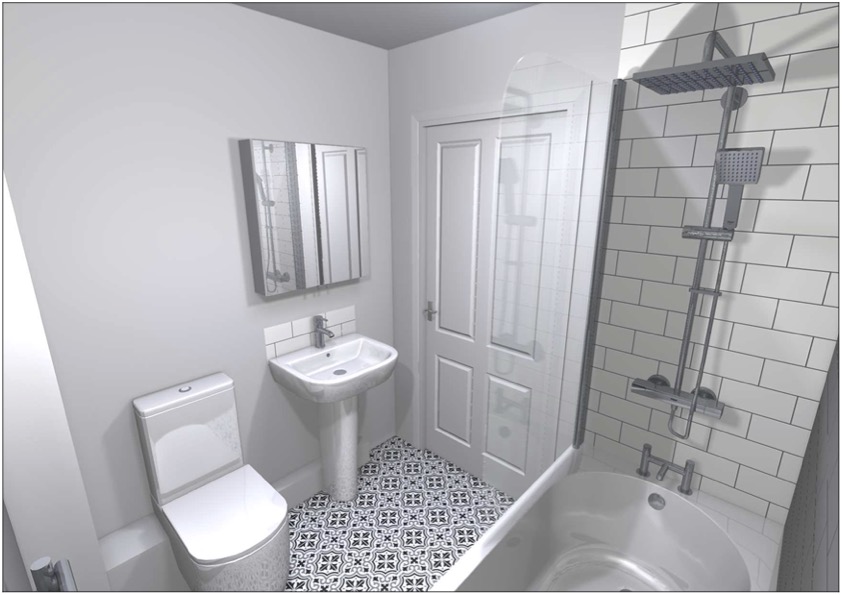
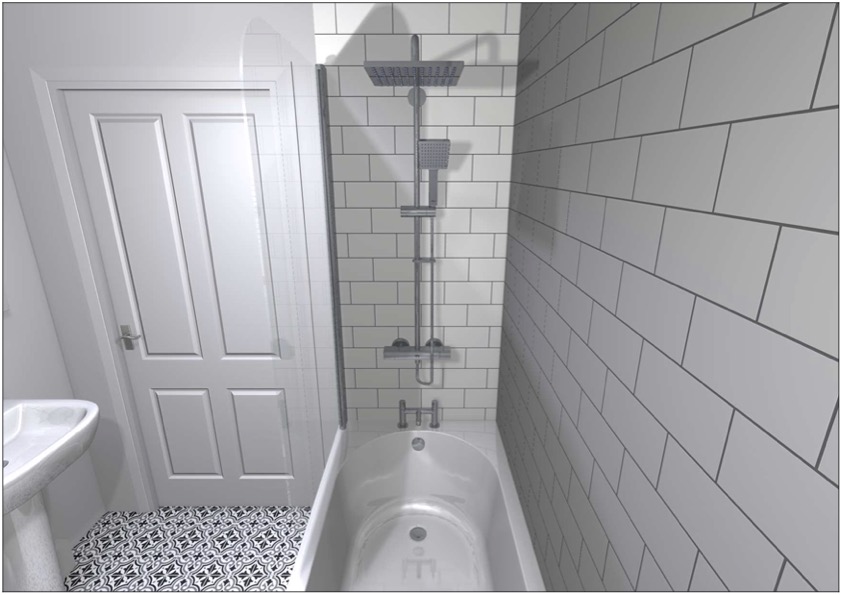
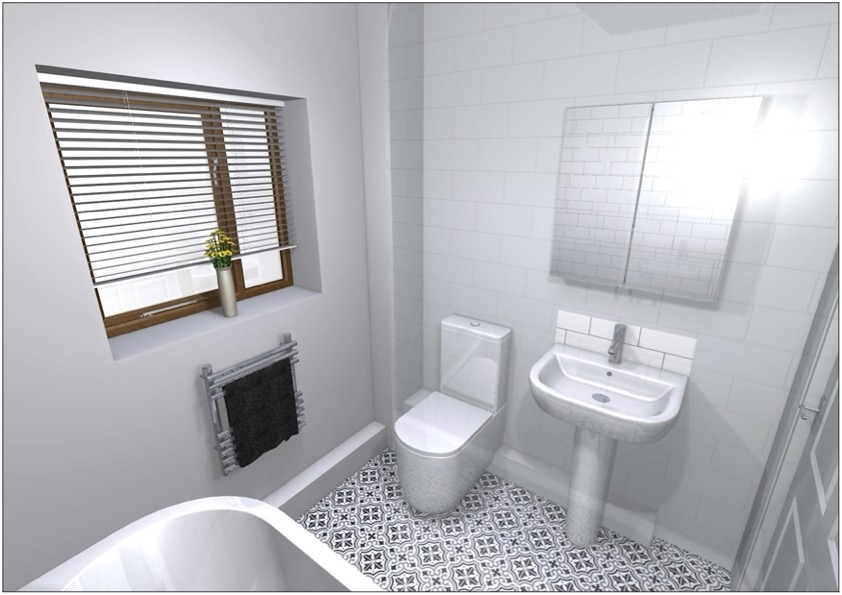
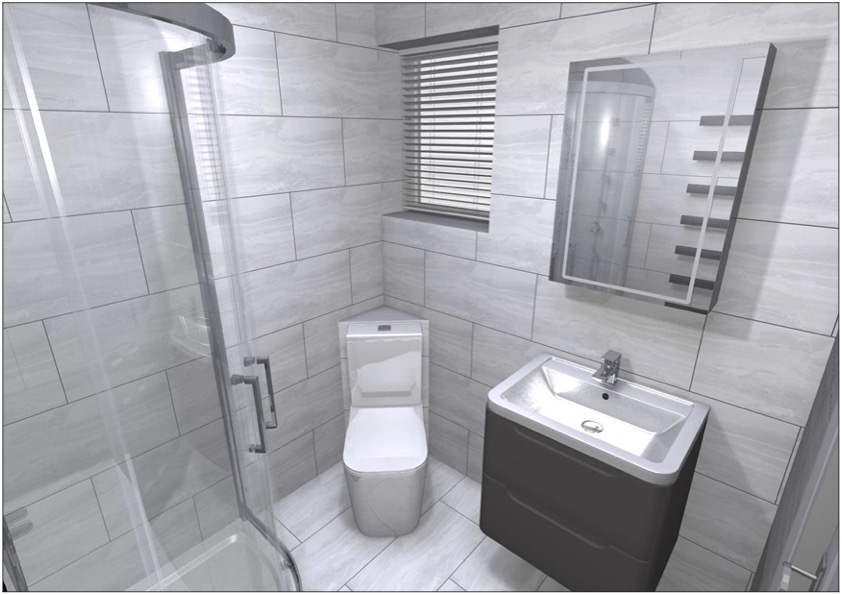
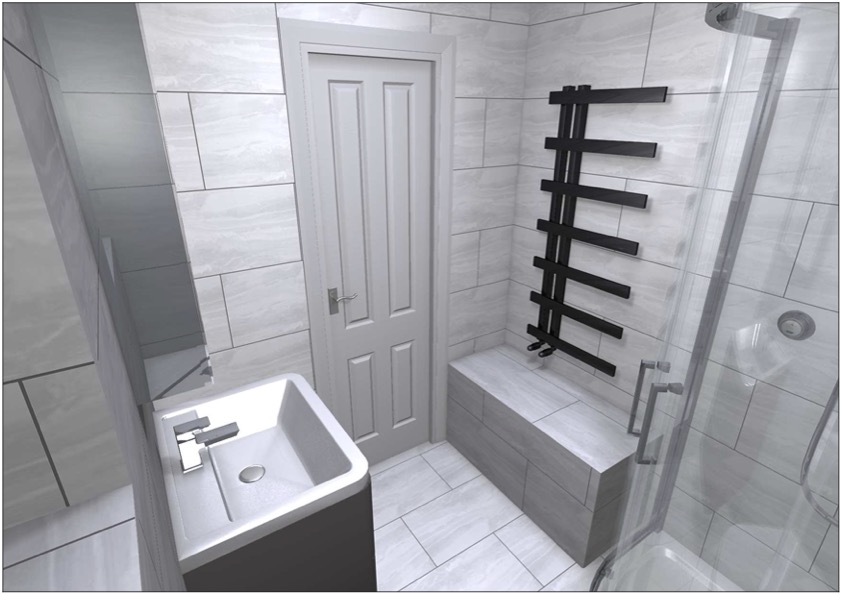
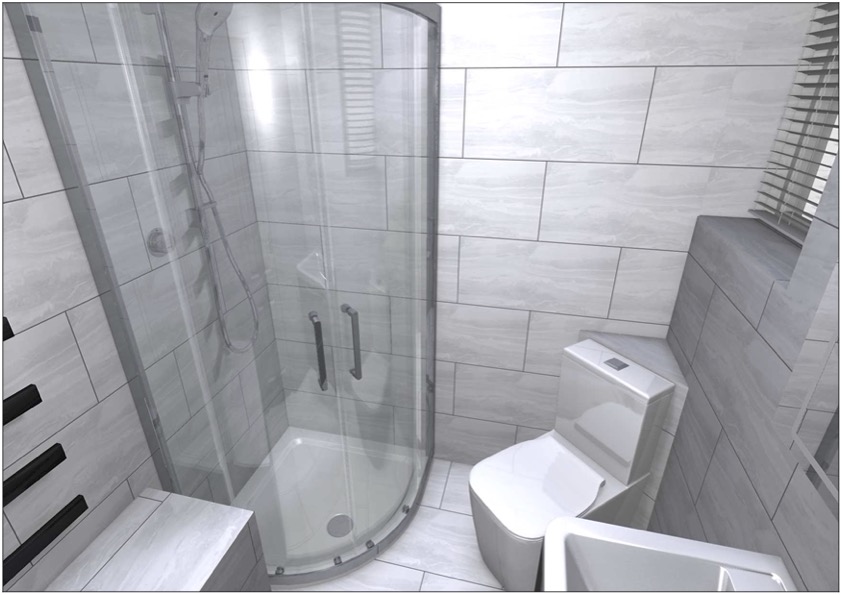
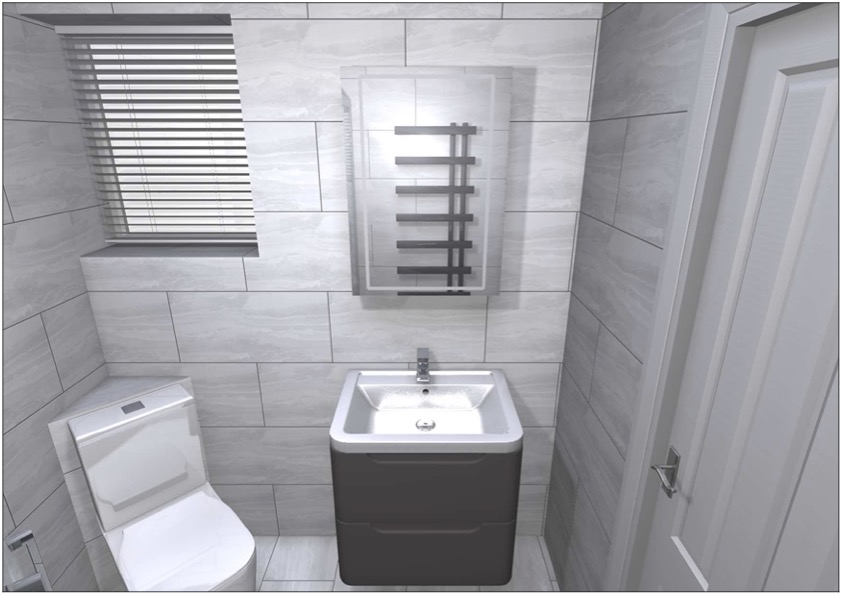
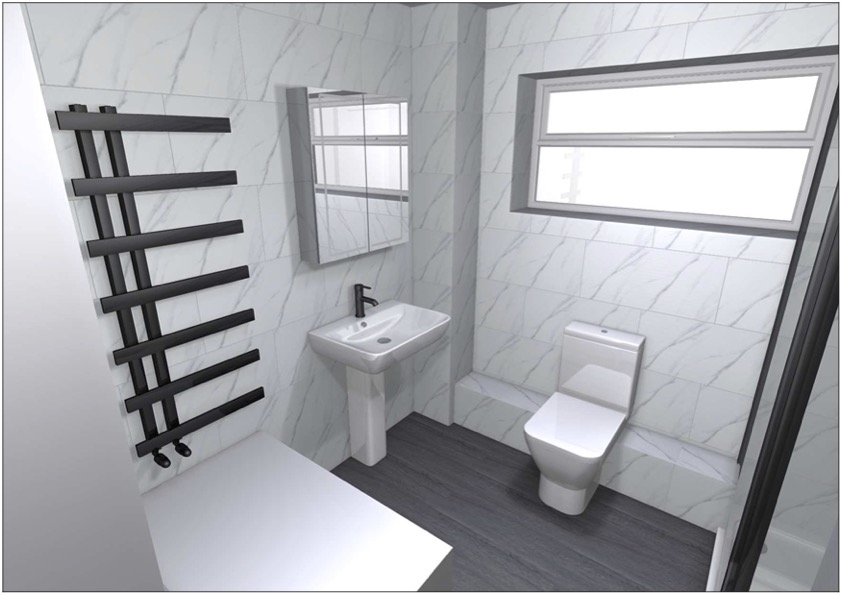
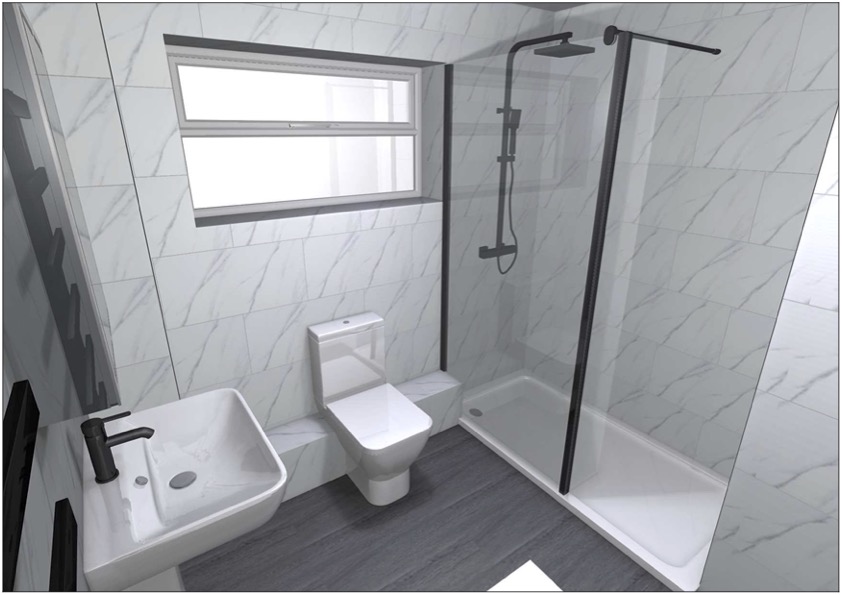
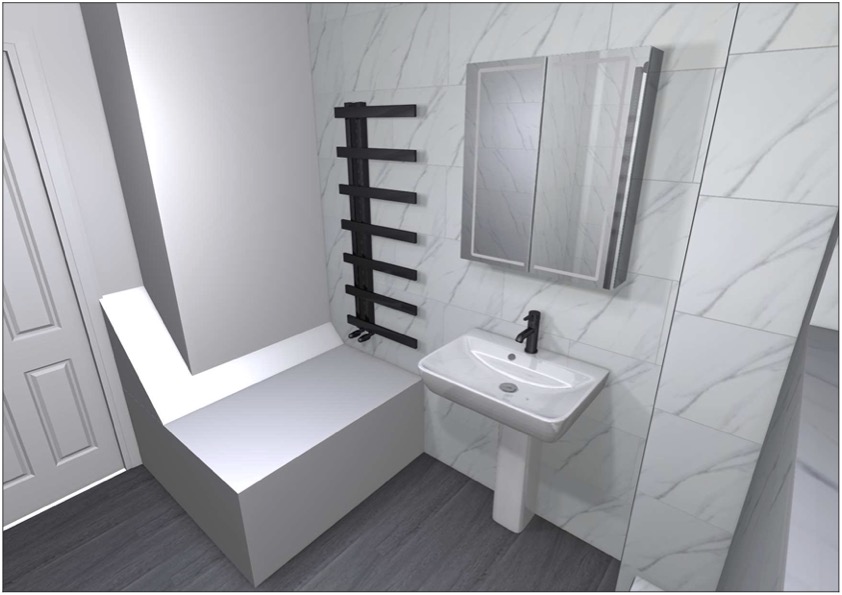
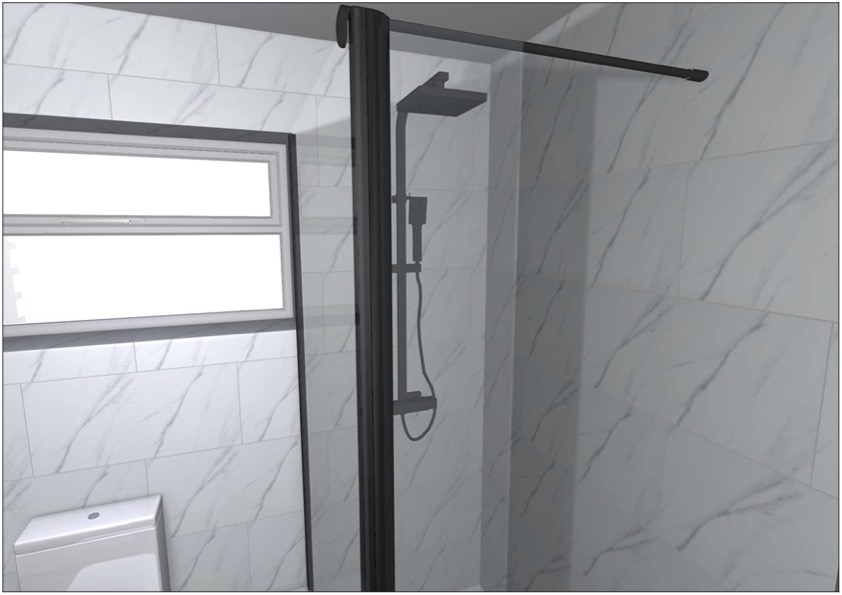
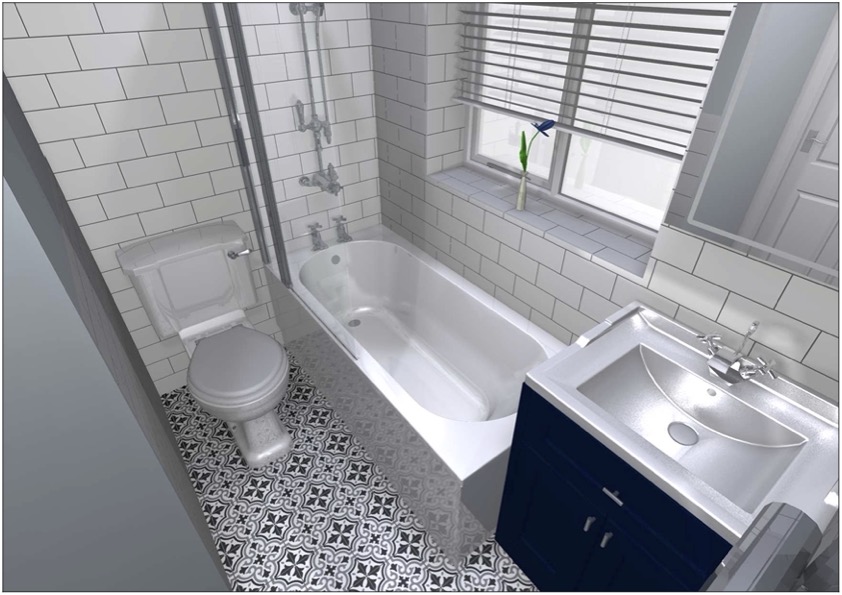
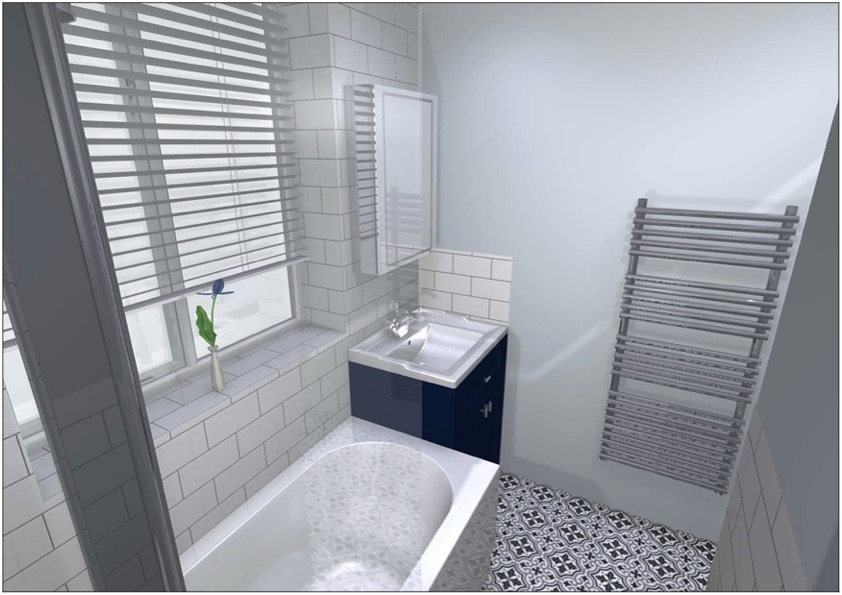
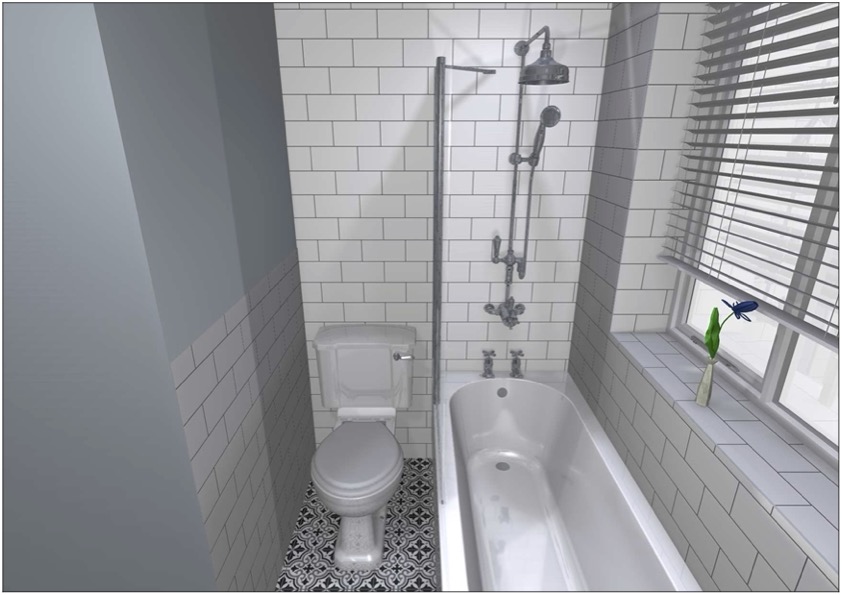
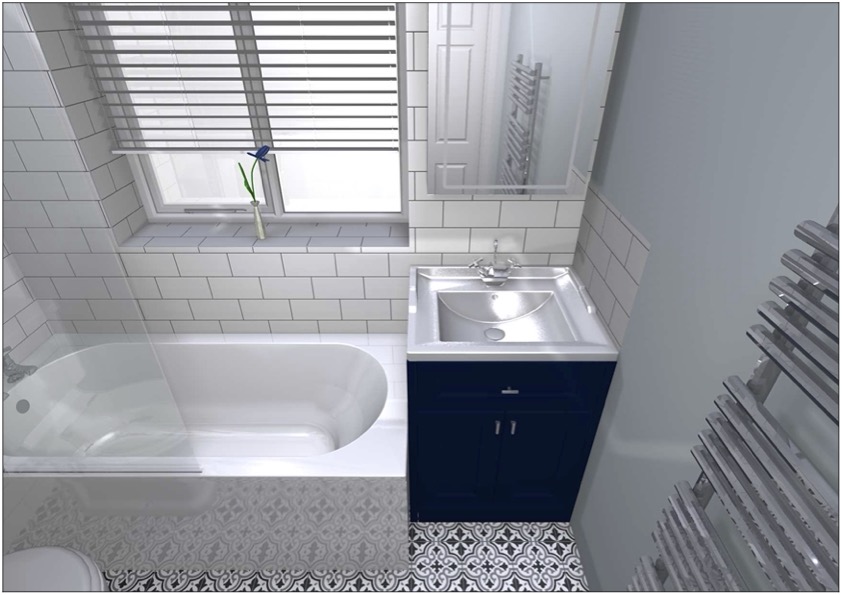
Below are a few slideshows on some recently completed projects. Due to GDPR, I am unable to show certain parts of the home visit pad which contains personal information and information on the project at hand. Over the course of my placement, I have been able to finalise on numerous kitchen and bathroom design and have recently been signed off as a fully trained DC.
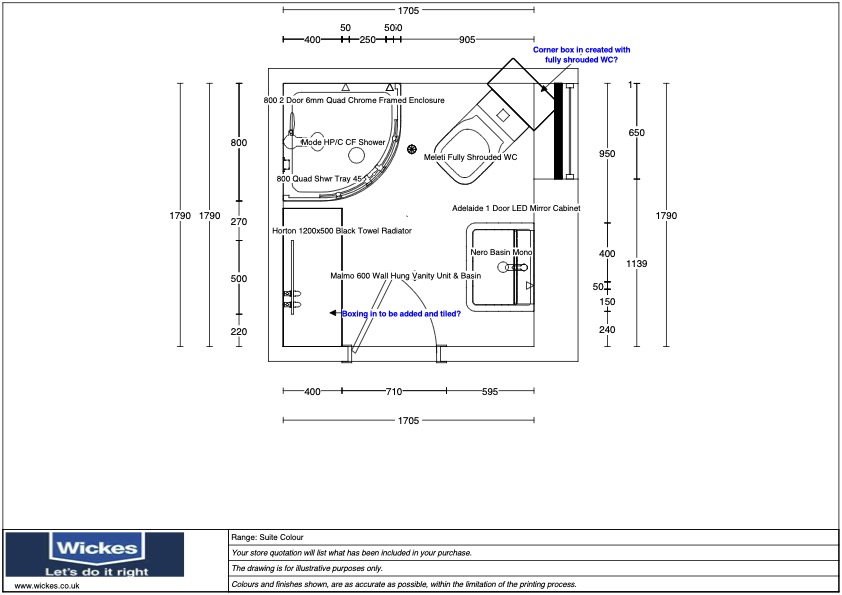
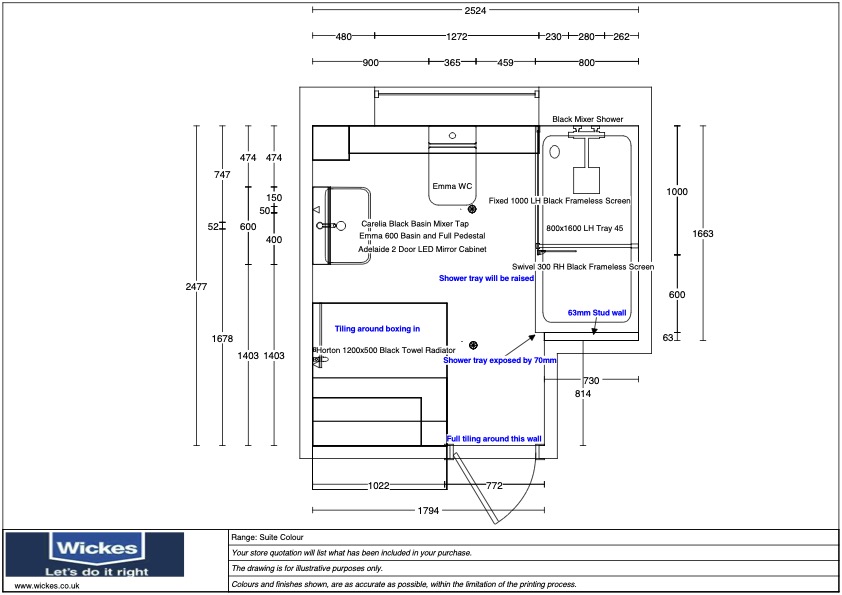
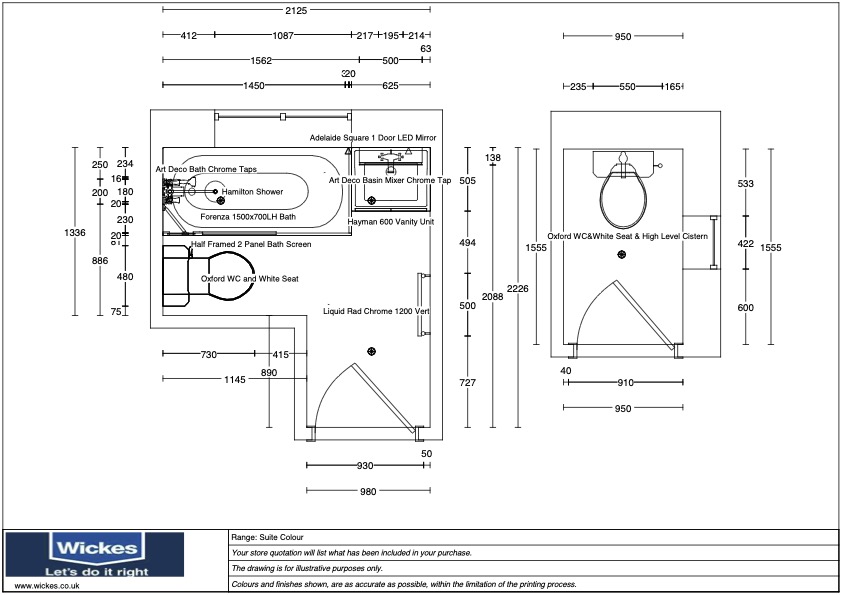
To begin with, we start of discussing any key points the customer would like to keep at the home visit and attain information on what style they would like and how they use the space. We then measure the space and draw the plan view on a home visit pad illustrating where all the opening and boxing ins are which may be a design restraint when we come to planning the space in-store. Once we have all the measurements, we take these back into store and start planning the project referring back to all the dimensions and notes made.
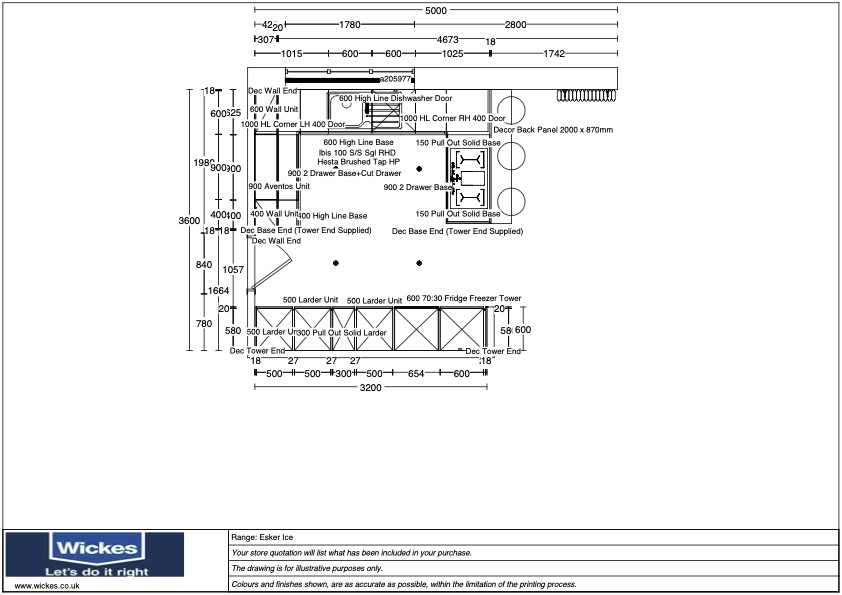
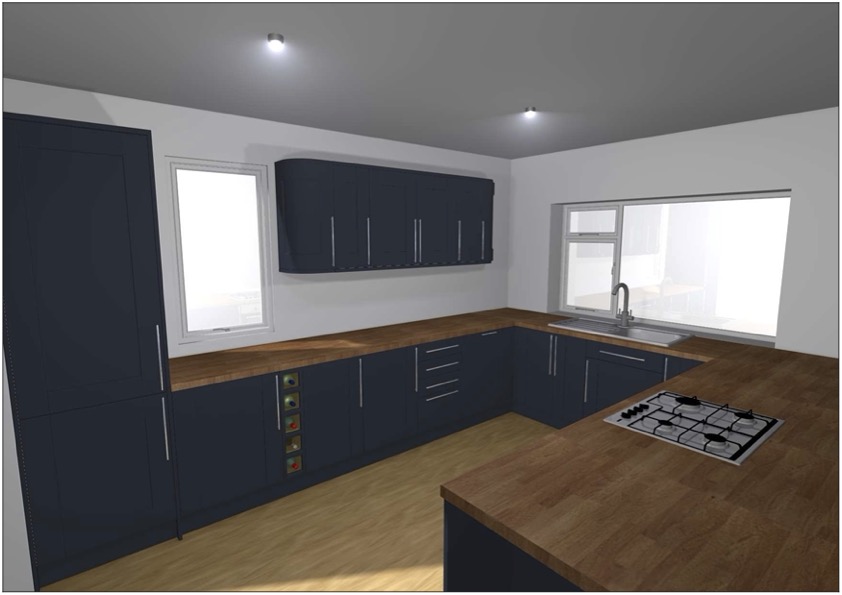
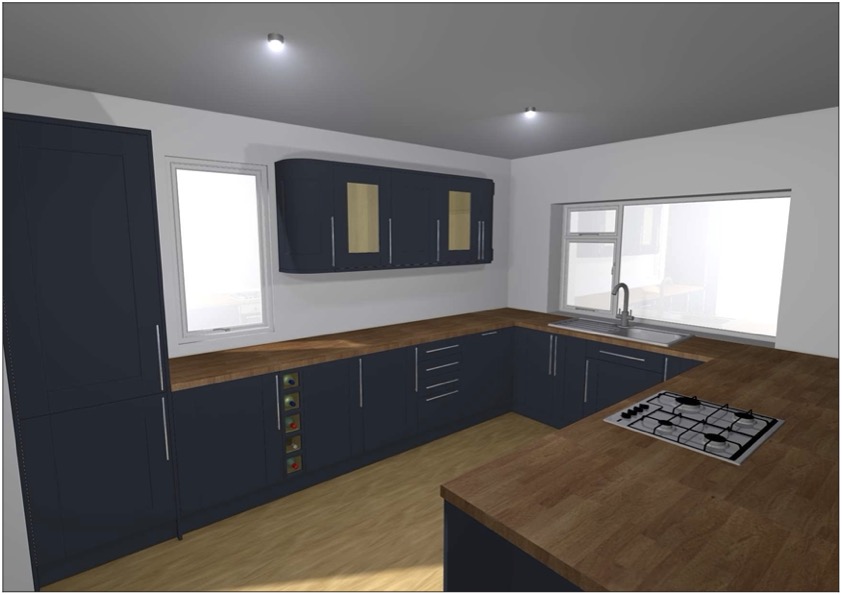
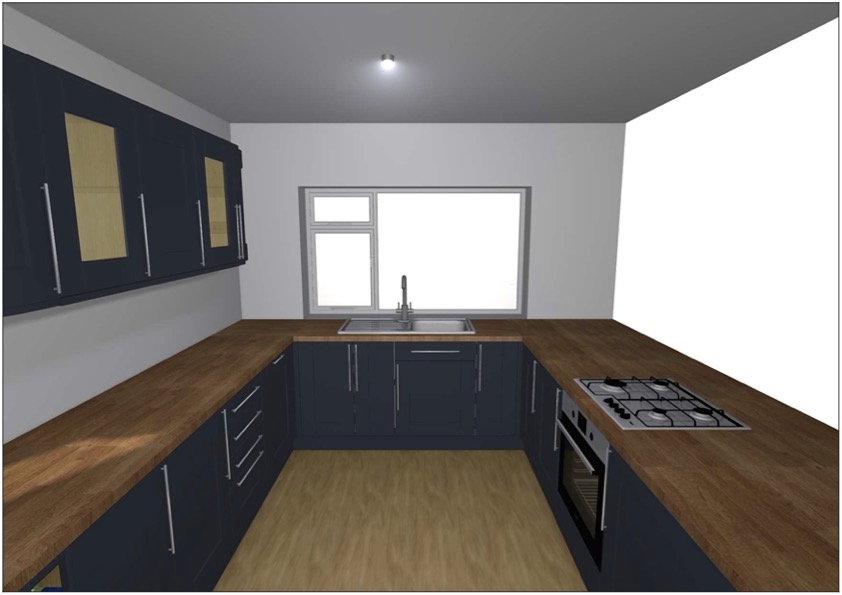
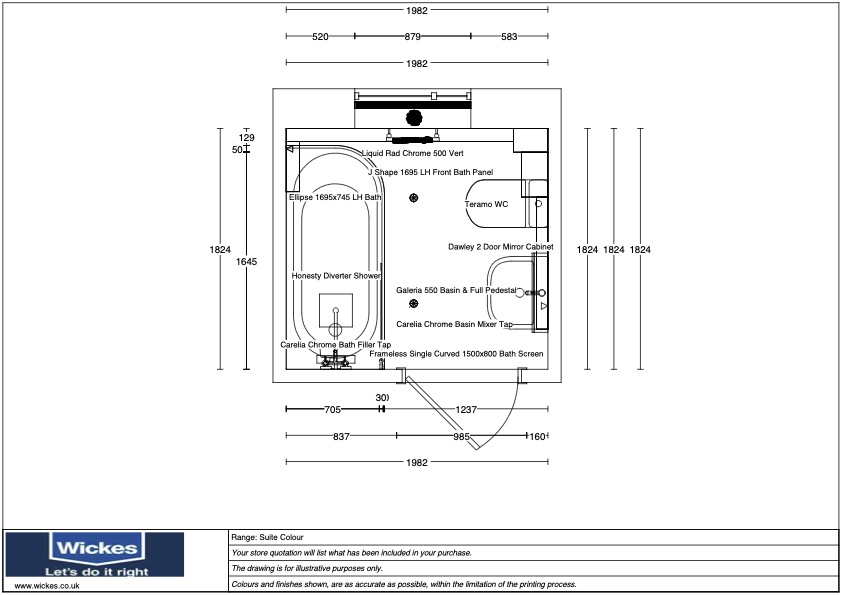
To begin the planning, I start by creating all the walls and placing the correct windows and doors in their positions which gives us the basic structure to build upon. Once I have created the room, I begin searching through the catalogue in the software for the appropriate units and appliances if it’s a kitchen or the appropriate enclosures and basins for the bathroom. Once I have the products in place, I add lighting and finishing touches such as flooring and tiling to finalise the designs ready for quoting the installation if required. I then save the designs and begin estimating the required works needed to install a kitchen or bathroom. An example of the tasks we need to quote for is the installation of small or large format tiles, constructing stud walls or boxing ins, or the removal of loose lay flooring and many more tasks which may be required to complete the installation. Now that I have the finalised designs with saved viewpoints ready to render in-store, and the estimated installation quotation created, I am ready to conduct the reveal and close appointment which is recommended to be within 9 days of taking the lead. If the customer would like to purchase the designs, we have created for them, we move onto the payment stage of the appointment. In order to complete the sale, Wickes require a full upfront payment or a commitment to a finance agreement through the Barclay finance application forms that we complete with the customer in-store. As previously mentioned, once this final step is completed, the project moves onto the installation team who get in contact within 48 hours of being allocated the project.
There have been numerous challenges since stepping up to becoming a DC. The main challenge is the shear amount of training that is required to learn the business and the products. As a full-time student, I found the first 6 weeks of training at Wickes incredibly full on and since I was part-time, I was required to catch up on any missed sessions in any spare time in-store or at home. Fortunately, I missed very few sessions and was able to catch-up with everything the same week. Another challenge as a DC is adapting to the queries and questions that customers have. I have worked over 4 years as a customer service assistant and have dealt with all forms of queries over my employment; however, customers in the showroom ask much more specific questions about products hence the extensive training provided. Adapting to these questions and approaching them in the right way took some getting used to and putting myself outside my comfort zone in order to learn from the questions.
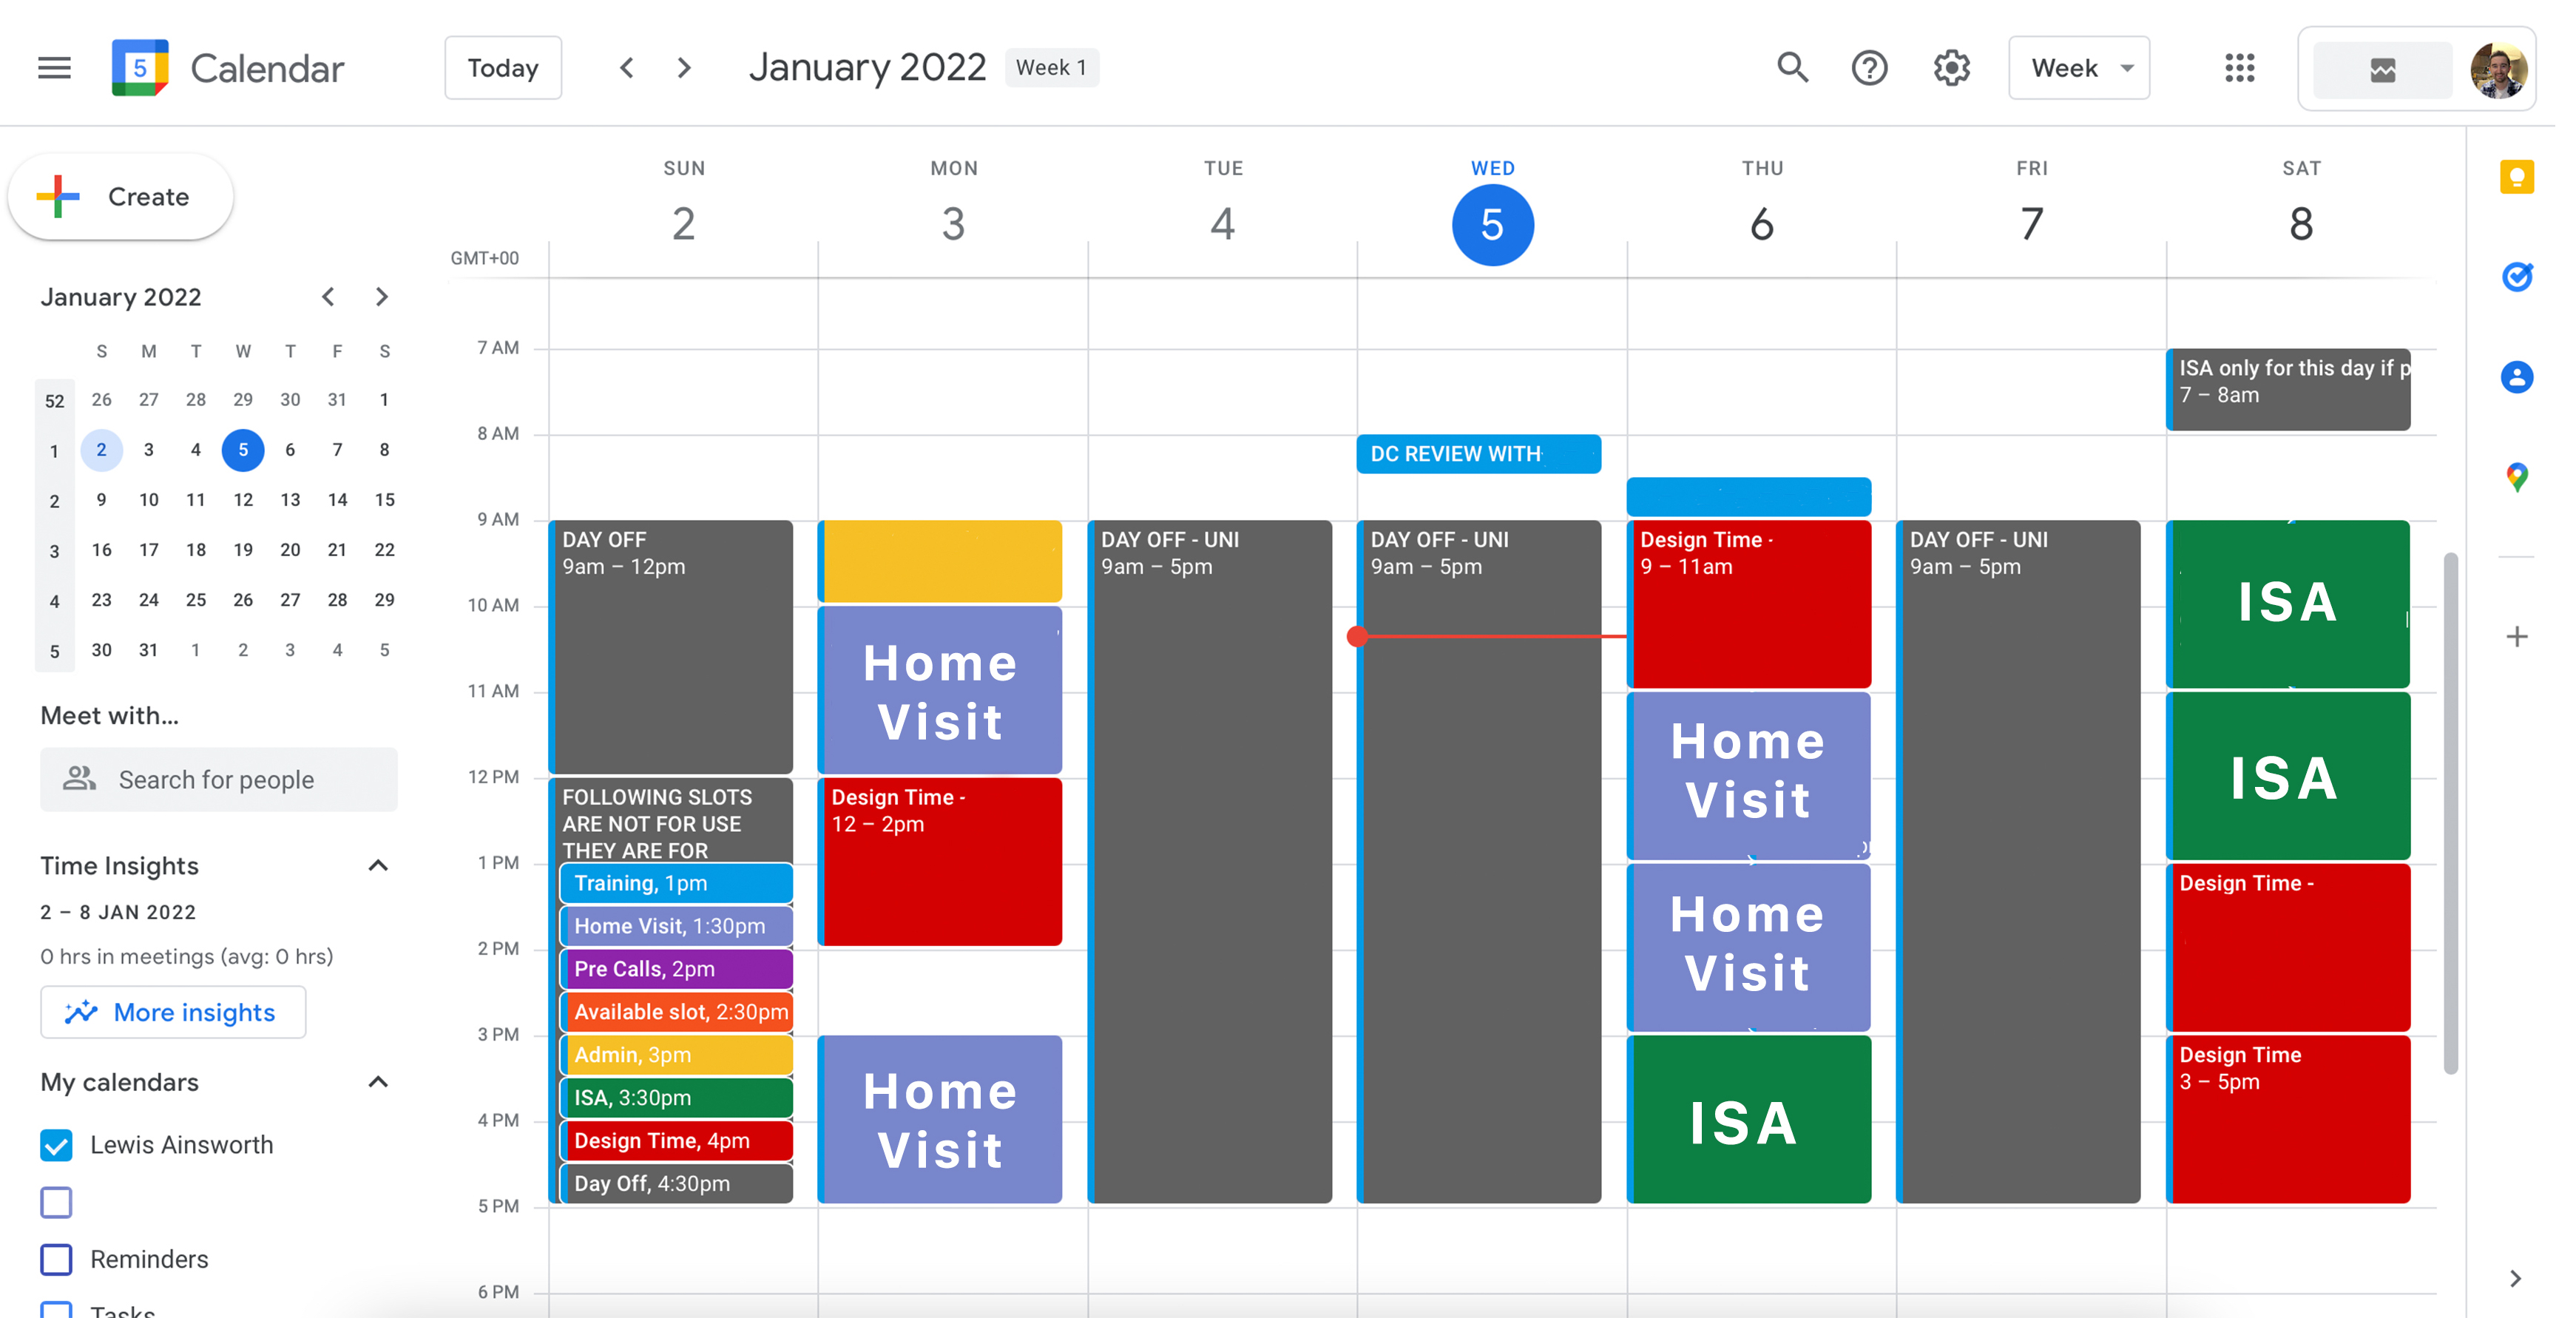
Time management is crucial to creating a smooth customer journey and staying up to date with all my HV’s and ISA’s. We are assigned personal emails at Wickes which allows us to utilise the google calendar tool. Next, I create slots on my calendar for the team to view since they all have access to the DC’s calendar which allows them to book leads in with us if we are away from the desk. The calendar proves extremely effective at planning my time and allows me to see the availability throughout the coming weeks and who has booked in with me in the near future. The screenshot below shows my calendar for week commencing Monday 3rd January 2022. It is important to note that due to GDPR laws, I have removed all names, numbers and addresses visible in this screenshot and replaced with either 'Home Visit' or 'ISA' to show our general layout of events. As you can see under Monday, I have a key to show which colours means what when refering to our calendar. This makes it easier for both myself and the team to understand each other's calendars and see what slots are available and how many HV's or ISA's we have per week.