
In teams you will design and develop an interactive solution that will offer visitors an engaging experience
through the development of an interactive exhibit that really adds to their understanding of the Transmedia End of Year Show.
It is important that you design and develop the theme and style for the delivery of the information as well as pushing the
boundaries of the way in which the content is delivered, technically and physically. You will work in teams to develop a
design and proposal for this project.
Your target audience must be chosen from the following:
School Groups
International Students
People with Disabilities
Technophobes
Educators
Once our team was together, we brainstormed some initial concept ideas and discussed as a group whether these ideas
were feasible and within our ability. Shortly after discussing all our ideas, we were all in agreement of our idea
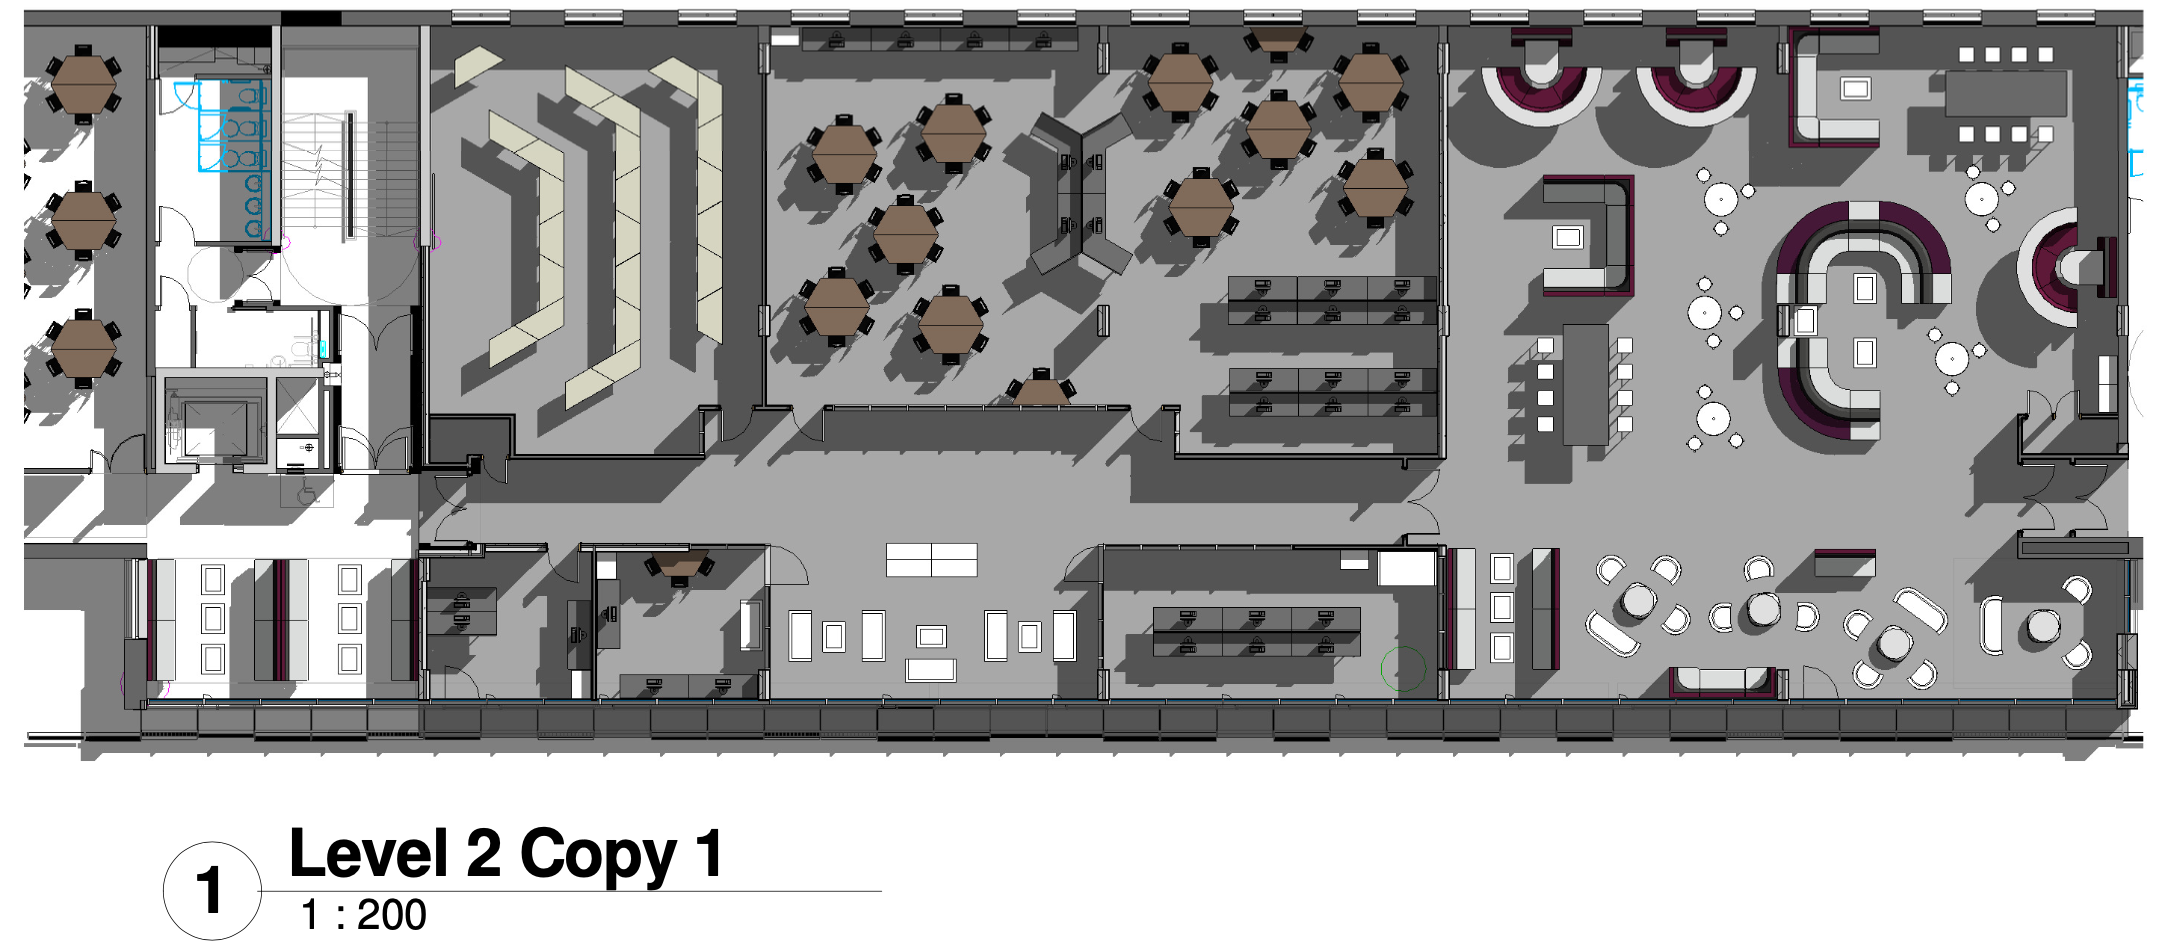
to showcase the new building development for the University of Winchester (costing over £72 million) in a VR format
to appeal to our international audience. Many international students find it difficult to fund their expense to
attend an open day at UK universities but also have limited time to experience all the universities of their choice
causing them to return home before attending all their chosen options. We believe that our concept of modelling
the whole university campus in VR would be applicable for all international students as well as some UK students
who may struggle to travel to their university for specified open days. Given we only have 6 weeks to finish this
project, we decided to model just one floor of the new build since the myself and the other CAD team member were
unfamiliar with the skills required to model buildings in AutoCAD and Revit. Once the concept was in place, we set
everyone’s tasks out and created a trello board to communicate from.
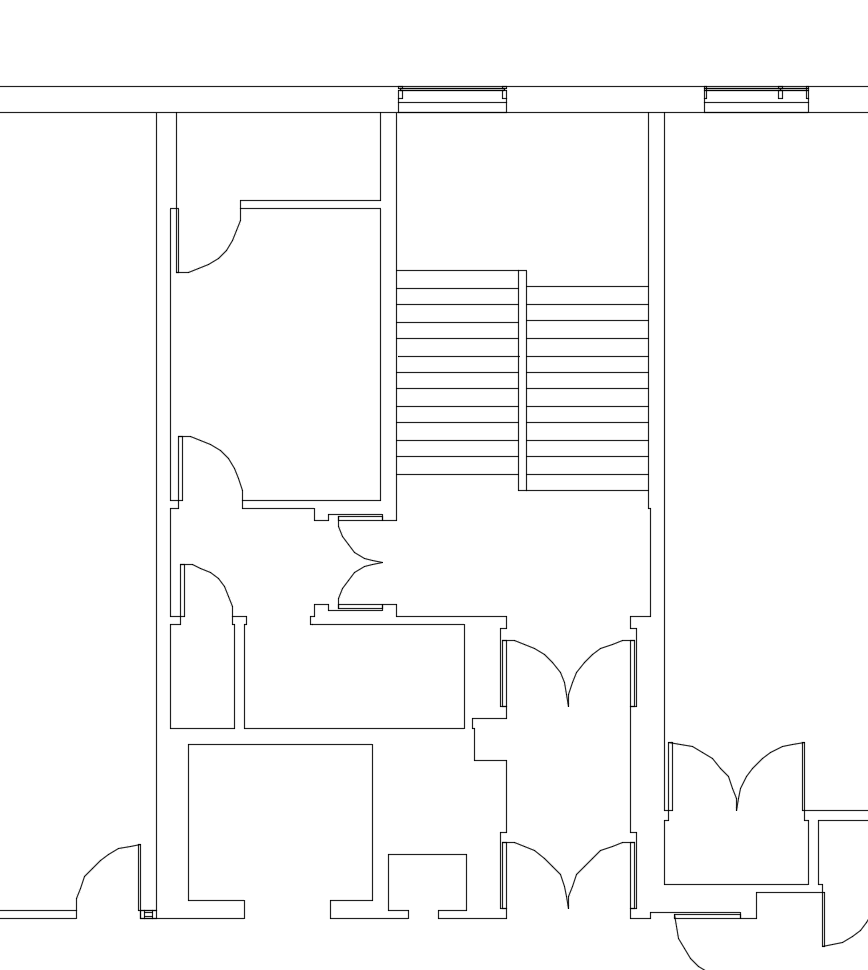
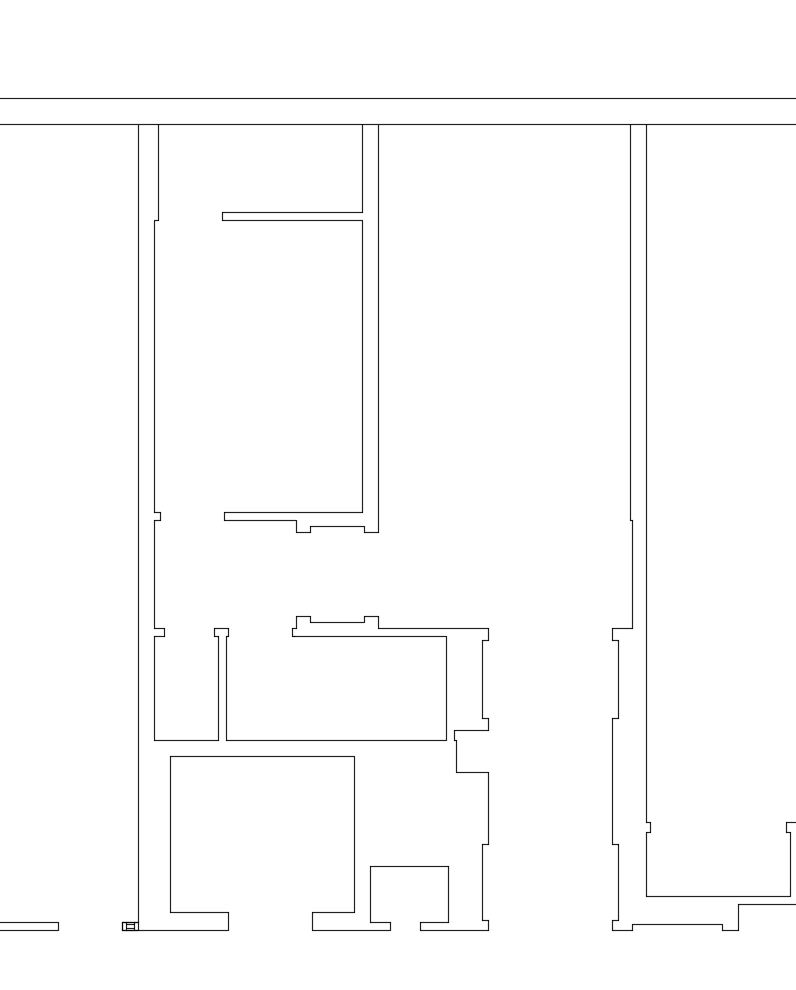
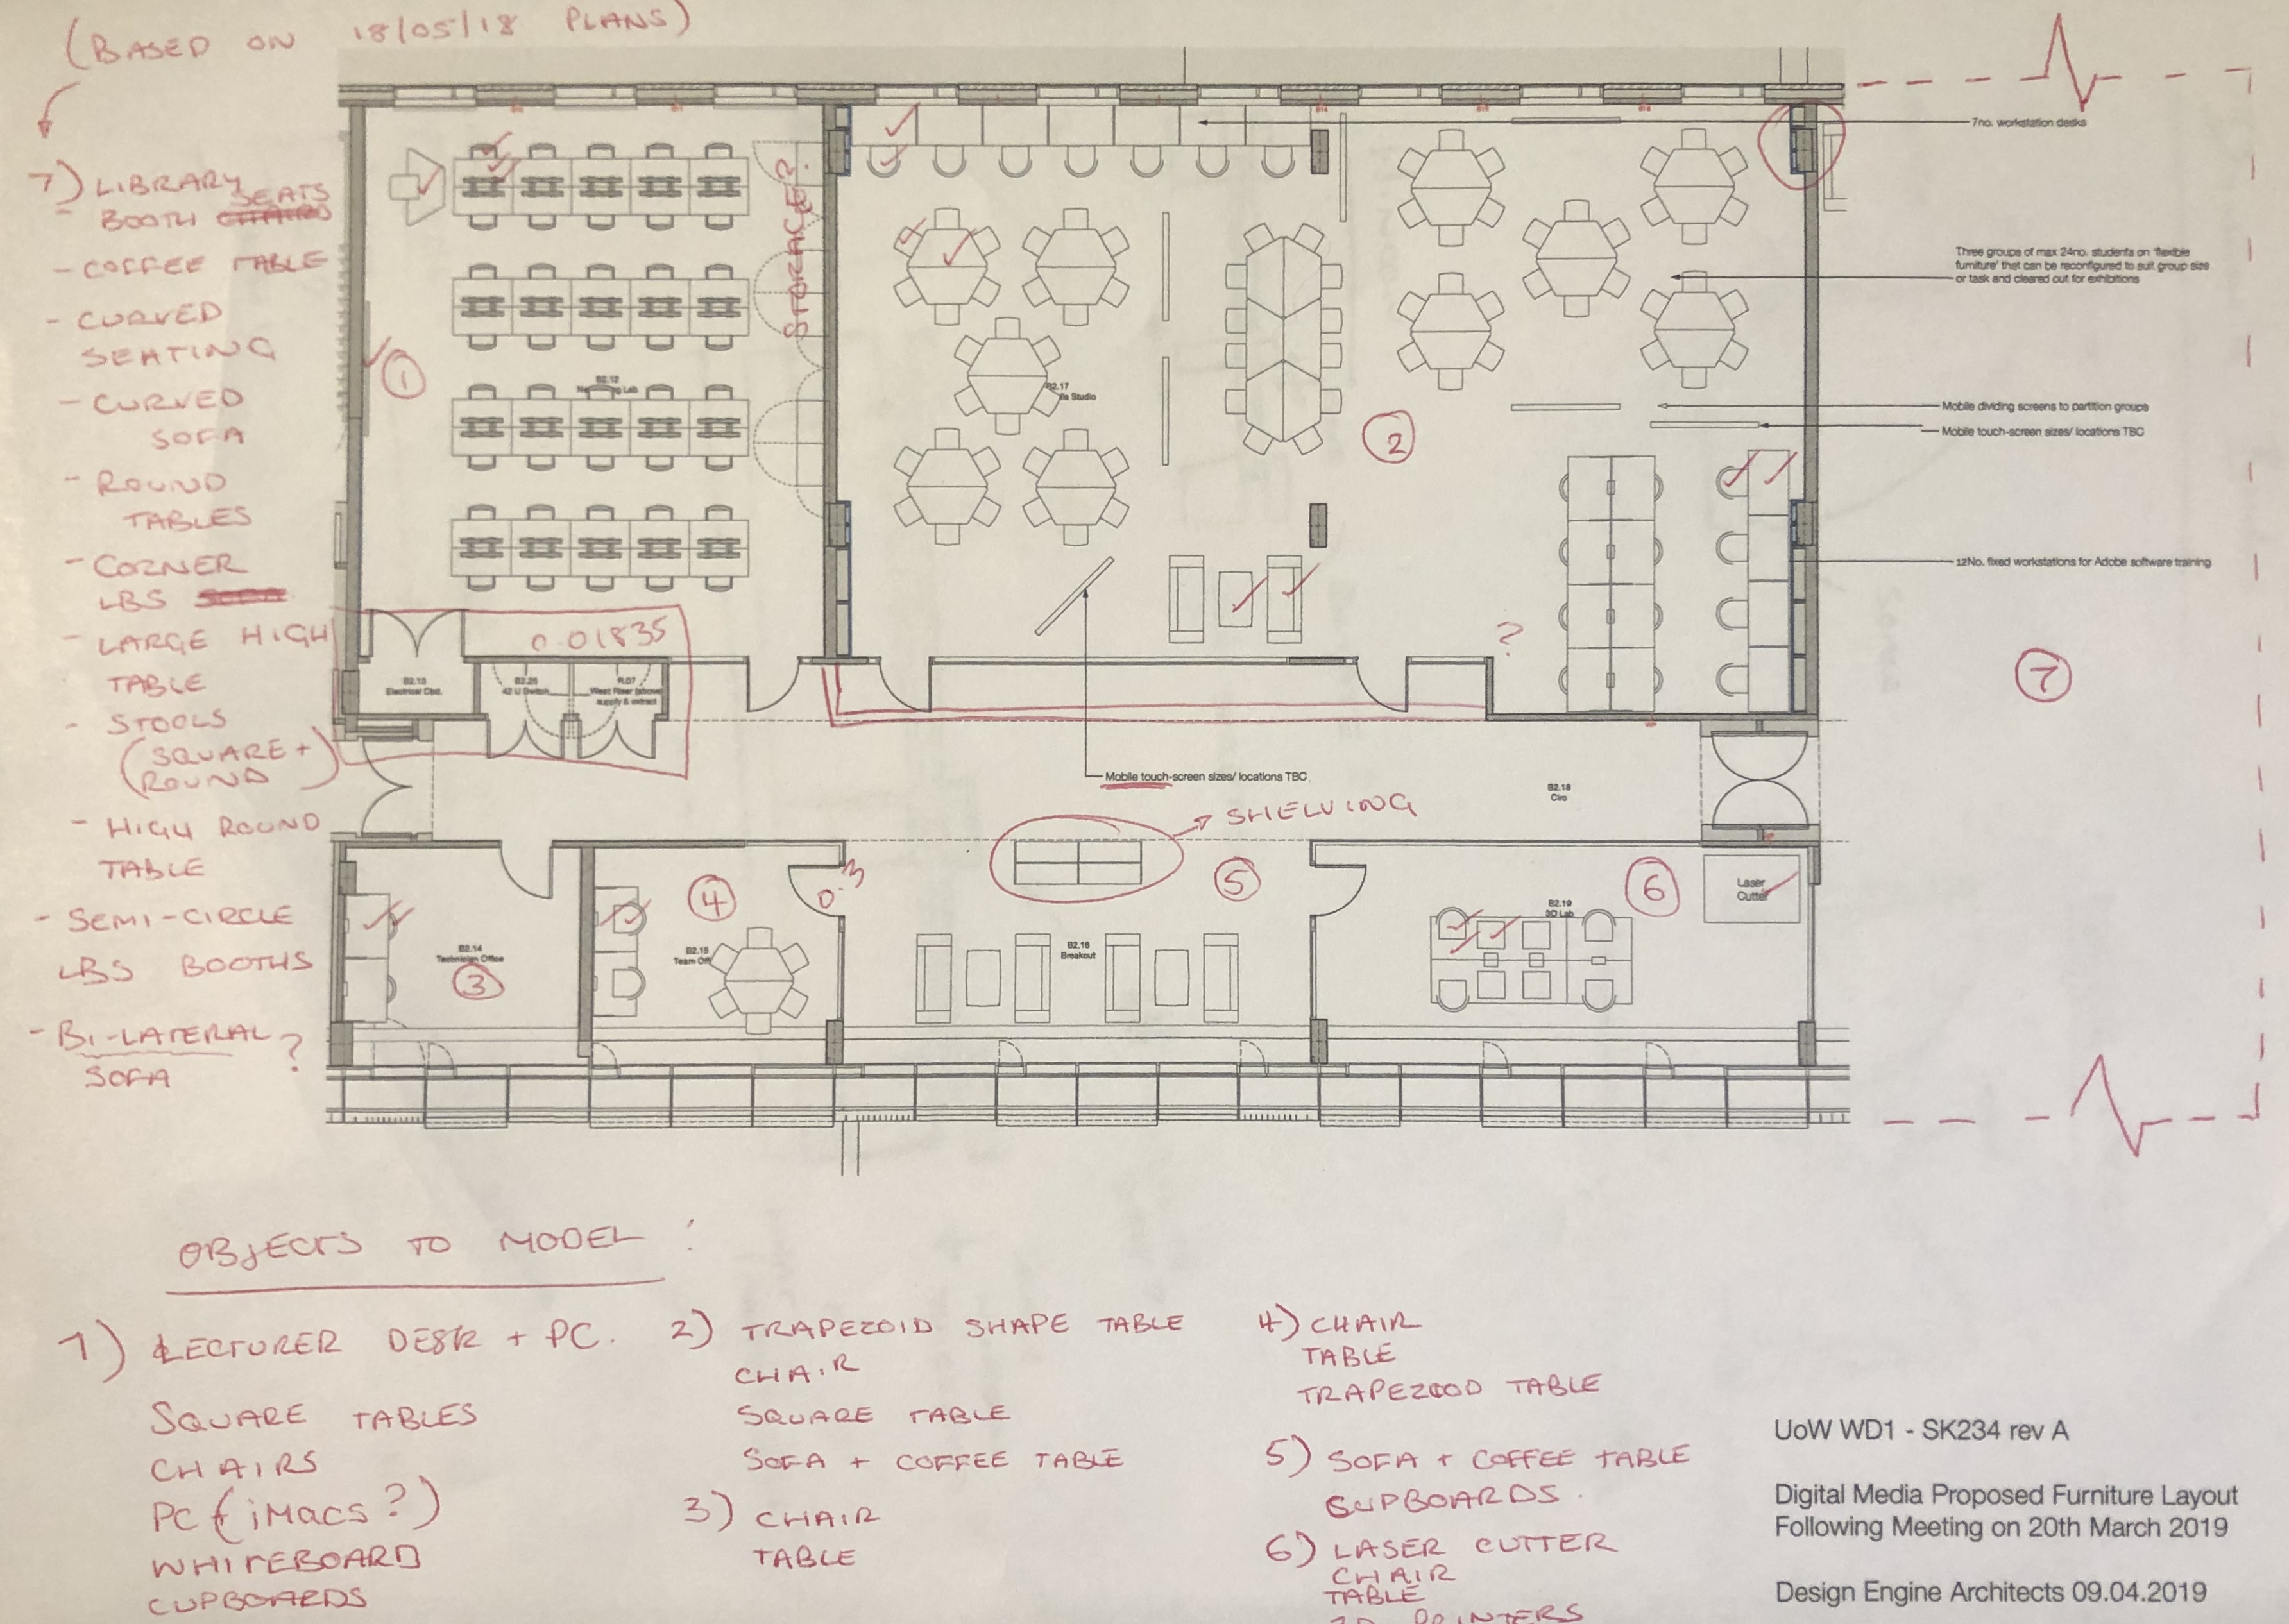
Firstly, I researched more on the building to understand its layout and was able to download documents from the
Winchester council planning website. After analysing these documents, I found that the visualisations showed a
different floor plan to the architectural drawings which was dated before the visualisations. Since our team could
not get into the new development due to it being under construction still, I had to lay out the floorplan based on
these documents which were mostly outdated but could still be used to accurately plot the general plan and adjusting
to any changes seen in the up-to-date visualisations which provided no numerical information.
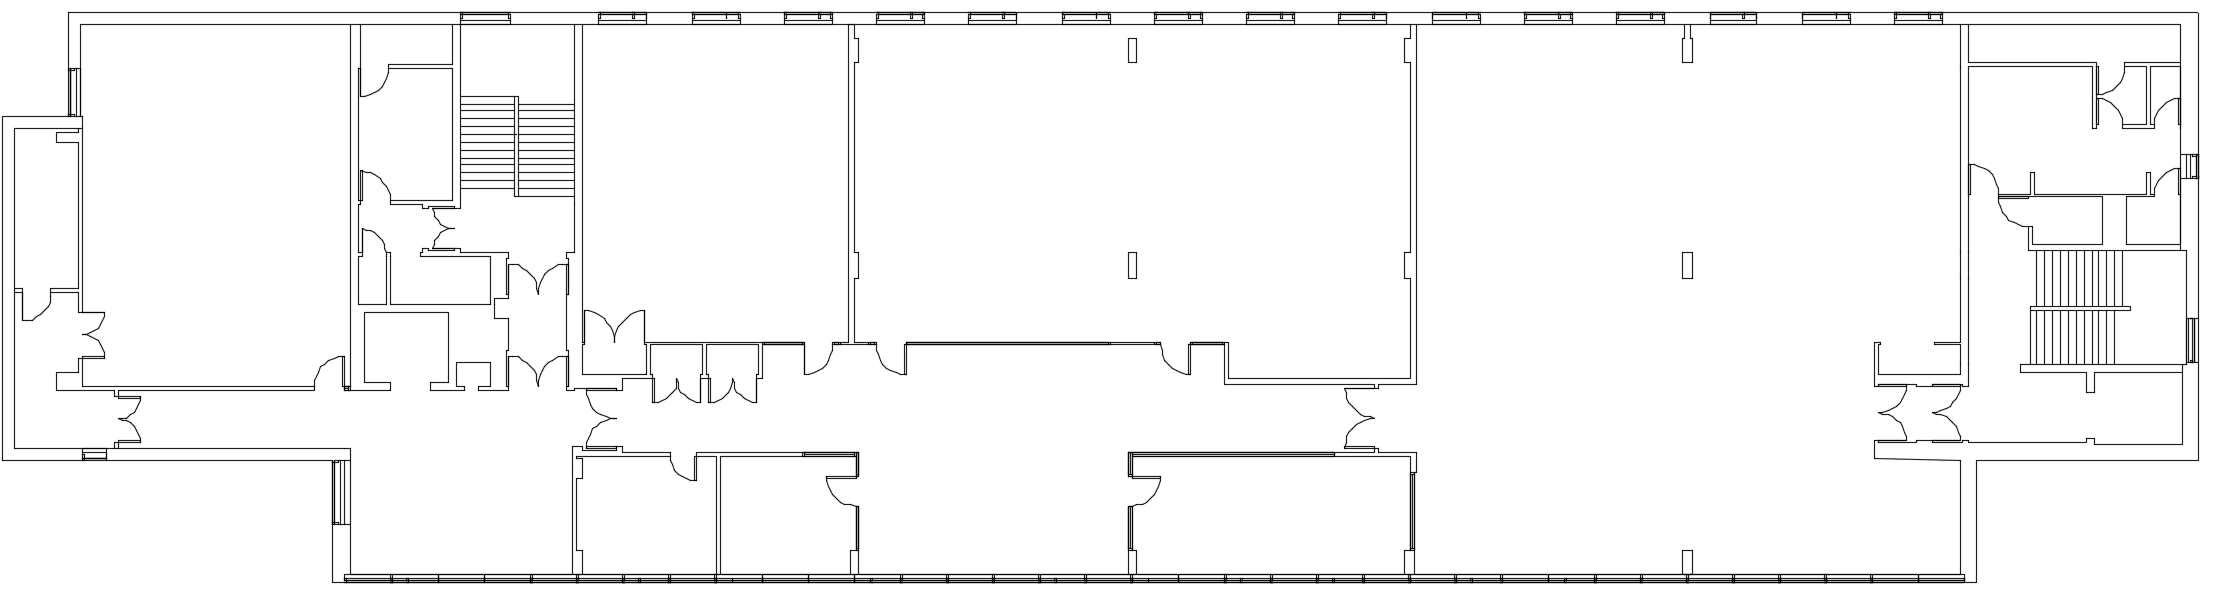
Using these drawings, I was able to measure and draw up the floorplans, adjusting any dimensions or rooms which have
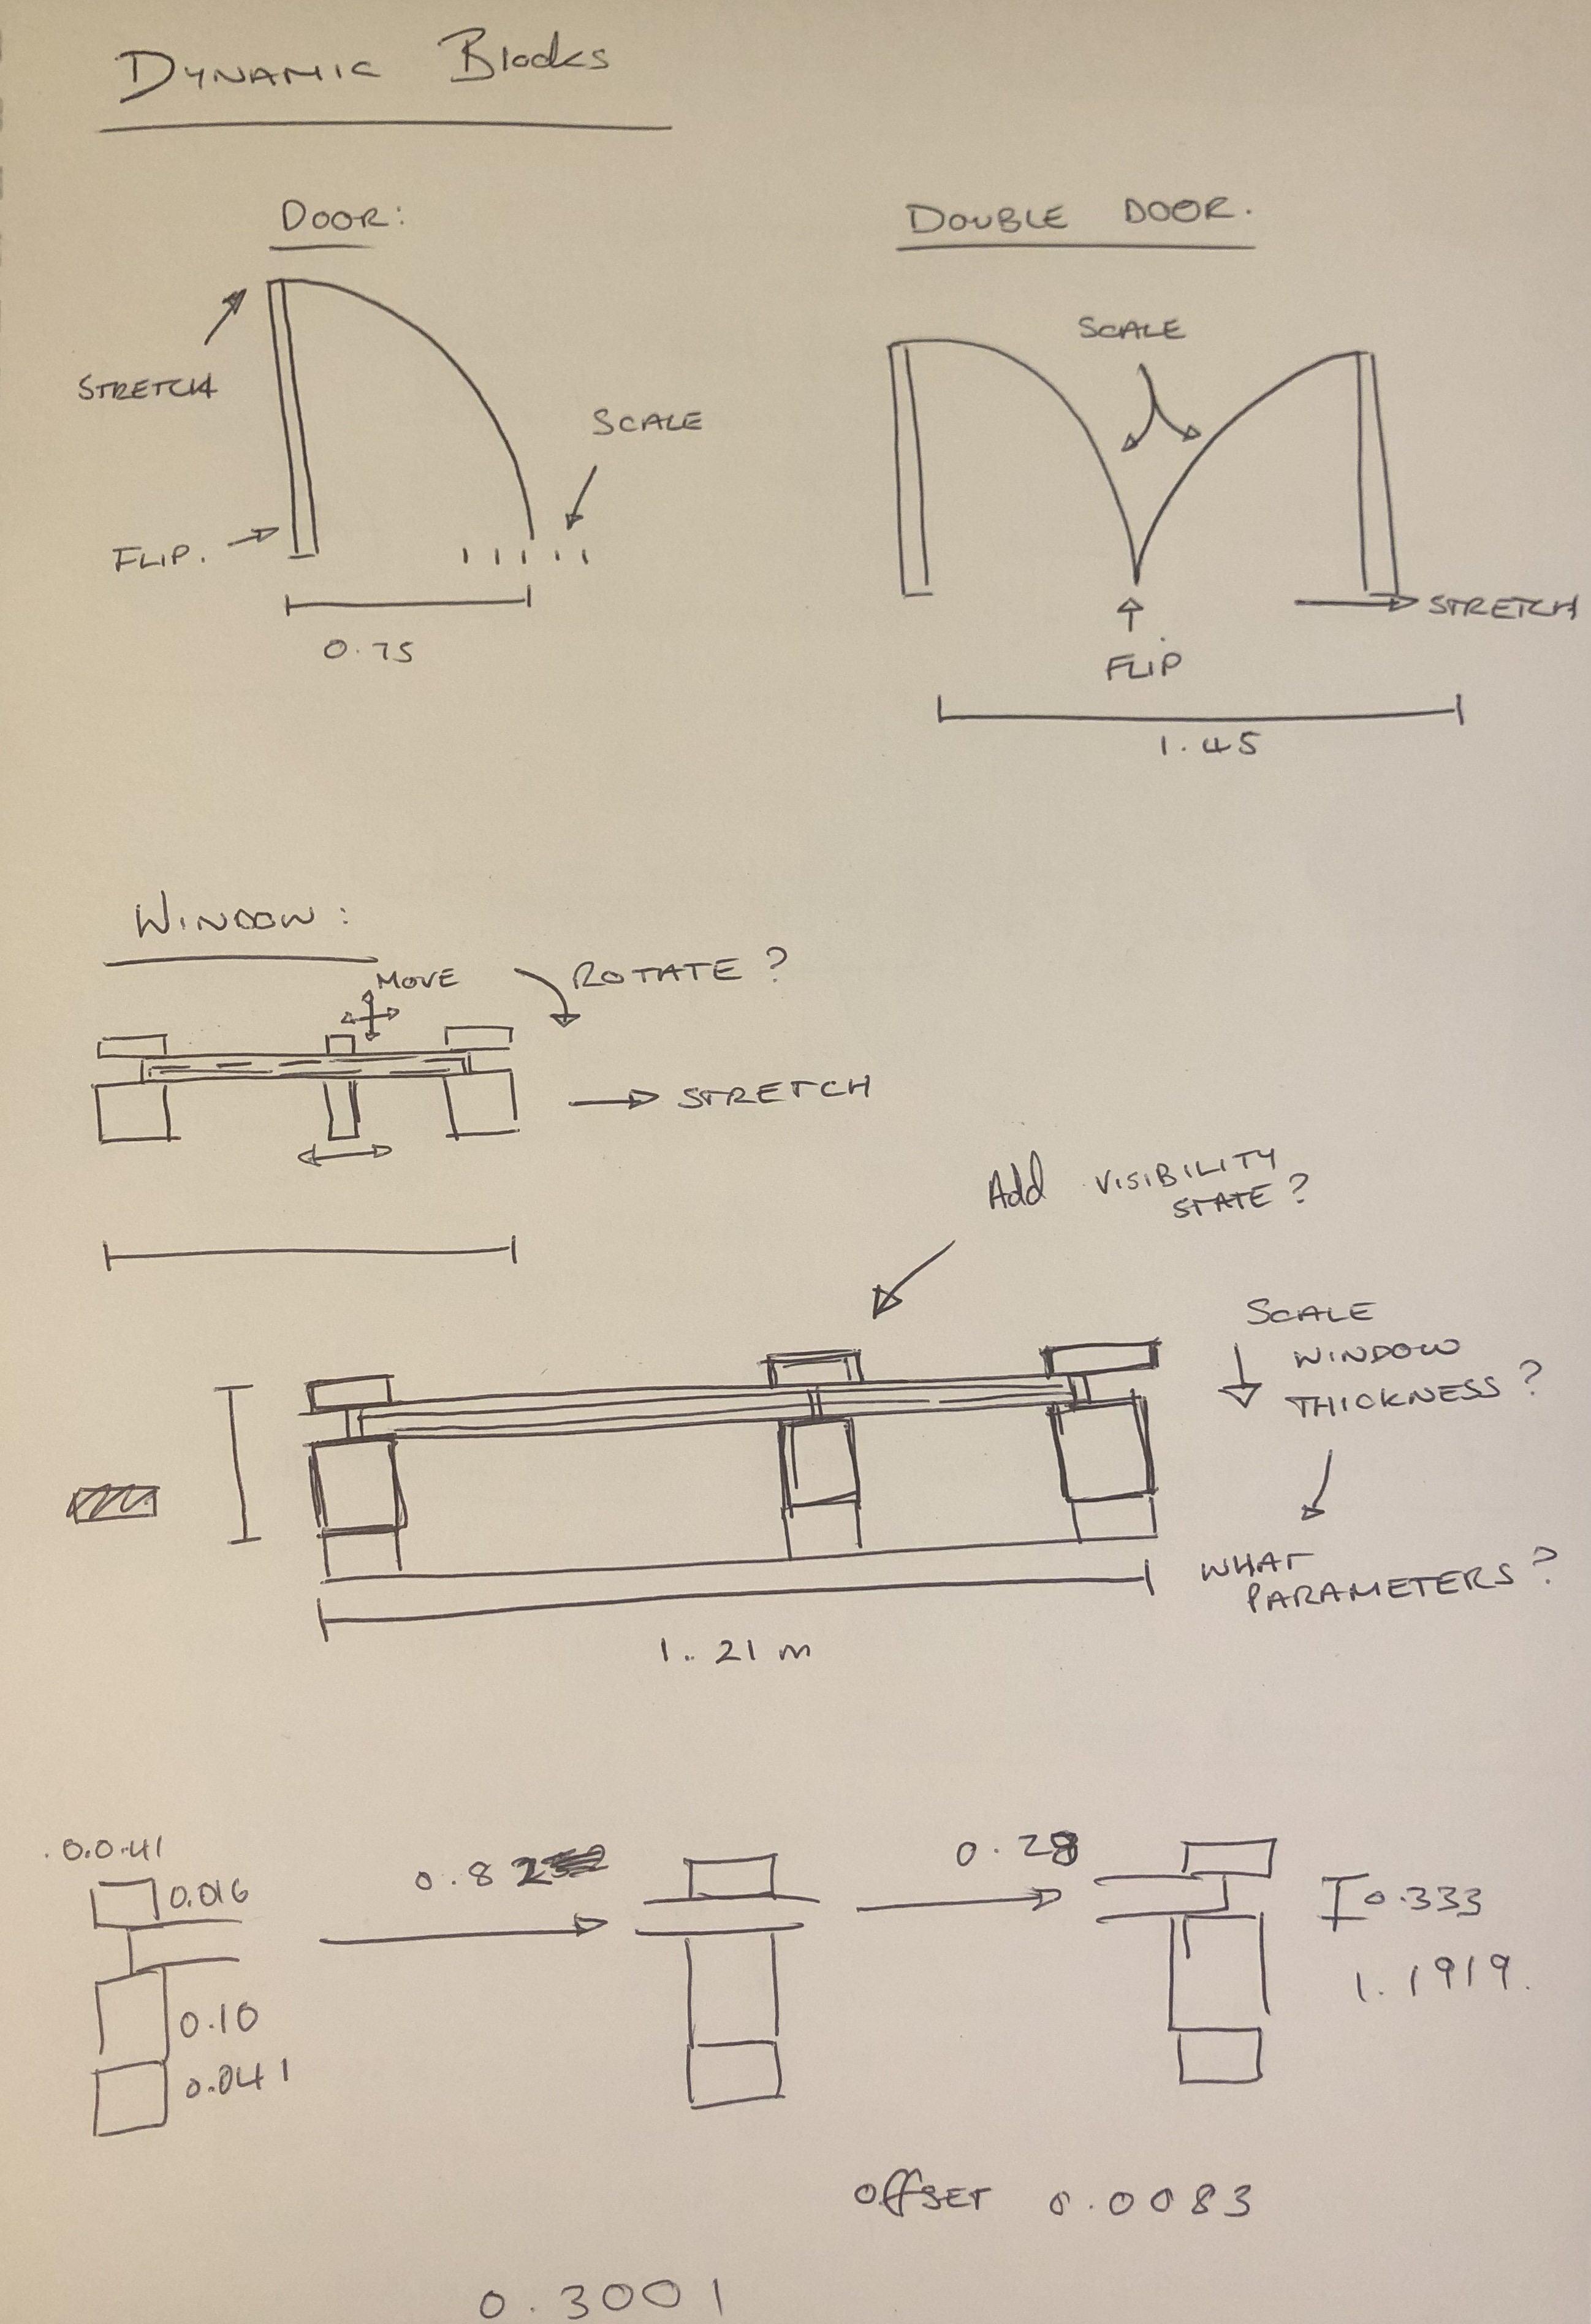
changed in the visualisations compared to the outdated architectural drawings. I then created and added several added dynamic blocks to a
separate layer allowing my colleague to turn this layer off to only display the exterior and interior walls of the
floor making it easier to model in Revit. After resolving all the changes to the floorplan and completing all the
dynamic blocks and layers, I was able to send the final document to my colleague to import into Revit and extrude the
walls and add the doors, windows and glass panels to the model.
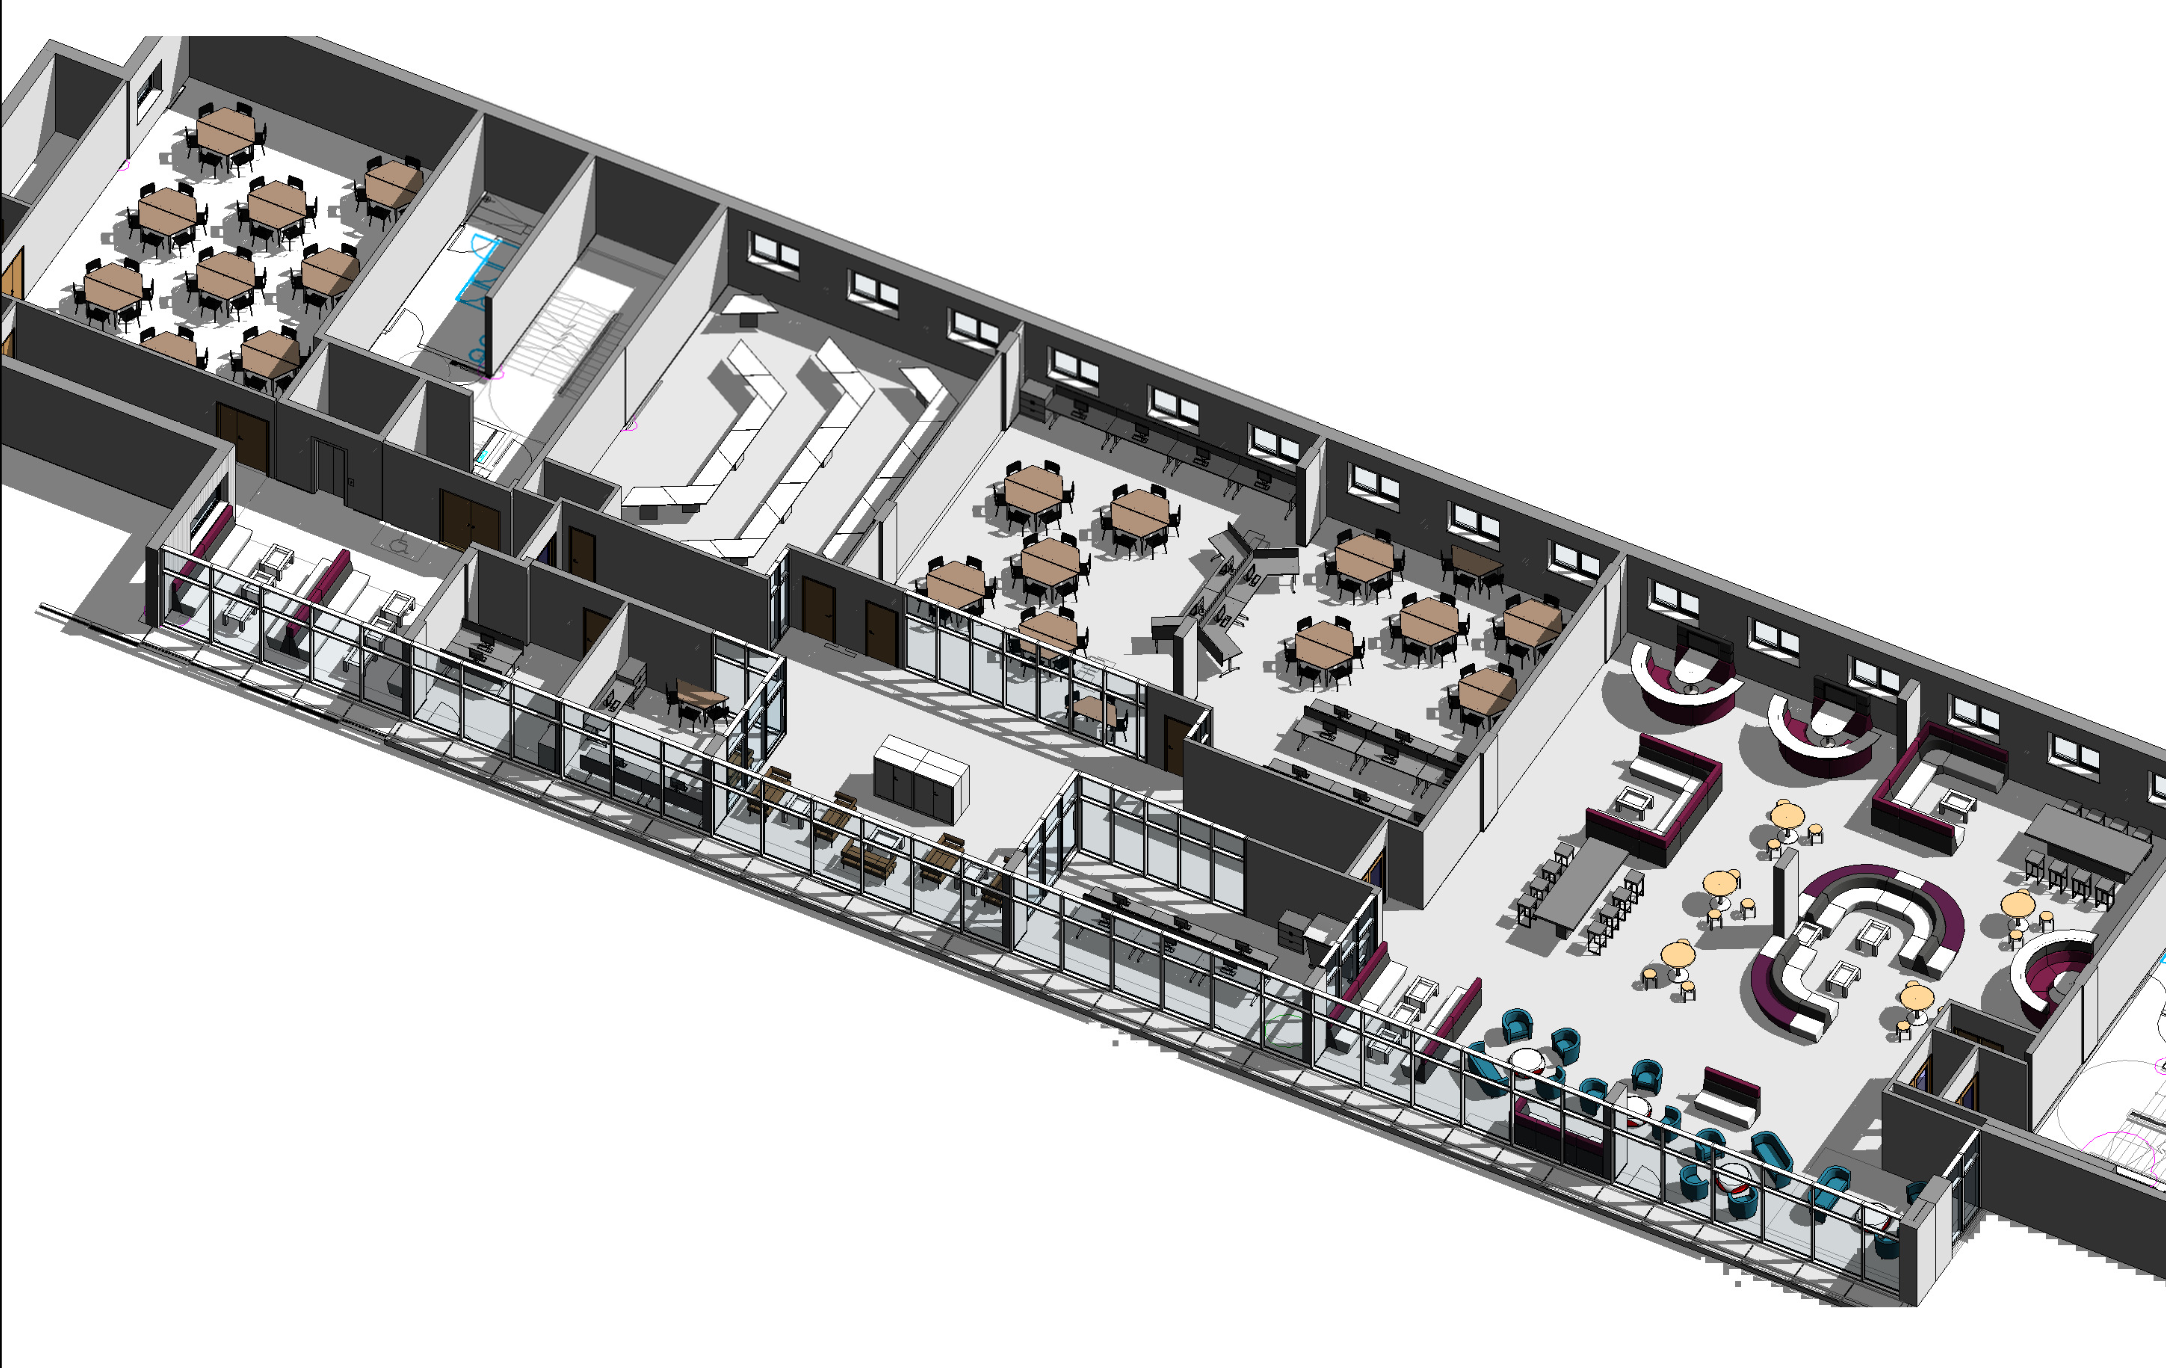
Whilst the CAD team was completing our tasks, the design team worked on the branding, app design, marketing information
and target audience research ready to showcase at the Transmedia End of Year Show. Our developer work on importing our
final model into Unity and completing the tasks needed to link up to a VR headset for the Transmedia End of Year Show but
to also show the code required to develop into our chosen app if the project is to continue.
Below are the images and documents used to measure and plan out ready to input all the information and dimensions into AutoCAD. Once the walls were layed out I moved onto sketching the dynamic blocks and which parameters I wanted to add to these blocks to make them easily adjustable for all the gaps in the drawing.
I took the opportunity to explore more of the functions in AutoCAD and fully utilise its tools. In this instance, I decided to fill in the gaps in the drawing where the doors and windows should be with the dynamic blocks. To do this I needed to enter the block editor after drawing the framework and assigning attributees such as stretch, scale, rotate, visibility states and more, to the block. These blocks allowed me to easily scale and stretch the doors or windows into position and simply dragging the arrows to meet the other edge.
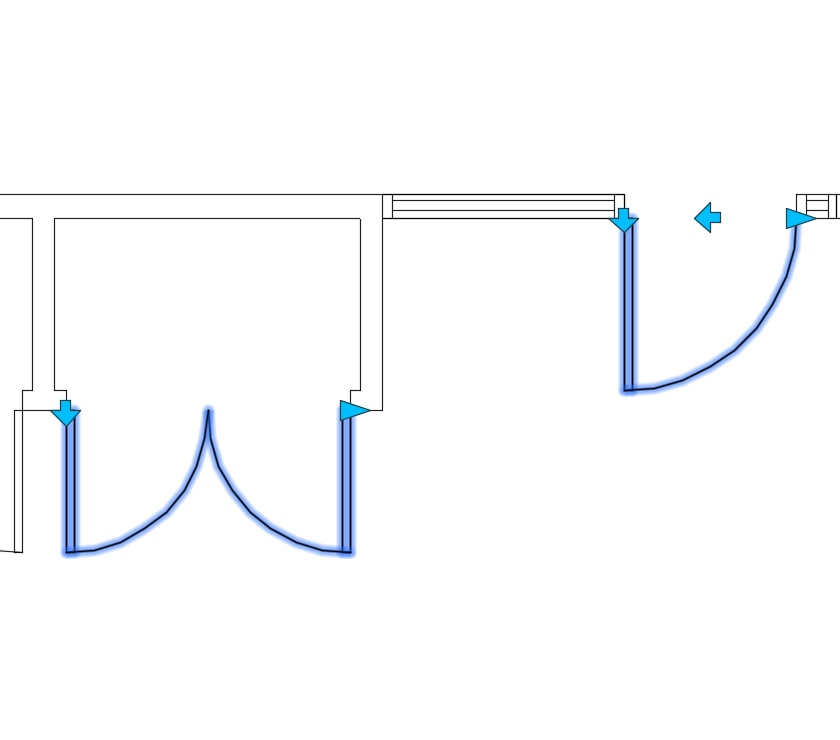
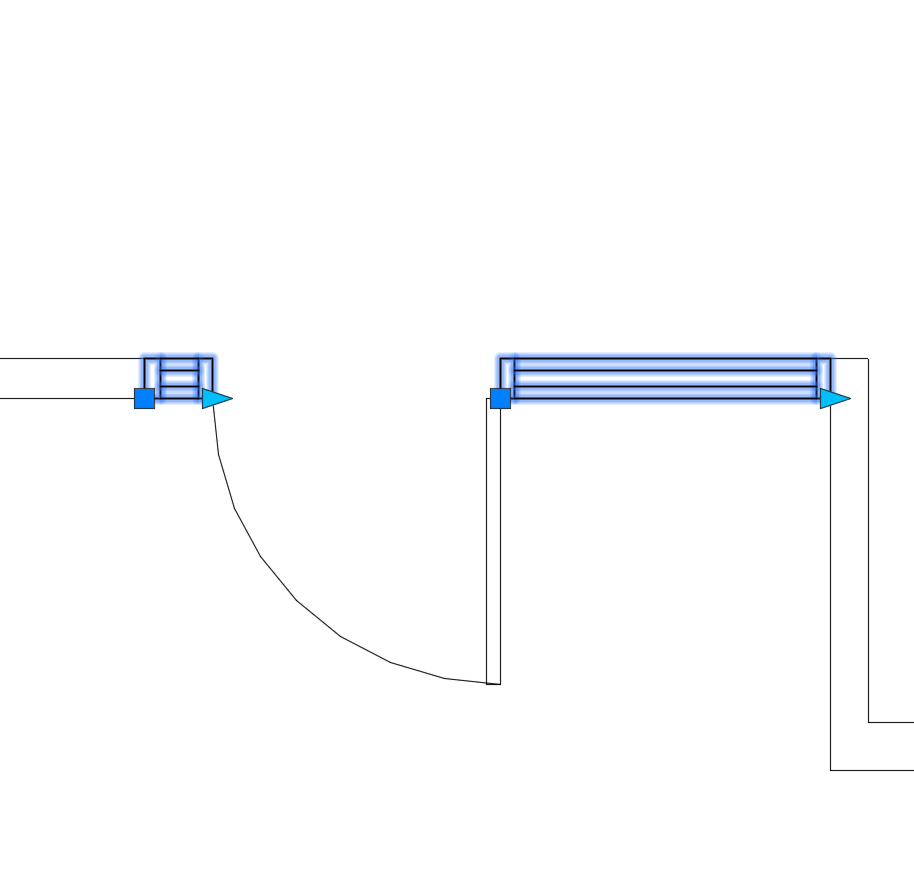
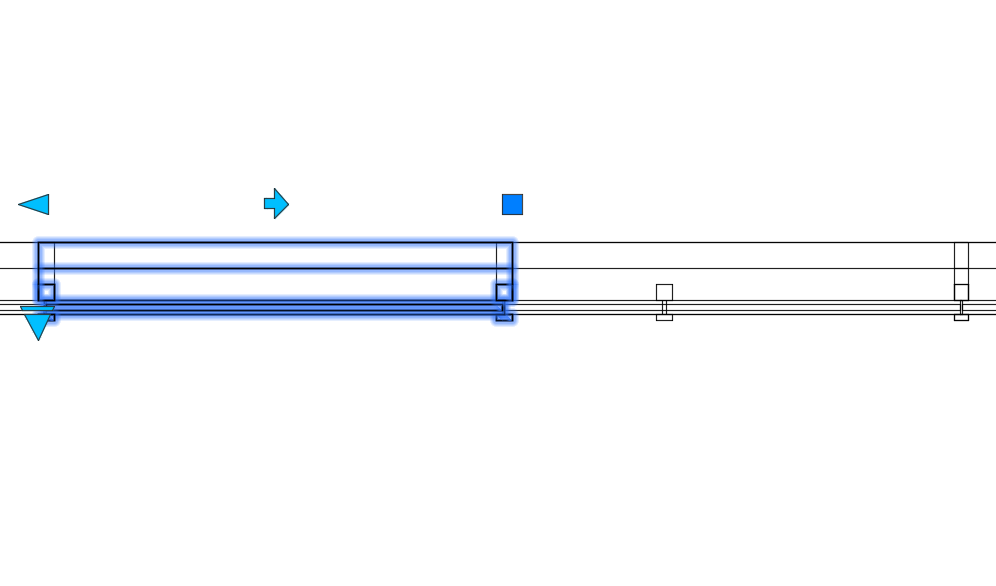
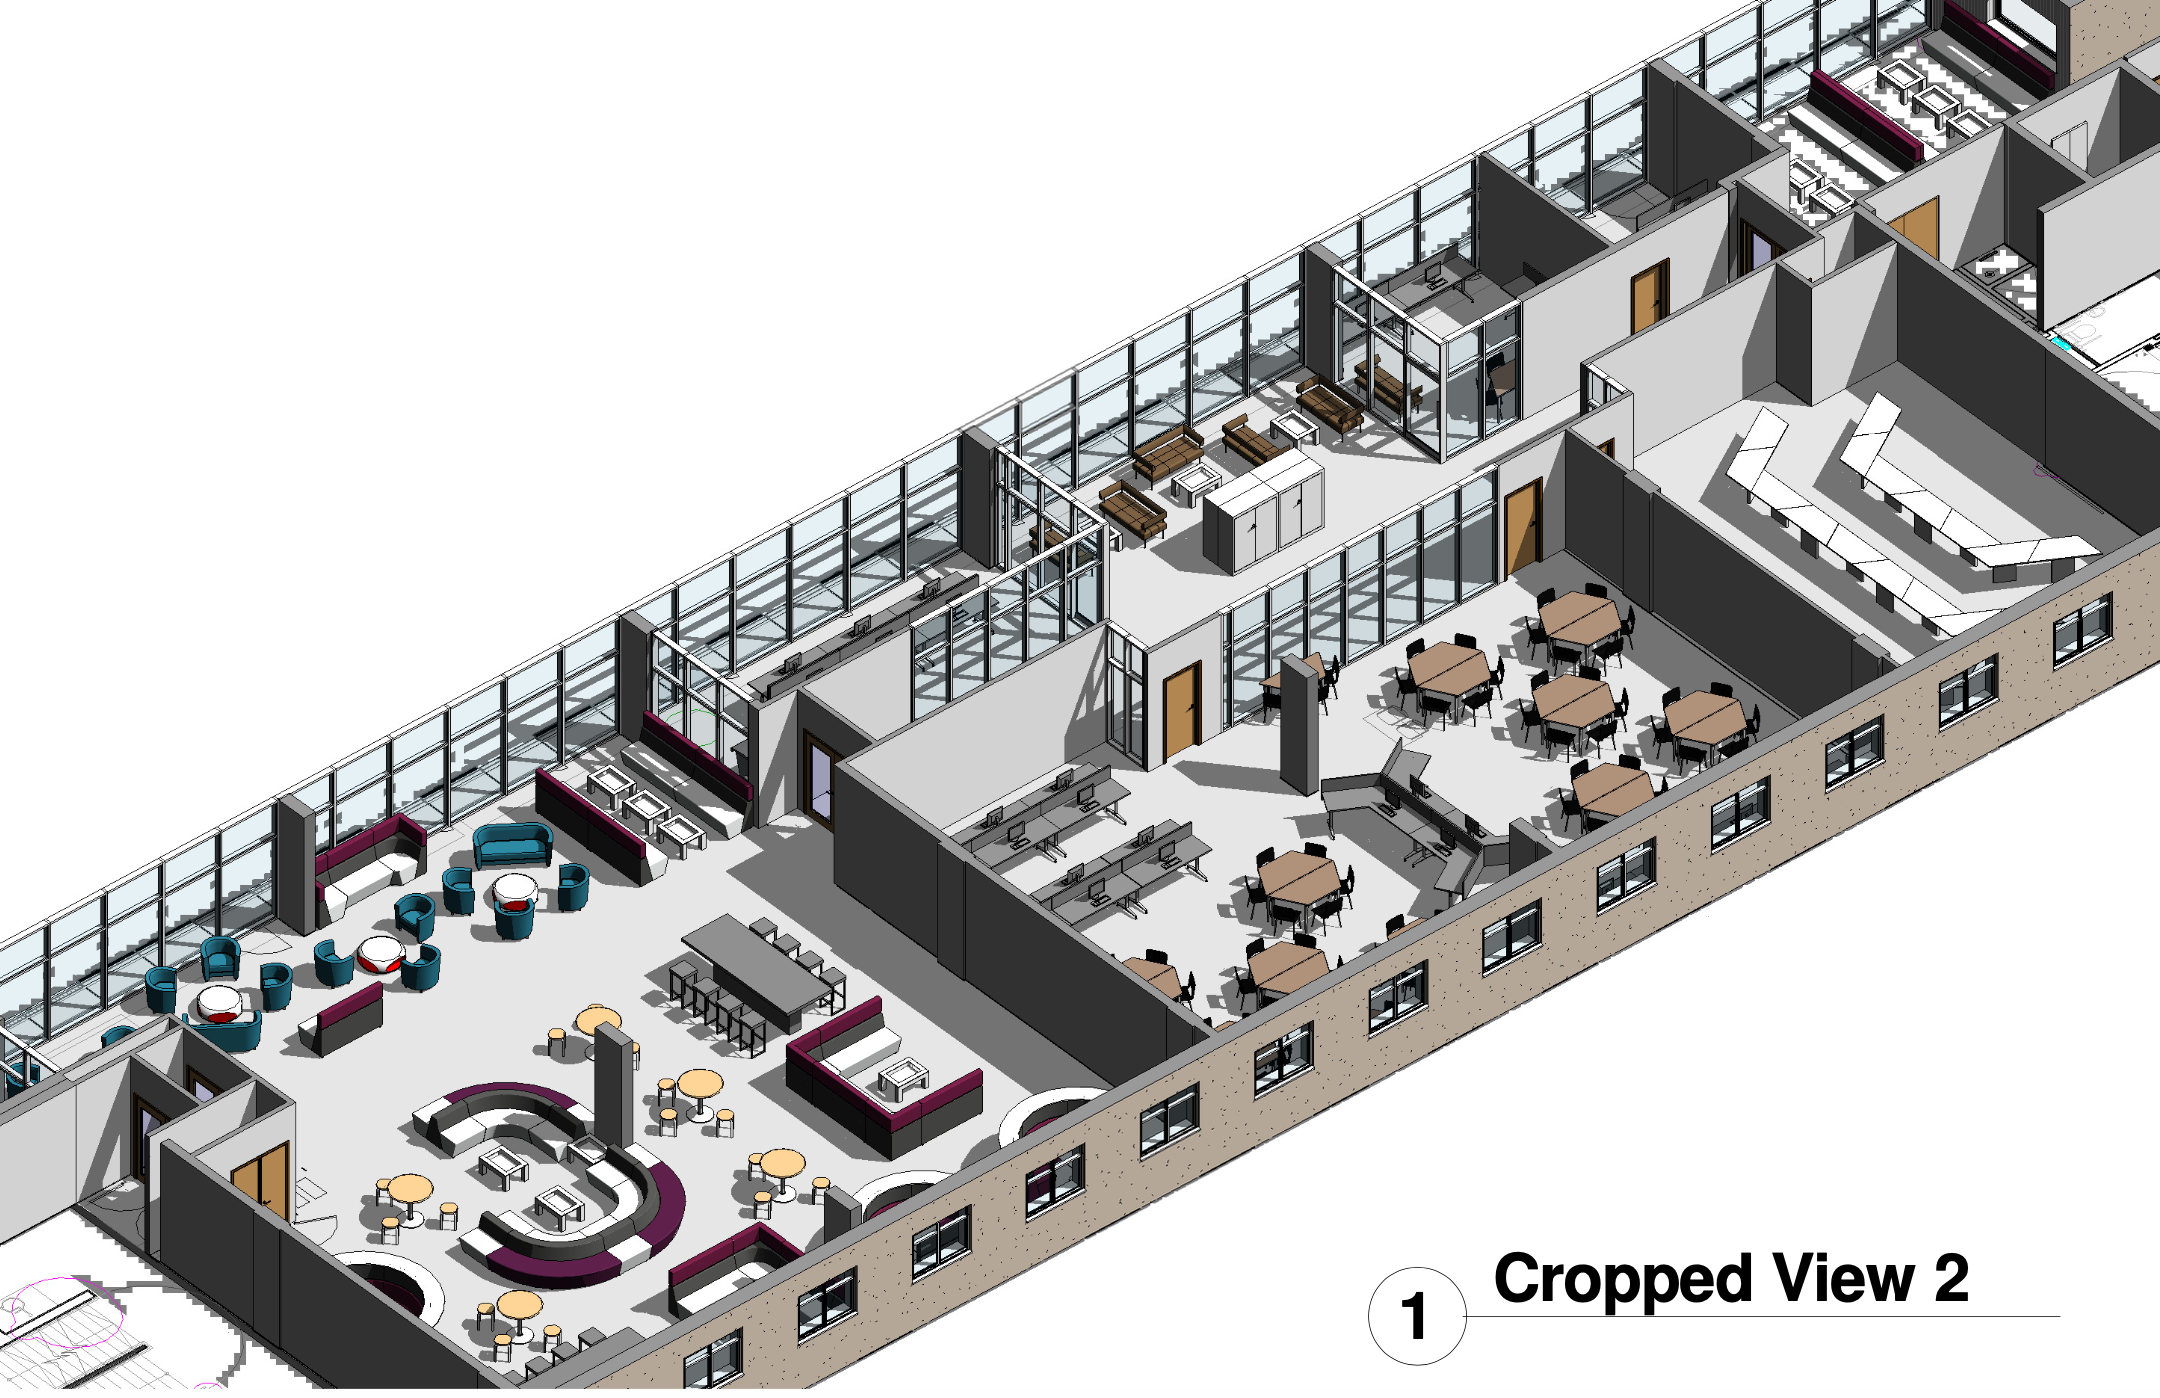
Below are two images showing the difference when the dynamic layer is turned on and off. I created this layer to allow my colleague to easily switchc between these layers in Revit, making it easier to build upon the walls and then come back to the dynamic blocks to insert the doors, window and interior glass walls.