Design task 1:


Create a titleblock in AutoCAD to showcase future project work and drawings.

To start this task, I researched more into title blocks and their function in the industry. After looking at several online examples and videos, I found that a title block is to display any key information on the drawings presented but also represents your branding and how you work. A title block is a presentational tool in the design industry and is key to make sure that you represent your branding and drawings in a clear and concise manner to show professionalism since this is fundamental to my portfolio and branding.

I done a few sketches to get an idea of how I wanted elements to be positioned and what size the headings, fields, and notes should be. Once I had an idea in place, I jumped into AutoCAD to create my title block templates in both landscape and portrait for A4, A3 and A2 paper sizes. I made several iterations and changes on the way to finalise this task to my requirements such as ensuring the logo is square and proportionate to the paper sizes, I also experimented with different heading sizes to ensure the important information/headers are clear whilst the notes and smaller bits of information on the drawings such as the dates, revisions, and drawn by information was slightly smaller than the important information presented on the drawings. Below is the final outcome for the landscape and portrait templates for A4 paper sizes (which is extremely similar to the A3 and A2 templates) and an image showing the automatic fields and logo used in my titleblock.


Design task 2:


Complete the lecture handout and produce an A2 plan using your title block templates. The following should be shown in the title block; the site plan and each of the 5 different floor levels as different viewports.

External references are used in CAD to display all external references (XREF’s) onto one file which is incredibly useful when working in teams or on group projects. I was supplied with a site plan, survey and architectural drawings to present on my A2 title block showing the different floors. Each floor needed to be facing the correct way and positioned carefully and accurately over the site plan to ensure all the floor stack up correctly. I then added a north arrow on a separate layer ready to present next to the individual floor in the title block. Below is my finished product showing the site plan in the top left and each individual floor surrounding the outside. If you would like to see this task as a .DWG format click here. If you would like to see in .PDF format click here.


Design task 3:


Compose your own shortcuts guide for those commands you feel have been the most useful in your studies

Since changing to the CAD course at the end of year 1, I’ve come across over 100 different commands in AutoCAD alone. Since I haven’t familiarised myself with Fusion360 just yet, I decided to base this task solely on AutoCAD and will be extremely useful to have a quick commands list for AutoCAD nearby to ground in my learning and efficiency in the program. Most of the commands I am familiar with or have previously used and some of the commands are ones which I would perhaps find useful in the near future. To download the full commands list, click here.


Design task 4:


Create a minimum of 3 dynamic blocks, showcasing your new skills for some of your interactive project assets

Prior to starting this task, I watched several YouTube tutorials to understand how the dynamic block editor and attributes work in AutoCAD. At the same time, I was currently adding to my interactive project work and realised an opportunity to create and use 3-4 dynamic blocks for my project work. The blocks I designed are; single door, double door, external windows and internal glass panel. Most of these simply needed the flip, scale and stretch attributes but I had the chance to use the visibility states attribute for the external window block. I attempted to use the rotate attribute for all 4 blocks but once the block was rotated, the scale and stretch attribute wouldn’t function properly. Below is the images of the dynamic blocks as well as the .DWG files associated with each block.


Design task 5:


You have been asked to design an exhibition named "The Digital Future of..."

You have an internal space of 12m x 18m with a ceiling height of 4m. Your target audience is secondary school children aged 11-16 years old

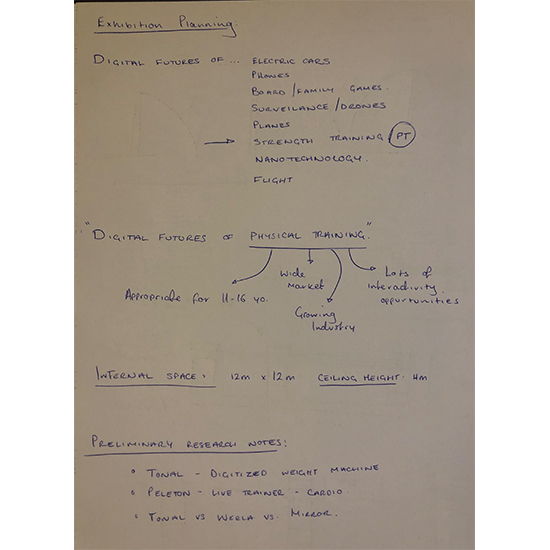
As you can see by the brief, our task is aimed for secondary school children, aged 11-16. I quickly brainstormed some exhibition ideas that would be applicable for this age range. I then done some preliminary research to help decide what exhibition category to choose, and the result was that physical training (PT) has some innovative products arriving to market which I believe is fundamental for the next generation of children to learn from. Although some types of PT are aimed for adults, I believe that most exercises and equipment are applicable to the target audience, although perhaps more aimed towards the higher age ranges, 
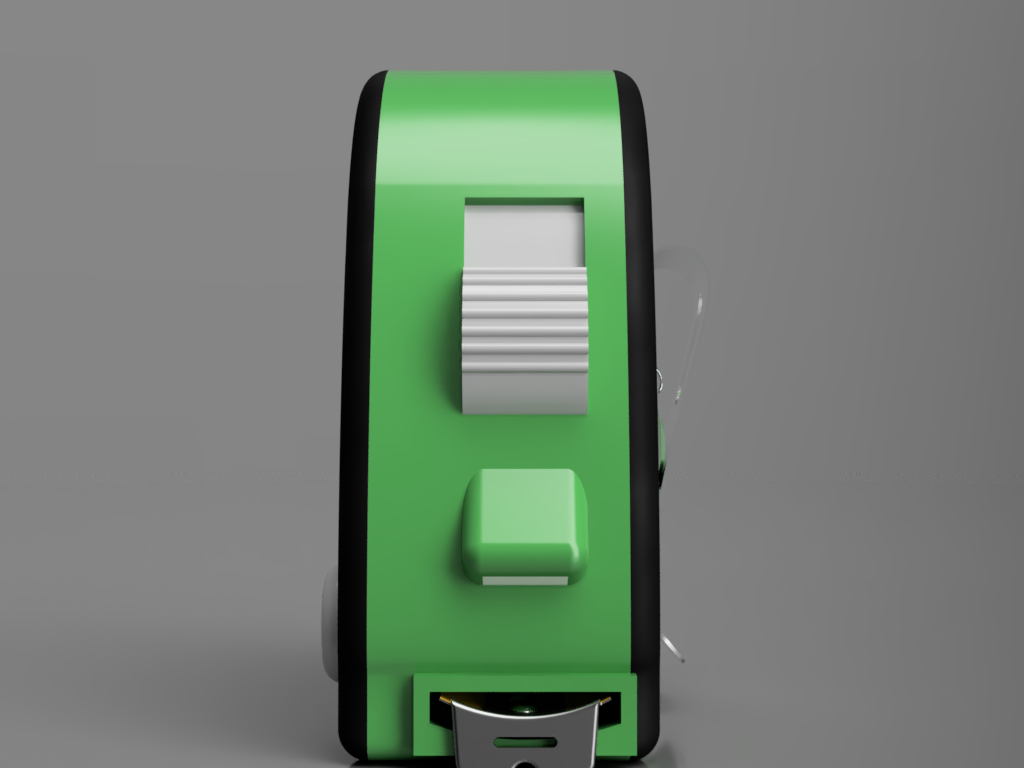
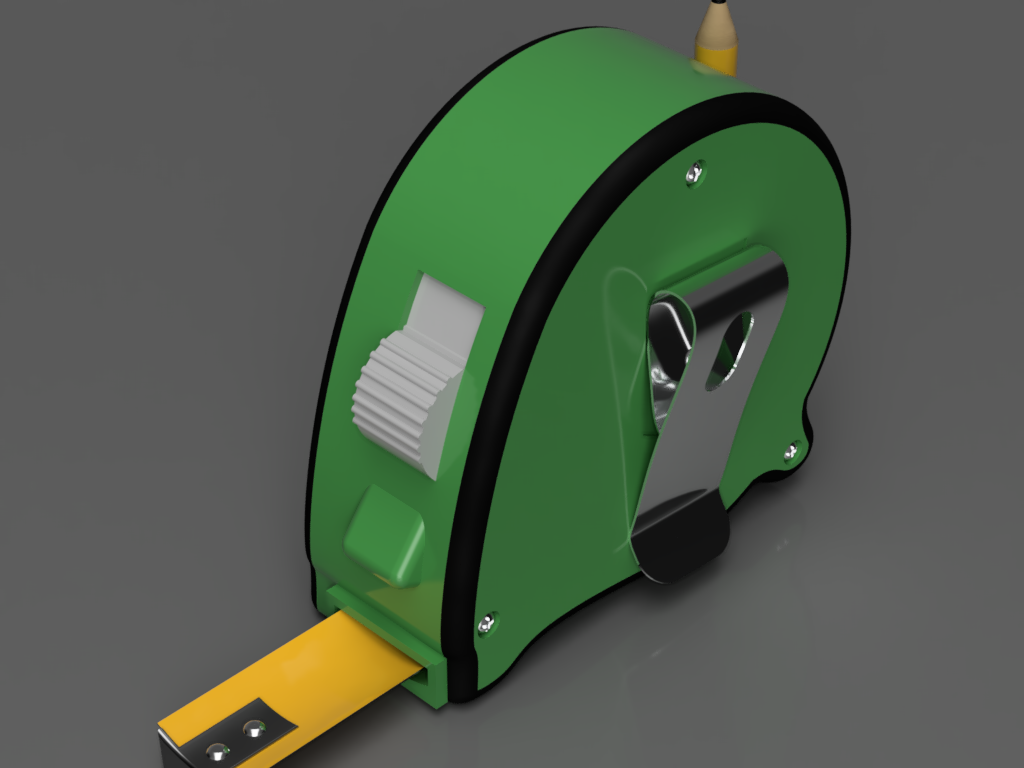
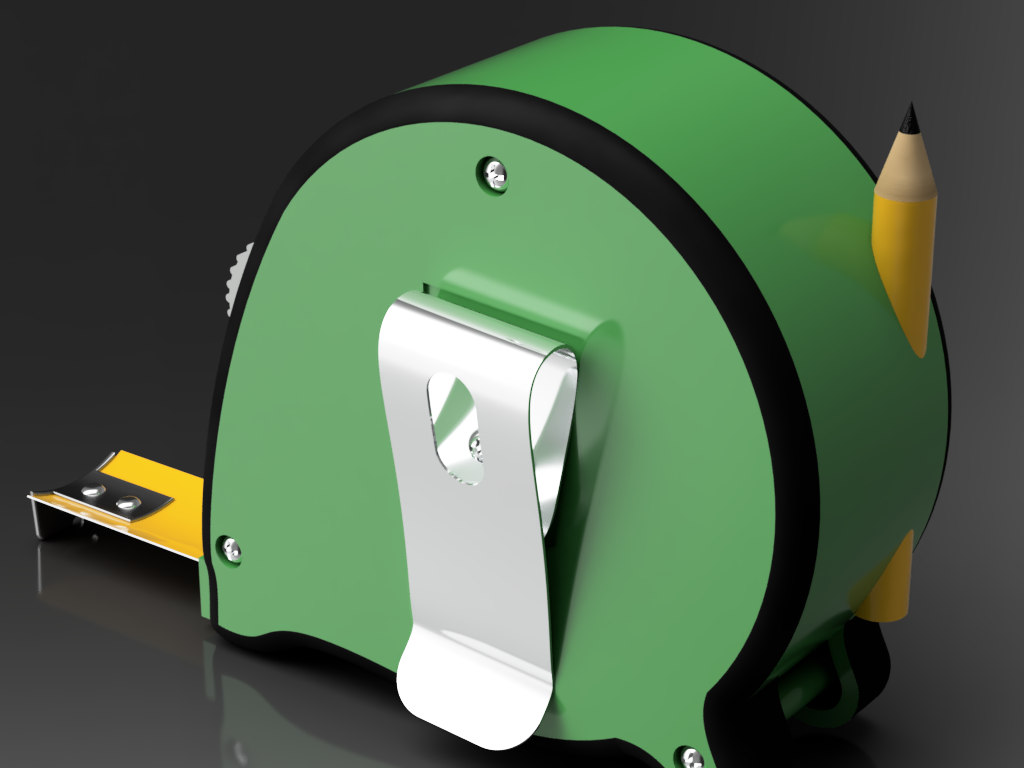
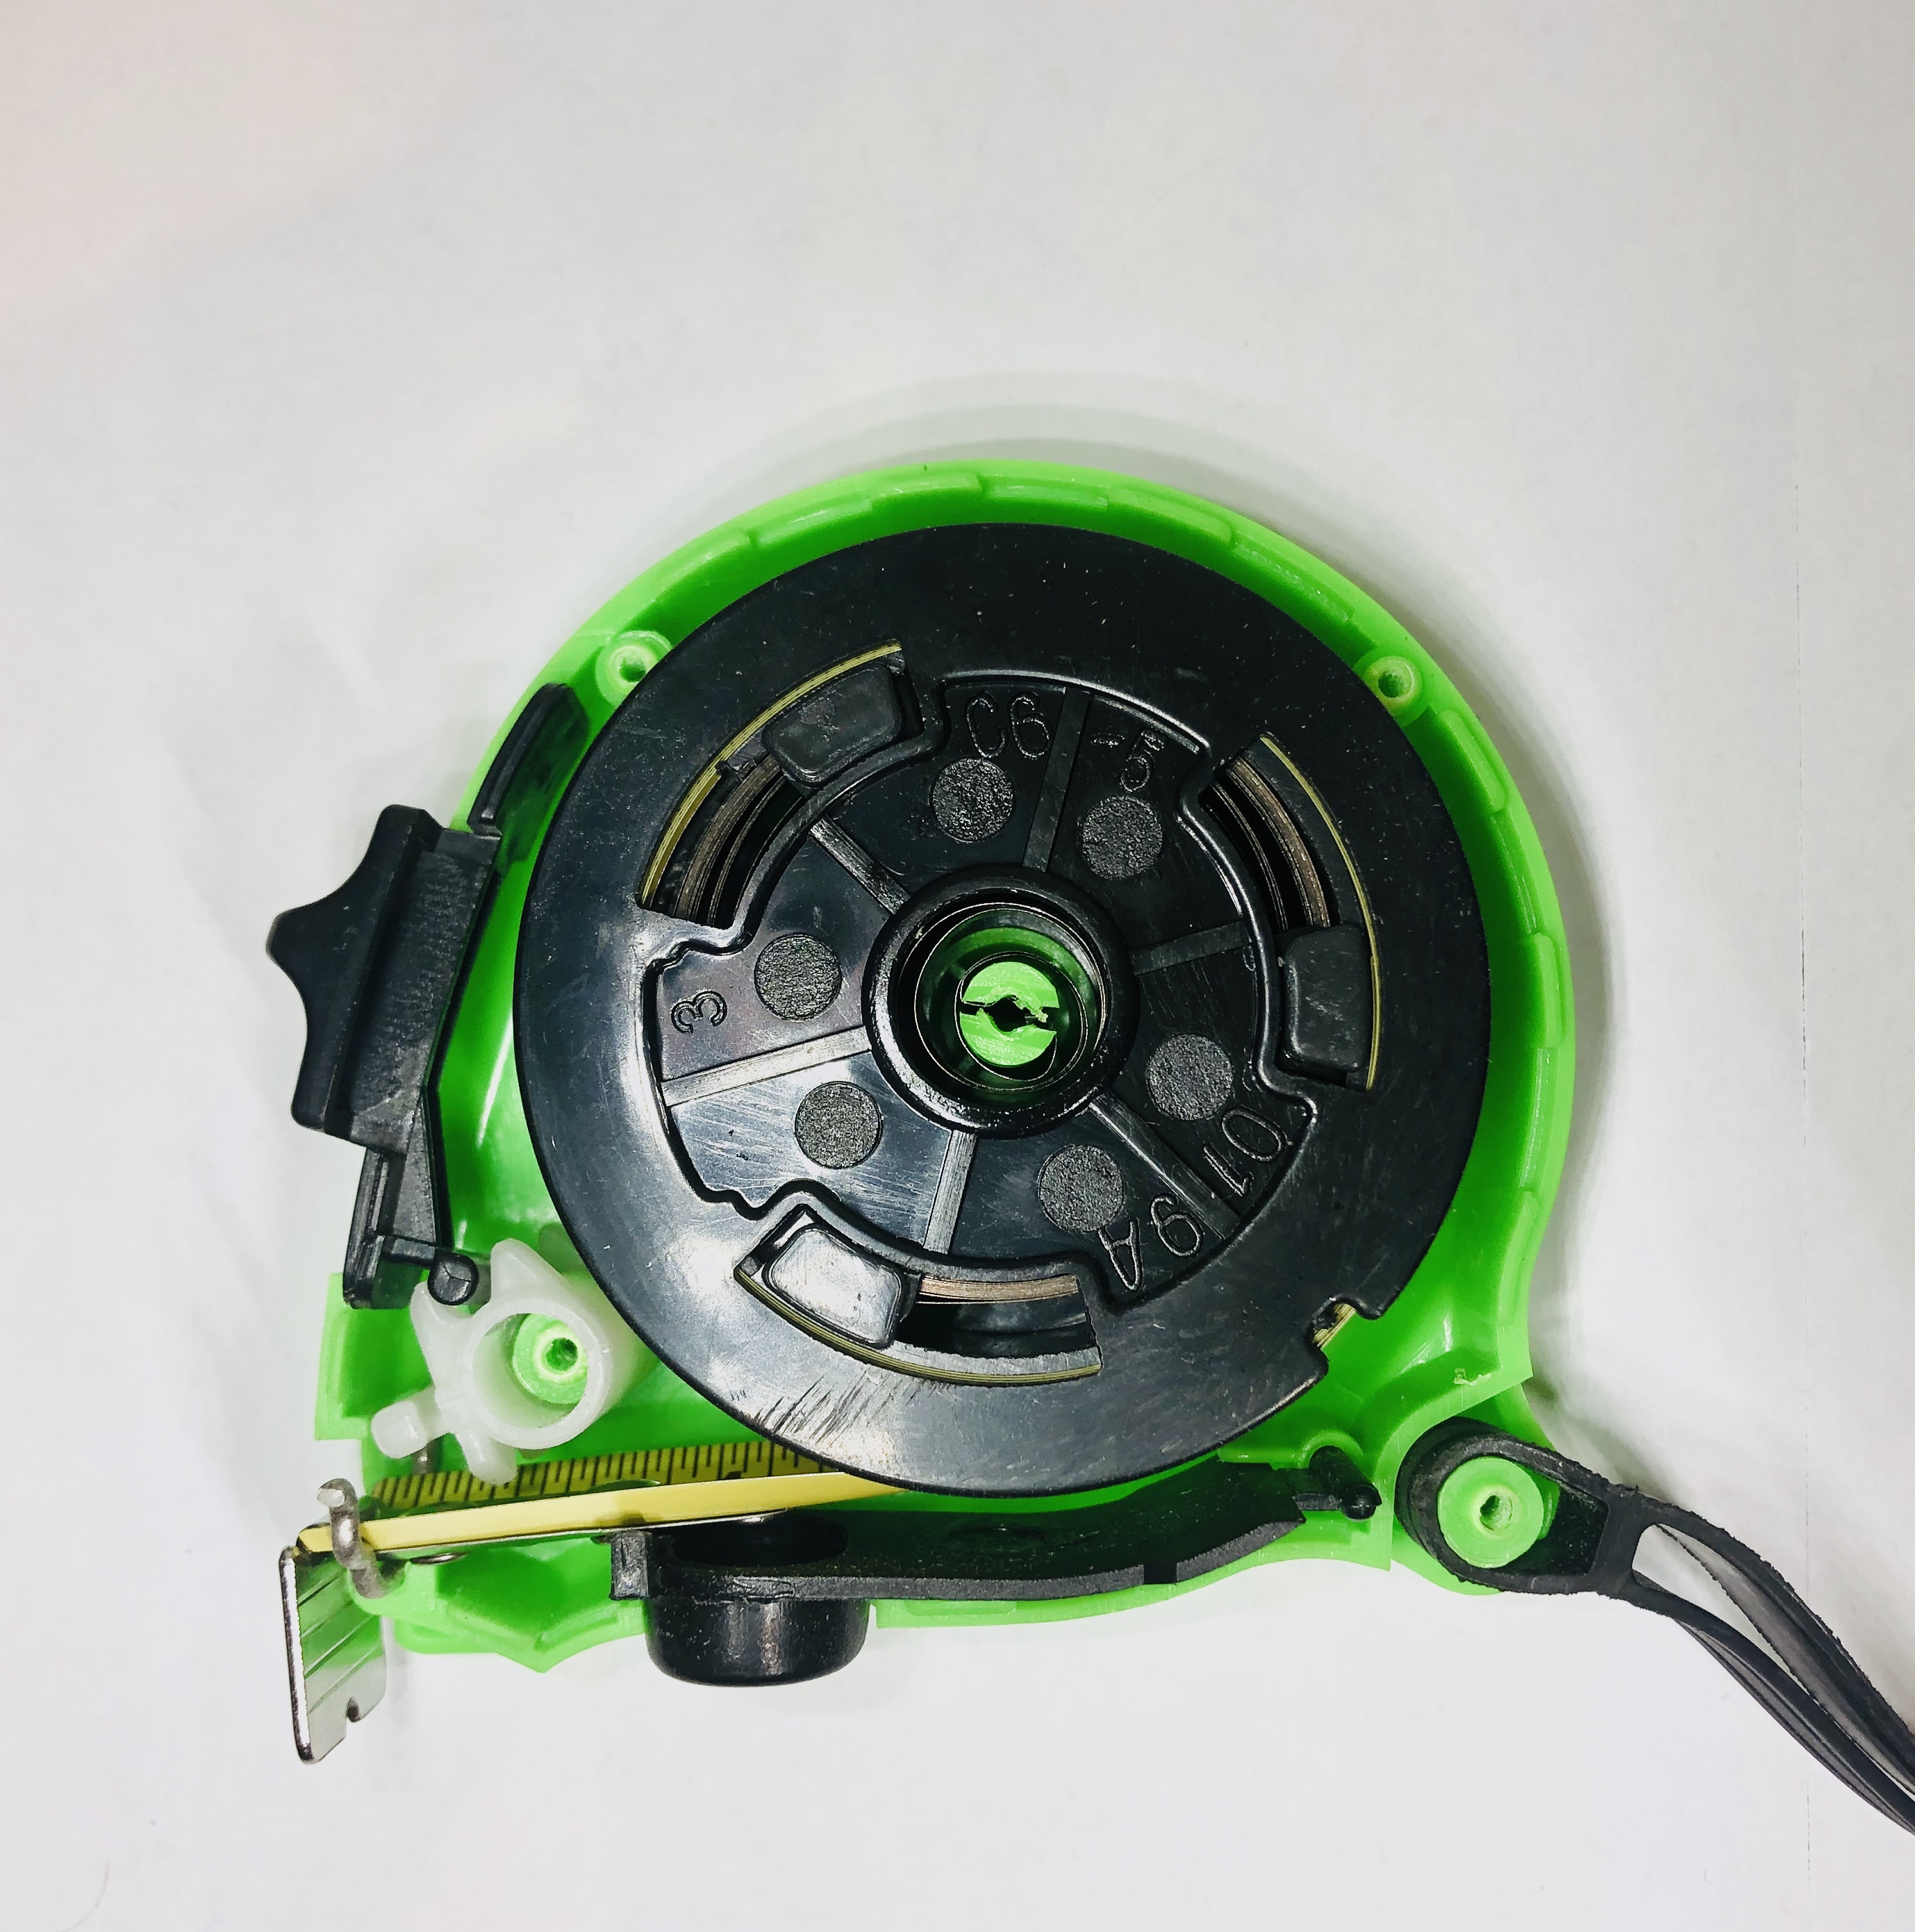
there are still many products available such as cardio equipment which are becoming more and more digital. For example, the Tangram Smart Rope records the calories, skips, speed, time and offers challenges via the app which connects to the devices built into the handles and rope. Also, this exhibition may inspire more children to stay active or perhaps be interested in pursuing a job or attaining the qualifications to work in this industry, whether it’s in the future of digital gyms or as a product designer for new digital equipment.Another reason for choosing this category is that secondary school children complete so many hours of Physical Education (PE) each week and this exhibition will aid their learning of PT and particularly the older age range (15-16) who are undergoing their GCSE’s in PE may use this exhibition as research or personal development in their studies making this exhibition, educational and interactive but most importantly safe for all ages.

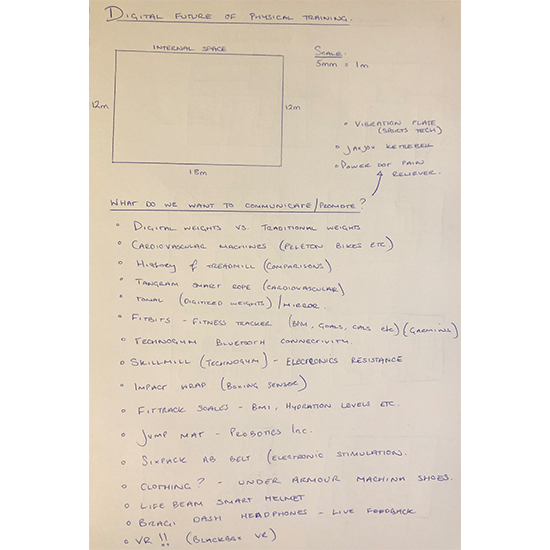
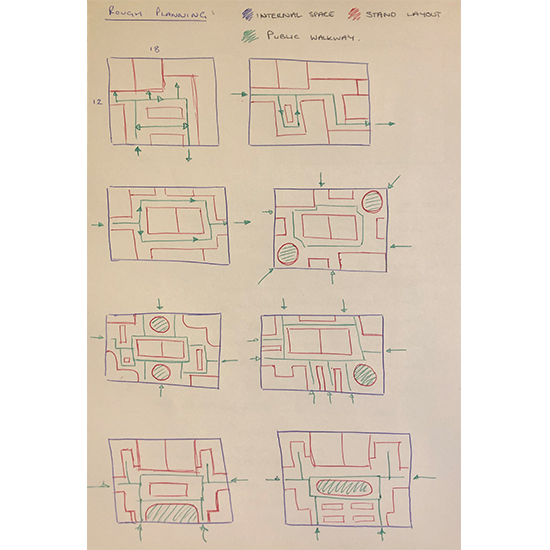
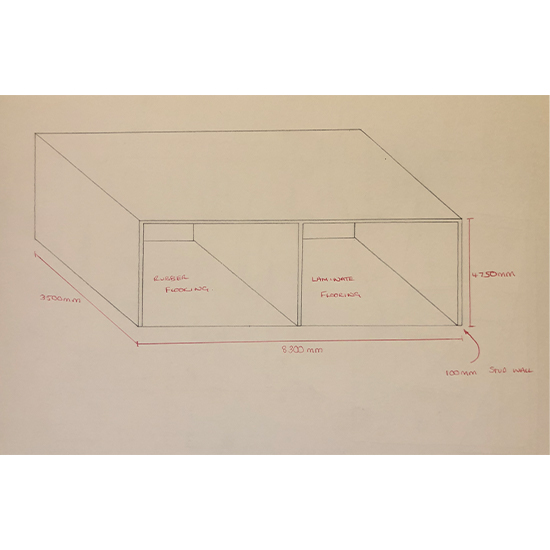
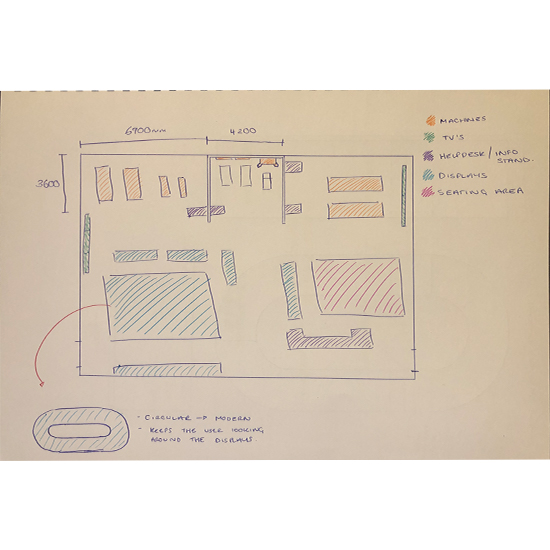
I then researched further into what types of digital equipment is available and learning their functional and space requirements to carefully plan in the given 12x18m internal space. Personally, I was surprised with the amount of creative and smart equipment out there for all consumers, right from the beginners/home gyms to the avid gym goers. Once all the equipment was noted down, I moved onto planning how I wanted to represent/layout the general shelving/rooms on. The floor, evaluating the flow of people through the exhibit. Keeping it symmetrical helped to create a modern, open, clear and safe exhibit for the children and continued to develop my plans, changing or tweaking aspects as I go along.

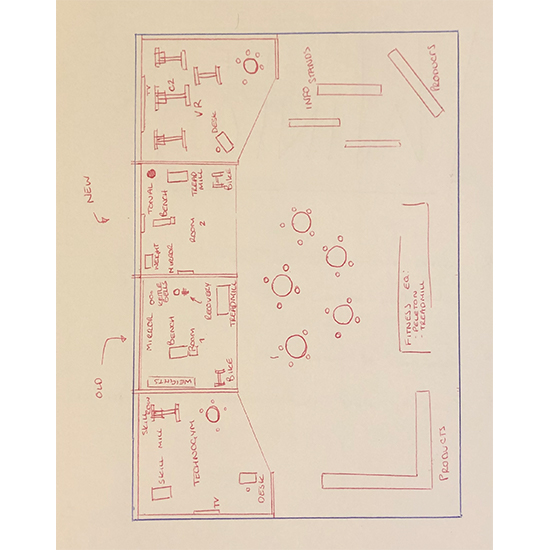
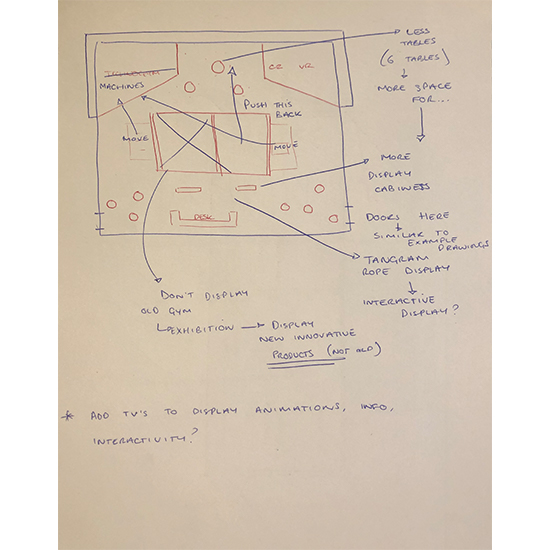
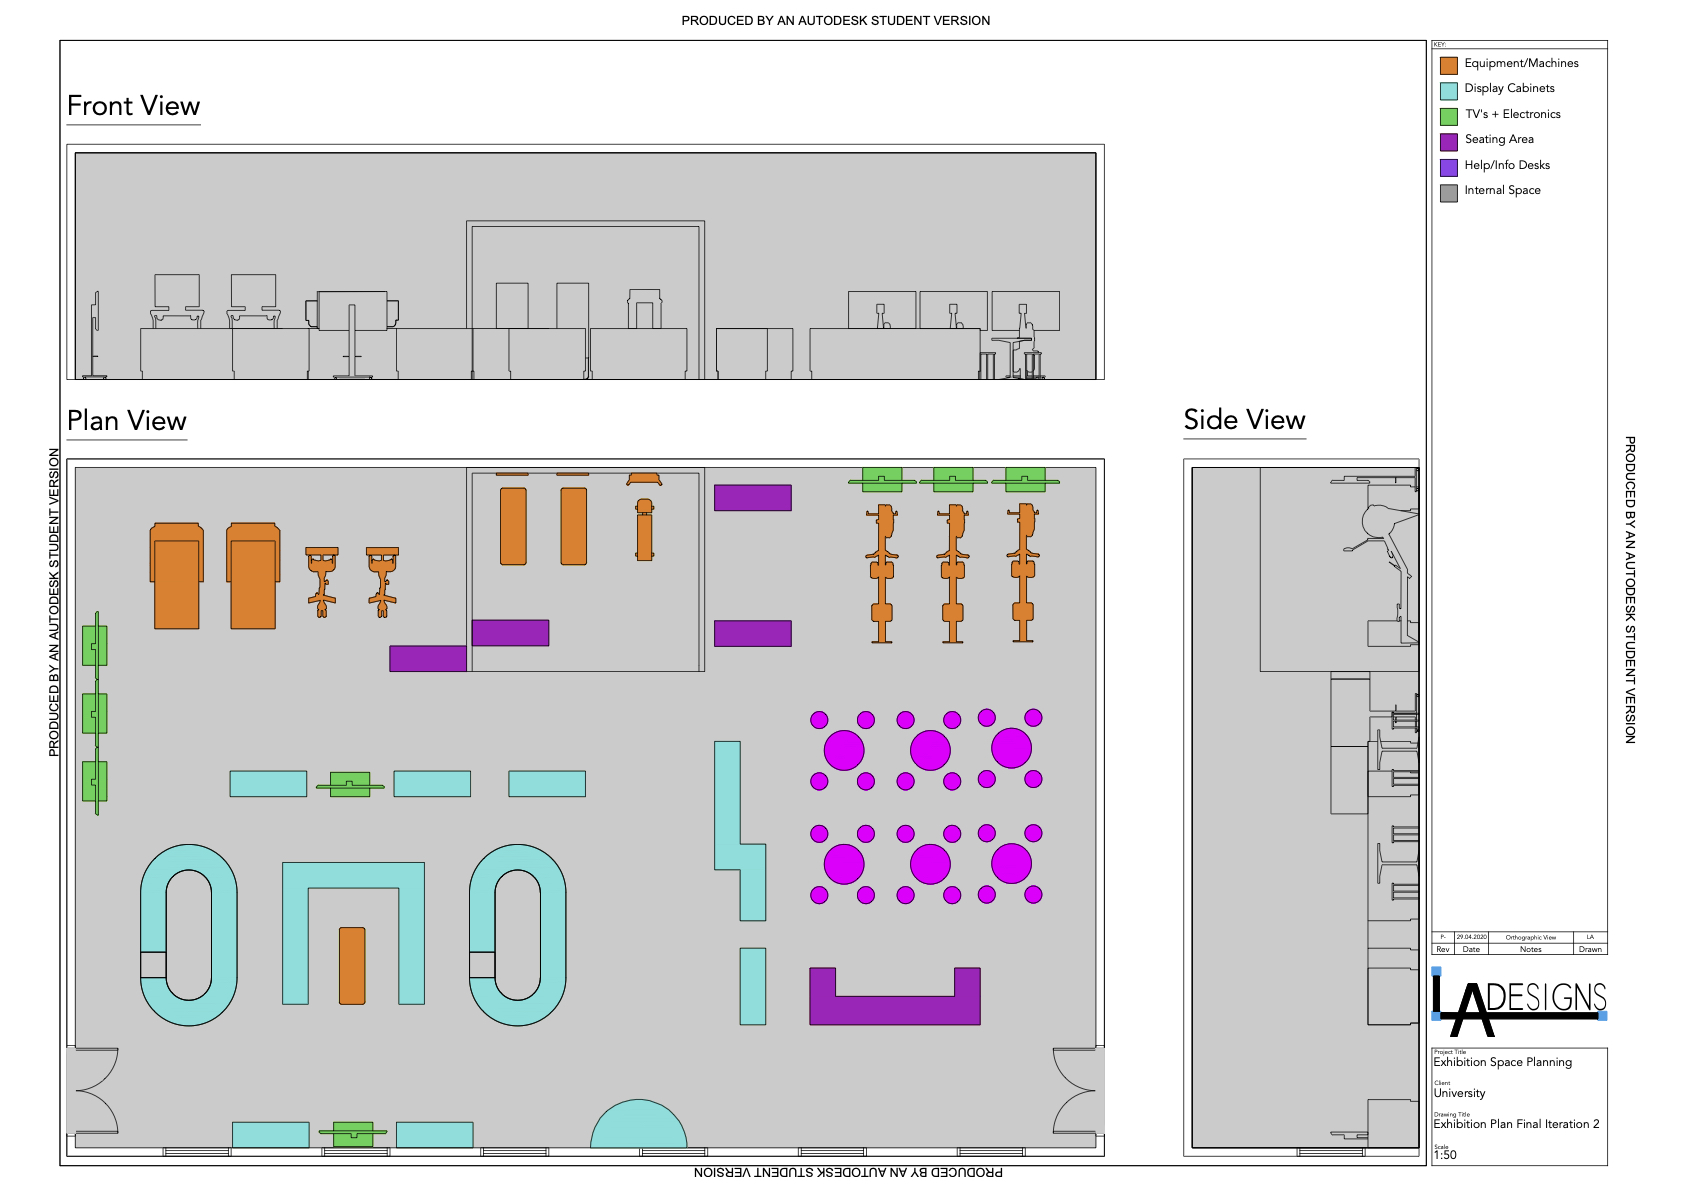
My main feature Is the rooms which will host the most expensive equipment which although is out of the children’s price range, it will allow them to learn how, why and at what speed this industry is growing. Inside this room would be the ‘Tonal’ gym and 2 ‘Mirror’ gyms to allow the user to interact with. To the right of this room would be the ‘Holofit’ VR Experience which I predict would be a massive interactive hotspot hence the 3 rowing machines and TV’s in the final plan. To the left of the room would be the Peloton equipment, which again is extremely expensive, will showcase how online studio lessons are impacting this industry. Online studies show that public gyms are a breeding ground for germs and bacteria both on the cardiovascular machines and the free weights and given the current COVID-19 pandemic, Peloton and other companies are revolutionising the home gym industry keeping both their customers safe by working out from home.

Along the bottom will be shelving/display cases to showcase the smaller and more affordable products such as Fitbits, Tangram Smart rope, Jump mat (by Probotics inc), Boxing sensors, smart bike riding helmets, digital clothing (Under Armour’s new Machina shoe collection records your run) and many more. A seating area will also be positioned near the Holofit equipment for any of the children to rest after their interactive mini-workout.

If you would like to view the final plan as a PDF, click here

Research and sketches:


Design task 6:


Pick an everyday item and explain how you will ergonomically improve it and why.

Although a tape measure isn’t necessarily an everyday item, to the people in a trade this item will be used frequently. I decided to use Fusion360 which I was very unfamiliar with at the time but was up for the challenge. I started off with research and tutorials on the program to understand the user interface as well as the different tools available for 3D modelling. Once I had completed an extremely good introduction course on the Autodesk Academy website, I dived straight into Fusion360 having just learnt and essentially memorised the function of each tools. The reason I diverted from sketching my idea was that I simply wanted to add and change little aspects to same shape and form of the current measuring tape but also because I wanted to experiment with different functions, components, bodies, tooling and features of Fusion360 that I didn’t want to be limited to a design/sketch or even perhaps not reaching my desired design having sketched a plan out due to inexperience in the program.

  • Added a small pencil holder to the back of the tape measure (Although I will need to rotate the pencil as the renders show the lead pointing up)
  • Larger belt clip – more durable and stronger closing force – less likely to fall off
  • Rubber grips around the edge of the tape measure – improved handling
  • Notched tape lock – fewer sharp edges whilst maintaining ability to close easily
  • LED light above tape – switched on via to notched tape lock – allows user to see the measurement in dark spaces
  • Scribe – Allows user to scribe along a square edge quickly and efficiently
  • Quick tape lock button moved to the right side – easier to grip and use from that side than underneath
  • Nail hole on the front of the metal plate attached to the tape – easier to measure from nail heads
  • Off-centered tape measure - allows room for LCD Button Cell battery and pencil holder

Existing Product:

Ergonomic Improvement: